background image

24

UK

BEFORE USE

Before initial use, the appliance should 

be preheated for 10 minutes with the lid 

closed. This will remove the smell typically 

encountered when first switching on an 

appliance. Please ensure sufficient ventilation.
Grease the grill plates lightly using cooking oil.

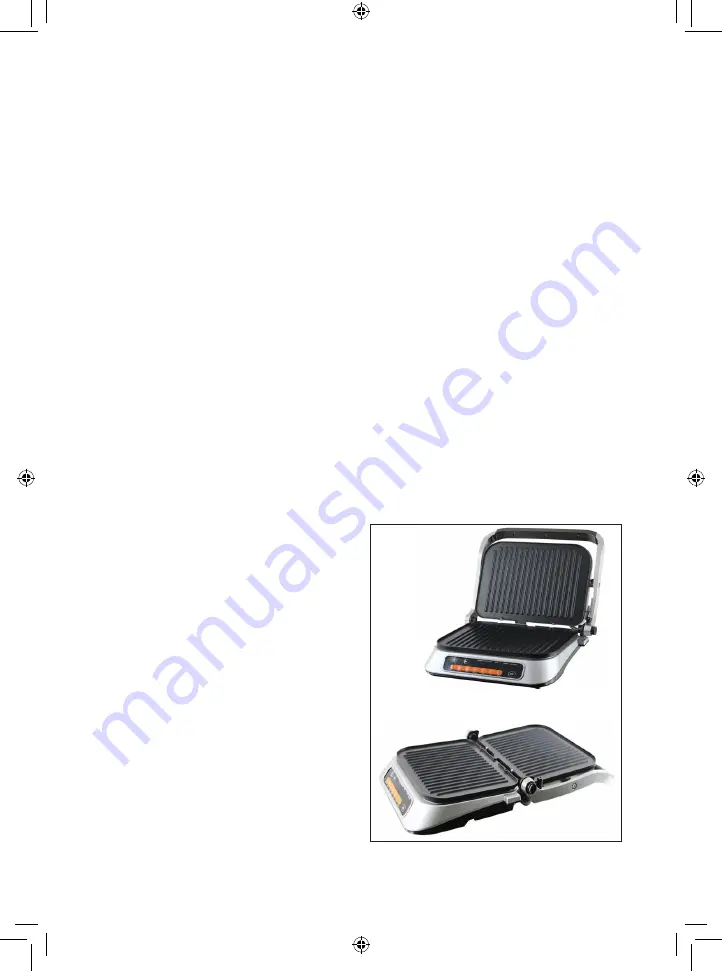
USE AS AN IQ GRILL

• 

Place the appliance on a level surface. 

Lower the lid (1) so that it lies flat against 

the bottom grill plate. Plug in. 

• 

Switch on the appliance using the on/off 

button (7). The indicators (10) flash.

• 

Select the required food using the function 

selectors (11). The indicator in the function 

selector activated comes on.

• 

Press the OK button (9) to start 

preheating. The indicator (10) for “Pre-

heating” flashes.

• 

Once the cooking temperature for the 

selected food is reached, 3 beeps will 

sound and the indicator for preheating will 

stay lit. 


Open the lid and place the food on the grill 

plate. Close the lid again.


The indicator for “Start to cook” flashes.

• 

Within 3 seconds, the appliance 

automatically registers the thickness of 

the food and adapts the cooking time 

accordingly. 

• 

The indicators for “Pre-heating” and “Start 

to cook” remain lit and the indicator for 

“Rare” flashes. 


Once the food is cooked “Rare”, 5 beeps 

will sound. The indicator for “Rare” 

remains lit and the indicator for “Medium” 

starts to flash.


Once the food is cooked “Medium”, 

5 beeps will sound. The indicator for 

“Medium” remains lit and the indicator for 

“Well done” starts to flash.


Once the food is cooked “Well done”, 7 

beeps will sound. The indicator for “Well 

done” remains lit. The appliance stops 

cooking automatically.

• 

Open the lid and remove the food from the 

grill plate once it is cooked as required.

• 

Warning! The metal parts will get very hot 

during use. Always hold by the handle. Be 

careful of spitting oil, fat or other liquids.

• 

Carefully release the food using a heat-

resistant plastic spatula or similar. You 

must not use metal utensils or utensils 

with a sharp edge on the grill plates, as 

they have a special non-stick coating. 

Instead use plastic, melamine or wooden 

utensils.

• 

Close the lid and unplug the appliance 

once the food is ready.

• 

Before cleaning and storing the appliance, 

make sure it has cooled completely.

USE AS AN OPEN GRILL

• 

Place the appliance on a level surface. 

• 

Open the lid so that the angle between the 

lid and the bottom grill plate is less than 

105°.

• 

Press and hold the release button (2) 

and carefully tilt the lid fully back until it is 

horizontal. Plug in. 

Содержание 16360028

Страница 1: ...DK IQ grill 2 NO IQ grill 7 SE IQ grill 12 FI IQ grilli 17 UK IQ Grill 22 DE IQ Grill 27 16360028 www adexi eu...

Страница 2: ...ge skader og at der ikke mangler nogen dele Brug ikke apparatet sammen med andre ledninger end den medf lgende Kontroll r at det ikke er muligt at tr kke i eller snuble over apparatets ledning eller e...

Страница 3: ...ndtag 7 T nd sluk knap 8 Knappen M manuel indstilling 9 Knappen OK 10 Indikatorer Pre heating forvarme Start to cook starter tilberedning Rare r d Medium rosa Well done gennemstegt 11 Funktionsv lgere...

Страница 4: ...ker N r f devaren er tilberedt Rare r d lyder der 5 bip Indikatoren for Rare lyser konstant og indikatoren for Medium begynder at blinke N r f devaren er tilberedt Medium rosa lyder der 5 bip Indikato...

Страница 5: ...mt vand tilsat lidt opvaskemiddel eller i opvaskemaskinen Tag drypbakken ud fra apparatets bagside og t m den Vask den afmonterede drypbakke i varmt vand tilsat lidt opvaskemiddel T r delene grundigt...

Страница 6: ...vores produkter p funktions og designsiden forbeholder vi os ret til at foretage ndringer i produktet uden forudg ende varsel SP RGSM L SVAR Har du sp rgsm l omkring brugen af apparatet som du ikke ka...

Страница 7: ...apparatet ikke har synlige skader eller manglende deler Ikke bruk apparatet med andre ledninger enn den som f lger med Kontroller at det ikke er mulig dra eller snuble i ledningen eller en eventuell...

Страница 8: ...k 7 Av p bryter 8 M knapp manuell innstilling 9 OK knapp 10 Indikatorer Pre heating forvarming Start to cook start tilberedning Rare lite stekt Medium medium Well done gjennomstekt 11 Funksjonsvelgere...

Страница 9: ...N r maten er ferdig som Lite stekt h res 5 pipelyder Indikatoren for Lite stekt fortsetter lyse og indikatoren for Medium begynner blinke N r maten er ferdig som Medium h res 5 pipelyder Indikatoren...

Страница 10: ...lplatene i varmt s pevann eller i oppvaskmaskin Fjern dryppsk len fra baksiden av apparatet og t m den Vask den demonterte dryppsk len i varmt s pevann La delene t rke helt f r du setter dem sammen ig...

Страница 11: ...utformingen p produktene v re forbeholder vi oss retten til endre produktet uten forvarsel VANLIGE SP RSM L Hvis du har sp rsm l om bruk av apparatet som du ikke finner svar p i denne bruksanvisningen...

Страница 12: ...n inte har n gra synliga skador och att inga delar fattas Anv nd inte apparaten med n gon annan sladd n den som medf ljer Kontrollera att ingen riskerar att snubbla ver sladden eller en eventuell f rl...

Страница 13: ...tan upptill 6 Handtag 7 P av knapp 8 M knappen manuell inst llning 9 OK knapp 10 Indikatorlampor Pre hearing f rv rmning Start to cook b rja tillagningen Rare Medium Well done 11 Funktionsv ljare Froz...

Страница 14: ...dikatorlampan f r Rare blinkar N r maten r tillagad Rare h rs 5 pip Indikatorlampan f r Rare lyser och indikatorlampan f r Medium b rjar blinka N r maten r tillagad Medium h rs 5 pip Indikatorlampan f...

Страница 15: ...a bort droppbrickan fr n baksidan av apparaten och t m brickan Diska den borttagna droppbrickan i varmt vatten med diskmedel L t delarna torka ordentligt innan de monteras igen Om det finns matrester...

Страница 16: ...design f rbeh ller vi oss r tten till ndringar av v ra produkter utan f reg ende meddelande VANLIGA FR GOR OCH SVAR Om du har n gra fr gor ang ende anv ndningen av apparaten och du inte kan hitta sva...

Страница 17: ...l k yt mit n muuta kuin mukana toimitettua virtajohtoa Varmista ettei virtajohtoon tai jatkojohtoon voi kompastua Laitetta ei saa k ytt yhdess ajastink ytkimen tai erillisen kauko ohjainj rjest elm n...

Страница 18: ...a 7 Virtakytkin 8 M painike asetusten s t k sin 9 OK painike 10 Merkkivalot Pre heating Esikuumennus Start to cook Kypsennyksen k ynnistys Rare raaka Medium Well done kyps 11 Toimintovalitsimet Frozen...

Страница 19: ...ja Rare Raaka merkkivalo vilkkuu Kun ruoan kypsyysaste on raaka laite antaa 5 nimerkki Rare Raaka merkkivalo palaa yht jaksoisesti ja Medium merkkivalo alkaa vilkkua Kun ruoan kypsyysaste on medium l...

Страница 20: ...sta Pese irrotetut grillilevyt l mpim ll saippuavedell tai astianpesukoneessa Irrota valuma astia laitteen takaa ja tyhjenn se Pese irrotettu valuma astia l mpim ll saippuavedell Anna osien kuivua kun...

Страница 21: ...mme oikeuden muuttaa tuotetta ilman etuk teisilmoitusta USEIN KYSYTTYJ KYSYMYKSI Jos sinulla on laitteen k ytt koskevia kysymyksi etk l yd vastauksia t st k ytt ohjeesta k y Internet sivuillamme osoit...

Страница 22: ...no visible damage and that no parts are missing Do not use with any cords other than that supplied Check that it is not possible to pull or trip over the cord or any extension cord The appliance must...

Страница 23: ...Control panel 5 Release button for top grill plate 6 Handle 7 On Off button 8 M button manual setting 9 OK button 10 Indicators Pre heating Start to cook Rare Medium Well done 11 Function selectors Fr...

Страница 24: ...main lit and the indicator for Rare flashes Once the food is cooked Rare 5 beeps will sound The indicator for Rare remains lit and the indicator for Medium starts to flash Once the food is cooked Medi...

Страница 25: ...rill plates in warm soapy water or the dishwasher Remove the drip tray from the rear of the appliance and empty it Wash the dismantled drip tray in warm soapy water Allow the parts to dry thoroughly b...

Страница 26: ...ur products in terms of function and design we reserve the right to make changes to the product without prior warning FREQUENTLY ASKED QUESTIONS If you have any questions regarding the use of the appl...

Страница 27: ...auch im Freien S mtliche Verpackungsmaterialien im Ger t und darum herum entfernen Das Ger t auf sichtbare Sch den und fehlende Teile berpr fen Nur mit den mitgelieferten Kabeln verwenden Achten Sie d...

Страница 28: ...edienfeld 5 Entriegelungstaste f r obere Grillplatte 6 Griff 7 Betriebsschalter 8 Taste M manuelle Einstellung 9 OK Taste 10 Anzeigeleuchten Pre heat Vorheizen Start to cook Zubereitungsbeginn Rare Bl...

Страница 29: ...eit entsprechend an Die Anzeigeleuchten f r Pre heating Vorheizen und Start to cook Zubereitungsbeginn bleiben erleuchtet und die Anzeigeleuchte f r Rare Blutig blinkt Wenn das Lebensmittel Rare Bluti...

Страница 30: ...llst ndig abgek hlt ist REINIGUNG Das Ger t darf erst gereinigt werden nachdem es bei ge ffnetem Deckel vollst ndig abgek hlt ist und der Stecker gezogen wurde Aus Gr nden der elektrischen Sicherheit...

Страница 31: ...hen Beh rden Kontakt auf um weitere Einzelheiten ber den Umgang mit Elektro und Elektronikm ll zu erfahren GARANTIEBEDINGUNGEN Die Garantie gilt nicht wenn die vorstehenden Hinweise nicht beachtet wer...

Отзывы: