background image

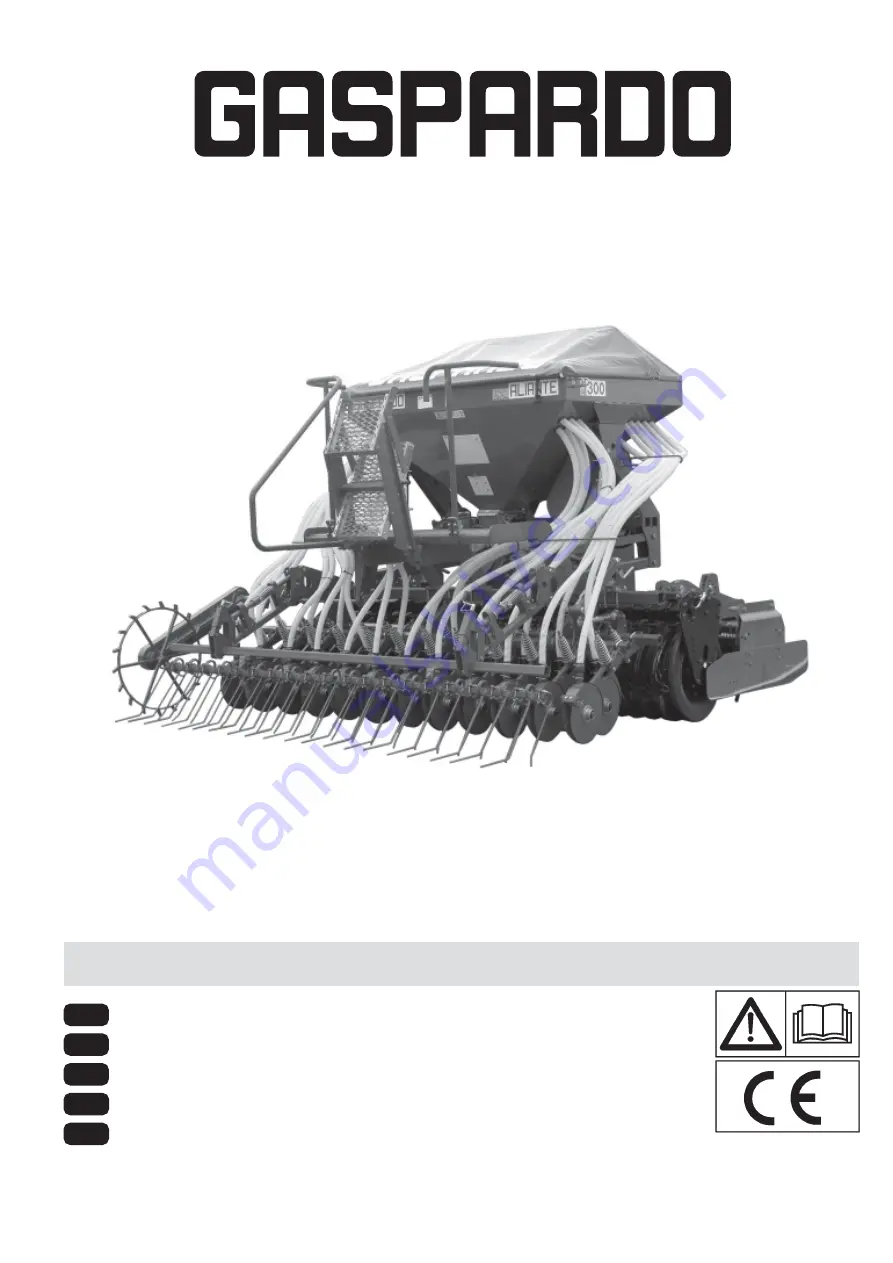
ALIANTE DD

Cod. G19502661

     12 / 2007

USO E MANUTENZIONE

USE AND MAINTENANCE

GEBRAUCH UND WARTUNG

EMPLOI ET ENTRETIEN

EMPLEO Y MANTENIMIENTO

IT

EN

DE

FR

ES

*)

*) Valido per Paesi UE
*) Valid for EU member countries
*) Valable dans les Pays UE
*) Gilt für EU-Mitgliedsländer
*) Válido para Países UE

 MASCHIO GASPARDO S.p.A.

Содержание ALIANTE DD

Страница 1: ...IONE USE AND MAINTENANCE GEBRAUCH UND WARTUNG EMPLOI ET ENTRETIEN EMPLEO Y MANTENIMIENTO IT EN DE FR ES Valido per Paesi UE ValidforEUmembercountries Valable dans les Pays UE Gilt f r EU Mitgliedsl nd...

Страница 2: ...m transport 91 4 0 Einstellung 92 4 1 Dosier 92 4 1 1Monoblock Rahmen 92 4 1 2R hrelement 92 4 1 3Dosierrollen 93 4 1 4Abtaster 94 4 1 5AusbauderRuehrwelle 96 4 1 6Reinigungswelle 98 4 1 7Streuungfein...

Страница 3: ...essaiderotation 145 6 0 Demantelement et elimination 145 Confotmitydeclaratione 183 1 0 Premisa 149 1 1 Garant a 149 1 1 1 Vencimientodelagarant a 149 1 2 Descripci ndelasembradora 149 1 3 Datostecni...

Страница 4: ...cod G19502661 g 4...

Страница 5: ...to di manutenzione difettosa e in caso di altri errori effettuati dal cliente Qualora siano fatte modifiche senza l autorizzazione scritta del costruttore e qualora si siano utilizzati ricambi non ori...

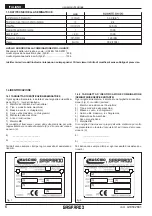
Страница 6: ...EDERPICEROTANTE Ogni singola attrezzatura dotata di una targhetta di identifica zione Fig 2 i cui dati riportano 1 Marchio ed indirizzo del Costruttore 2 Tipo e modello della macchina 3 Massa a vuoto...

Страница 7: ...ile La massa della macchina evidenziata nella targhetta di identi ficazione 8 Fig 4 Tendere la fune per livellare la macchina I punti di aggancio sono individuabili dalla presenza del simbolo grafico...

Страница 8: ...caduta Non salire sulla macchina 6 Pericolo di intrappolamento State lontani dagli organi in movi mento 7 Pericolo di cesoiamento delle mani State lontani dagli organi in movimento 8 Pericolo d avvolg...

Страница 9: ...uesto segnale avverte che se le operazioni descritte non sono correttamente eseguite possono causare gravi lesioni morte o rischi a lungo termine per la salute CAUTELA Questo segnale avverte che se le...

Страница 10: ...visto a tal proposito 52 Dopo lo smontaggio dell albero cardanico rimettere il cappuc cio di protezione sull albero della presa di potenza Circolazione su strada 29 Per la circolazione su strada neces...

Страница 11: ...riuscita di olio ad alta pressione pu causare ferite cutanee con il rischio di gravi ferite ed infezioni In tal caso consultare immediatamente un medico Se non si rimuove rapidamente l olio con mezzi...

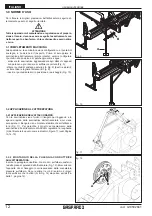
Страница 12: ...destri e sinistri svitare i dadi e togliere l attacco B Fig 9 inserire i puntelli anteriori in posizione di parcheggio Fig 10 A B fig 12 L fig 11 3 2APPLICAZIONEALL ATTREZZATURA 3 2 1APPLICAZIONE DEL...

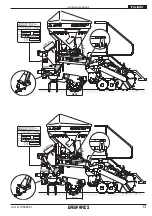
Страница 13: ...TRA MP 85W 140 AGIP G R MU EP2 MASCHIO S pA 35011 Campodarsego PADOVA IT ALY 982 DC TIPO MOD Kg MATR ANNO DI FABBRICAZIONE 323 mm 6 9 0 m m R500 Raccomanded Oil AGIP ROTRA MP 85W 140 AGIP G R MU EP2 M...

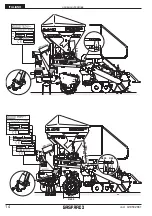
Страница 14: ...R600 Raccomanded Oil AGIP ROTRA MP 85W 140 AGIP G R MU EP2 MASCHIO S pA 35011 Campodarsego PADOVA ITALY 1 R500 R600 Raccomanded Oil AGIP ROTRA MP 85W 140 AGIP G R MU EP2 MASCHIO S pA 35011 Campodarse...

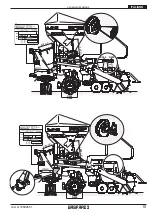
Страница 15: ...GIP ROTRA MP 85W 140 AGIP G R MU EP2 MASCHIO S pA 35011 Campodarsego PADOVA IT ALY 98S VITO TIPO MOD Kg MATR ANNO DI FABBRICAZIONE 299 mm 6 8 5 m m R500 Raccomanded Oil AGIP ROTRA MP 85W 140 AGIP G R...

Страница 16: ...TENZIONE Durante la fase di aggancio tra la seminatrice e l attrezzatura vietato stazionare nella zona intermedia alle due 4 Prima di sollevare l attrezzatura per l aggancio alla seminatrice controlla...

Страница 17: ...ne delle cinghie di trasmissione allentare completamente la tensione delle stesse per mezzo del po mello A Fig 17 Attenzione NON RIMUOVERE mai il dado B Fig 17 Le cinghie devono essere sostituite semp...

Страница 18: ...mazione di anse e ripiegamenti cause di rotture Even tualmente adattarli variando la lunghezza come in Figura 22 3 2 6 TRASMISSIONE Collegare la ruota motrice all organo dosatore con l albero cardanic...

Страница 19: ...eso del solo trattore deve gravare sull asse anteriore e che la massa gravante sui bracci del sollevatore non deve essere maggiore del 30 del peso del trattore stesso Queste considerazioni sono sintet...

Страница 20: ...tare completamente le viti utilizzando una sola chiave fissa 4 1 2 ELEMENTOAGITATORE Garanzia di una continua alimentazione dei rulli dosatori L agitatore presenta un diametro di 85 mm ed composto da...

Страница 21: ...alibrazione i rulli dosatori nuovi potrebbero presentare bordi appuntiti e provocare ferite all operatore Esistono due tipi di rulli dosatori rossi 5 elementi 8 camere per ruota ruote sfalsate su due...

Страница 22: ...i tastatori pu essere facilmente smontato in pochi minuti per effettuare operazioni di pulizia Esso compo sto da 5 portine indipendenti controllate da molle regolabili I separatori fissati tra una por...

Страница 23: ...lo far scorrere prima le rondelle riposizionandole nella loro sede A questo pun to si pu tranquillamente riavvitare lo sportello Serrare bene a mano Con il gruppo tastatori smontato possibile rimuover...

Страница 24: ...ore con gruppo tastatori e rullo dosatore smontati Fig 42 Estrarre tutte le spille curvate dall agitatore Fig 43 Estrarre l albero agitatore Fig 44 facendo attenzione che il cu scinetto ed il disco di...

Страница 25: ...gere cuscinetto e disco di protezione sul lato sinistro inserire l ultima spilla curvata nella parte destra A Fig 48 Nella sede destra del cuscinetto inserire prima il cuscinetto ed applicare il disco...

Страница 26: ...a sede e spostarle nel senso della freccia USURA In presenza di un notevole strato oleoso gli elementi elastici si usurano rapidamente perdendo l efficacia della loro funzione L usura pu essere facilm...

Страница 27: ...180 rispettando le posizioni 1 2 3 4 5 Fig 55 Nel rimontare i settori fare in modo che in condizioni di lavoro quelli attivi presentino le camere sfalsate una dall altra D Fig 55 per garantire continu...

Страница 28: ...rio effettuare una prova di semina Allentare la vite di fissaggio posta sulla regolazione del cam bio Fig 57 quindi portare l indicatore graduato nella posizione deside rata in base alla quantit di pr...

Страница 29: ...54 241 105 233 26 48 50 52 28 265 239 220 170 205 269 258 109 246 28 51 53 55 30 284 256 236 182 220 288 276 117 264 30 55 57 59 32 303 273 252 194 235 307 294 125 282 32 59 60 63 34 319 284 260 202 2...

Страница 30: ...ualsiasi responsabilit dovuta a ne gligenza ed alla mancata osservanza di tali norme La Ditta Costruttrice comunque a completa disposizione per assicurare un immediata e accurata assistenza tecnica e...

Страница 31: ...dal manometro C Fig 62 Regolazione del soffiaggio Le seminatrici vengono consegnate con la pressione relativa alla larghezza della macchina come da Tabella 5 Se occorre aumentare il numero di giri del...

Страница 32: ...vite C Fig 65 funge da finecorsa per ogni elemento assolcatore Per ottenere una semina regolare tarare il finecorsa C in ugual misura per tutti gli elementi assolcatori In particolari condizioni del t...

Страница 33: ...la ghiera di bloccaggio 1 e ruotare la manopola 2 per la regolazione Ultimata la regolazione serrare nuovamente la ghiera di bloccaggio ATTENZIONE Durante le operazioni di assemblaggio seminatrice at...

Страница 34: ...a dell utilizzo indispensabile accertarsi che tutti i cilindri idraulici vengano azionati lentamente in entrambe le direzioni fino a quando le condotte ed i cilindri stessi si riempia no d olio Al pri...

Страница 35: ...n per mettere quindi che persone bambini animali domestici si avvicinino alla seminatrice IMPORTANTE importante per la buona riuscita del lavoro seminare per un breve tratto e controllare che la depos...

Страница 36: ...uali impurit Lubrificare le catene di trasmissione 5 0 3 OGNI 20 30 ORE DI LAVORO Verificare il serraggio dei bulloni assolcatori Ingrassare le catene di trasmissione Ingrassare i dischi marcafile il...

Страница 37: ...o quindi asciugarla 3 Controllare accuratamente ed eventualmente sostituire le parti danneggiate o usurate 4 Serrare a fondo tutte le viti e i bulloni 5 Ingrassare le catene di trasmissione passare co...

Страница 38: ...cod G19502661 g 38 Notes...

Страница 39: ...39 cod G19502661 g Notes...

Страница 40: ...cod G19502661 g 40...

Страница 41: ...other errors by the client If modifications have been carried out without written authorization of the manufacturer and if non original spare parts have been used 1 2 DESCRIPTION OF THE SEEDER This fa...

Страница 42: ...553 2001 Acoustic pressure level LpAm A dB 83 8 Acoustic power level LwA A dB 103 5 The technical data and the models provided must be considered as non binding We reserve the right to change them wit...

Страница 43: ...esponsible personnel The mass of the machine is on the identification Plate 8 Fig 4 Stretch the rope to keep the machine level The hook points can be detected by finding the hook symbol 9 Fig 5 ATTENT...

Страница 44: ...nger of falling Do not get onto the machine 6 Danger of getting trapped Keep away from moving parts 7 Danger of injury to the hands Keep away from the mowing parts 8 Danger of envelopment Do not remov...

Страница 45: ...l the protective devices are in perfect condition installed and in the safe position 13 It is absolutely prohibited to stand within the machine s radius of action where there are moving parts 14 It is...

Страница 46: ...ts includes Fig 7 A Direction indicator B Red position light C Stop light Cardan shaft 38 The equipment installed can only be controlled by means of the Cardan shaft complete with the necessary overlo...

Страница 47: ...62 Oil escaping at high pressure can cause skin injury with the risk of serious wounds and infection Call a doctor immediately if such an incident occurs If the oil with surgical means is not removed...

Страница 48: ...front support props A Fig 9 right and left unscrew the nuts and remove the linkage B Fig 9 insert the front props in the parking position Fig 10 3 2 ATTACHMENT TO THE EQUIPMENT 3 2 1ATTACHINGTHETRIANG...

Страница 49: ...TRA MP 85W 140 AGIP G R MU EP2 MASCHIO S pA 35011 Campodarsego PADOVA IT ALY 982 DC TIPO MOD Kg MATR ANNO DI FABBRICAZIONE 323 mm 6 9 0 m m R500 Raccomanded Oil AGIP ROTRA MP 85W 140 AGIP G R MU EP2 M...

Страница 50: ...R600 Raccomanded Oil AGIP ROTRA MP 85W 140 AGIP G R MU EP2 MASCHIO S pA 35011 Campodarsego PADOVA ITALY 1 R500 R600 Raccomanded Oil AGIP ROTRA MP 85W 140 AGIP G R MU EP2 MASCHIO S pA 35011 Campodarse...

Страница 51: ...GIP ROTRA MP 85W 140 AGIP G R MU EP2 MASCHIO S pA 35011 Campodarsego PADOVA IT ALY 98S VITO TIPO MOD Kg MATR ANNO DI FABBRICAZIONE 299 mm 6 8 5 m m R500 Raccomanded Oil AGIP ROTRA MP 85W 140 AGIP G R...

Страница 52: ...oupling of the planting unit and the equipment there must be no one standing in the area between the two 4 Check that there is no interference between the mechanical parts of the two machines before l...

Страница 53: ...elts remove belt tension completly with using handwheel A Fig 17 Caution Never take off nut B Fig 17 The belts should always be replaced in pairs using original spare parts If a blower rotation speed...

Страница 54: ...rk the formation of loops and folds and therefore breakages should be avoided If necessary adjust their length as shown in Figure 22 3 2 6 TRANSMISSION Connect the drive wheel to the metering unit wit...

Страница 55: ...eight of the tractor alone should be borne by the front axle and that the weight on the arms of the hoist should not be more than 30 of the weight of the tractor itself These factors are summarized in...

Страница 56: ...ed by means of the drive torque transmitted by the external round belt in order to safeguard against damage to the seeds that could compromise their capacity to sprout in the soil The agitator pulls t...

Страница 57: ...operator The standard wheels are produced staggered over two rows There are various types of wheels for a wide range of applications in three different product families red 5 elements 8 chambers per w...

Страница 58: ...o ensure tight closing The hatches do not touch the seeding wheel while it is in operation Thanks to the separators fixed between one hatch and the next it is possible to activate each element indepen...

Страница 59: ...and reposition them in their seats At this stage simple screw the hatch into place Tighten the screws well by hand Look at the figure when the hatch is disassembled it is also possible to remove the e...

Страница 60: ...maged parts Doser with seed hatch and seeding wheel disassembled Fig 42 Remove the various parts of the agitator Fig 43 Remove the agitator Fig 44 ensuring that the bearing and protection disc on the...

Страница 61: ...isc on the left side insert the last part of the agitator in the right side Fig 48 In the right hand seat of the bearing first fit the bearing and then apply the protection disc on the right before th...

Страница 62: ...direction shown by the arrow WEAR When the oil layer is thick spring elements wear out quite quickly and they are no longer efficient Wear can be easily checked from the outside REPLACINGTHESPRINGELEM...

Страница 63: ...180 When re assembling the sections make sure that during operation the dosing grooves of the active sections are staggered from one another D Fig 55 This will give continuity to distribution Re posit...

Страница 64: ...late approximate seed distribution quantities It is however always necessary to carry out a sowing test Loosen the fastening screw on the gear adjuster Fig 57 and bring the graded indicator to the req...

Страница 65: ...160 194 254 241 105 233 26 48 50 52 28 265 239 220 170 205 269 258 109 246 28 51 53 55 30 284 256 236 182 220 288 276 117 264 30 55 57 59 32 303 273 252 194 235 307 294 125 282 32 59 60 63 34 319 284...

Страница 66: ...available to assure immediate and accurate technical assistance and all that may be necessary for the improved operation and better performance of the equipment The oleo dynamic blower drive may be us...

Страница 67: ...til the required pressure is reached as shown by the pressure gauge C Fig 62 Blower pump control Seed drills are delivered with pressure based on the machine width as according to Table 5 If you wish...

Страница 68: ...65 acts as a limit switch for each furrowopening element To obtain regular sowing calibrate the limit switch C to the same measurement for all furrow opening elements In particolari condizioni del ter...

Страница 69: ...n the lock nut 1 and turn the knob 2 to adjust When the adjustment has been completed re tighten the lock nut ATTENTION During the planting unit equipment assembly operations and if a hydraulic liftin...

Страница 70: ...machine make sure that all the hydraulic cylinders are engaged slowly in both directions until the piping and cylinders are filled with oil When the system is operated for the first time and at the b...

Страница 71: ...m The seeding machine can transport chemical substances Do not allow children people pets to come near the seeding machine IMPORTANT For a successful seeding work it is useful to seed on a small stret...

Страница 72: ...ation and removes eventual impurities Grease the transmission chains 5 0 3 EVERY 20 30 WORKING HOURS Check the tightness of the bolts on the listers Grease the transmission chains Lubricate the row ma...

Страница 73: ...of seed dispersed may be dosing unit access clogged by foreign bodies during the rotation test the empty weight of the collecting container was not taken into account and deducted The differences due...

Страница 74: ...cod G19502661 g 74 Notes...

Страница 75: ...75 cod G19502661 g Notes...

Страница 76: ...cod G19502661 g 76...

Страница 77: ...nden verursachten Fehlern Wenn ohne schriftliche Bevollm chti gung des Herstelles Ver nderungen durchgef hrt werden oder keine Originalersatzteile verwendet werden 1 2 BESCHREIBUNG DER S MASCHINE Dies...

Страница 78: ...halldruckpegel LpAm A dB 83 8 Schallleistungspegel LwA A dB 103 5 Die Angaben bez glich der technischen Daten und modelle sind unverbindlich Der Hersteller beh lt sich das Recht vor diese Angaben ohne...

Страница 79: ...rsonal ausgef hrt werden Das Maschinengewicht kann dem Identifizierungsschild 8 Abb 2 entnommen werden Zum Ausrichten der Maschine das Seil spannen Die Anschlusspunkte sind durch das graphische Haken...

Страница 80: ...eilen Abstand halten 7 Gefahr f r Abtrennen der H nde N hern Sie sich nicht den laufenden Teilen 8 Mitschleppgefahr Bei laufender Maschine Maschinenorgane in Bewegung darf die Schutzabdeckung nicht en...

Страница 81: ...n 12 Die Arbeit mit der Maschine erst beginnen wenn alle Schutzvorrichtungen vollst ndig angebracht und in Sicherheitsposition sind 13 Es ist strengstens verboten sich in Bereichen aufzuhalten die in...

Страница 82: ...ehend wird die korrekte Sequenz der Leuchten angegeben Abb 7 A Richtungsanzeiger B Rote Positionsleuchte C Bremslicht Gelenkwelle 38 Die angeschlossene Ausr stung kann nur gesteuert werden wenn ihre K...

Страница 83: ...von unter hohem Druck stehendem l kann zu Hautverletzungen mit der Gefahr schwerer Infektionen f hren In diesem Fall ist sofort ein Arzt aufzusuchen Wenn das l mit chirurgischen Mitteln nicht schnell...

Страница 84: ...den Anschluss B Abb 9 entfernen Die vorderen St tzf e in Parkposition einsetzen Abb 10 3 2 EINBAUAM LANDWIRT SCHAFTSMASCHINE 3 2 1 Montage des dreieckigen Schnellanschlusses Gemeinsam mit der S masch...

Страница 85: ...TRA MP 85W 140 AGIP G R MU EP2 MASCHIO S pA 35011 Campodarsego PADOVA IT ALY 982 DC TIPO MOD Kg MATR ANNO DI FABBRICAZIONE 323 mm 6 9 0 m m R500 Raccomanded Oil AGIP ROTRA MP 85W 140 AGIP G R MU EP2 M...

Страница 86: ...R600 Raccomanded Oil AGIP ROTRA MP 85W 140 AGIP G R MU EP2 MASCHIO S pA 35011 Campodarsego PADOVA ITALY 1 R500 R600 Raccomanded Oil AGIP ROTRA MP 85W 140 AGIP G R MU EP2 MASCHIO S pA 35011 Campodarse...

Страница 87: ...AGIP ROTRA MP 85W 140 AGIP G R MU EP2 MASCHIO S pA 35011 Campodarsego PADOVA IT ALY 98S VITO TIPO MOD Kg MATR ANNO DI FABBRICAZIONE 299 mm 6 8 5 m m R500 Raccomanded Oil AGIP ROTRA MP 85W 140 AGIP G R...

Страница 88: ...andwirtschaftsmaschine um diese mit der S maschine zu verkoppeln ist darauf zu achten da keine Behinderungen aufgrund der mechanischen Maschinenteile der beiden Maschinen bestehen dies gilt vor allem...

Страница 89: ...en Achtung Nie die Stopmutter B Fig 17 entfernen Die Riemen m ssen immer paarweise ersetzt werden Originalersatzteile verwenden Wenn der Sensor zum Erfassen der Gebl se Drehgeschwindigkeit UpM montier...

Страница 90: ...sich Schlaufen und Biegungen bilden was zu Bruch f hren kann Eventuell durch ndern der L nge wie auf Abbildung 22 dargestellt anpassen 3 2 6 ANTRIEB Das Treibrad wie auf Abbildung 23 dargestellt mit d...

Страница 91: ...e vorschreiben dass mindestens 20 des alleinigen Schleppergewichtes auf der Vorderachse lasten muss und dass das auf den Armen des Hubwerks lastende Gewicht nicht ber 30 des Schleppergewichts liegen d...

Страница 92: ...zt um Keimfaehigkeitseinbussen durch Saatgutbeschaedigung zu vermeiden Die Ruhrwelle foerdert das Saatgut nach unten in das Dosierrad Im Normalfall steht die Ruhrwelle IMMER still Sie wird durch das g...

Страница 93: ...uhe benutzen gerade neue Dosierraeder koennen durch den Kalibrierprozess scharfe Kanten aufweisen Verletzungsgefahr Standardraeder sind doppelt versetzt ausgefuehrt es existieren mehrere Raeder fuer v...

Страница 94: ...ner fest eingestellten Vorspannkraft durch Federdruck Die Bodenklappen beruehren das Saerad im Betrieb nicht Zwischen den Klappen sind feststehende Zwischenwaende angeordnet die ein unabhaengiges Arbe...

Страница 95: ...die Sitze eindruecken Danach kann die Klappe bequem wieder festgeschraubt werden Nur Handfest anziehen Im Bild noch zu sehen Ist die Bodenklappe demontiert kann auch der Entleerschieber nach unten ent...

Страница 96: ...t ausgebauter Bodenklappe und demontiertem Saerad Abb 42 Alle Ruehrelemente aus der Ruehrwelle ziehen Abb 43 Ruehrwelle Abb 44 nach aussen ziehen darauf achten dass das Lager und die Deckscheibe auf d...

Страница 97: ...cheibe der linken Seite aufschieben letztes Ruehrelement auf rechter Seite aufstecken Abb 48 In rechtem Lagersitz vorher Lager einsetzen und Deckscheibe rechts vor dem rechten Ruehrelement aufsetzen H...

Страница 98: ...ueckschwenken die beiden Laschen nach aussen aus dem Sitz druecken und Welle nach hinten schwenken Jeweilige Position mit Handrad sichern USURA Reinigungsbuersten setzten sich bei hohem Oelgehalt schn...

Страница 99: ...der Elemente ist derart vorzugehen dass die Kehlen der aktiven Elemente bei derArbeit zueinander verschoben sind D Abb 55 um eine kontinuierliche Streuung zu gew hrleisten Die Feststellnutmutter wied...

Страница 100: ...ie Abdrehtabelle gibt immer nur annaehernde Ausbringmengen wieder Es ist in jedem Falle eine Abdrehprobe durchzufuehren Loesen Sie die Feststellschraube an der Getriebeverstellung und Abb 57 bringen S...

Страница 101: ...2 160 194 254 241 105 233 26 48 50 52 28 265 239 220 170 205 269 258 109 246 28 51 53 55 30 284 256 236 182 220 288 276 117 264 30 55 57 59 32 303 273 252 194 235 307 294 125 282 32 59 60 63 34 319 28...

Страница 102: ...ige und sorgf ltige technische Beihilfe und f r alles was zum Erreichen der besten Betriebsweise und H chstleistung des Ger ts beitragen kann kann zur vollen Verf gung Der hydraulische Gebl seantrieb...

Страница 103: ...wird erhalten wird Druckeinstellung Die S maschinen werden mit einem Druck je nach der Maschinenbreite geliefert wie in Tabelle 5 vorgegeben wird Wenn man die Gebl seumdrehungen f r die Verteilung vo...

Страница 104: ...r jedes Furchenformerelement F r eine gleichm ige Aussaat muss der Endanschlag C f r alle Furchenformerelemente in gleichem Ma geeicht sein Bei besonderen Bodenbedingungen kann der Eindringwinkel der...

Страница 105: ...llung drehen Nach der Einstellung ist die Feststellnutmutter wieder festzuziehen ACHTUNG Beim Zusammenbau S maschine Ausr stung und in Anwesenheit der hydraulischen Hubvorrichtung des S scharrenhalter...

Страница 106: ...Hydraulikanlage wird ohne l geliefert Daher ist vor dem Gebrauch unbedingt sicherzustellen dass sich alle Hydraulikzylinder langsam in beide Richtungen bewegen bis die Leitungen und die Zylinder selb...

Страница 107: ...per eintreten Schn re Sackpapier usw Die S maschine kann chemische Stoffe bef rdern Personen Kindern und ist der Zutritt zur S maschine zu untersagen WICHTIG Nach einer kurzen Aussaatstrecke ist zu ko...

Страница 108: ...ss befreit die Leitungen von Kondenswasser und entfernt eventuelle Fremdstoffe Die Antriebsketten schmieren 5 0 3 ALLE 20 30 RBEITSSTUNDEN Den Anzug der Mutterschrauben der S scharenreisser berpr fen...

Страница 109: ...e k nnen folgende sein Der Zugang zum Dosierapparat ist durch Fremdk rpder verstopft Bei der Rotationsprobe wurde das Leergewicht des Sammelbeh lters nicht ber cksichtigt und abgezogen Die durch Gleit...

Страница 110: ...cod G19502661 g 110 Notes...

Страница 111: ...111 cod G19502661 g Notes...

Страница 112: ...cod G19502661 g 112...

Страница 113: ...d autres erreurs effectu es par le client En cas de modifications apport es sans l autorisation crite du constructeur et en cas d utilisation de pi ces d tach es qui ne sont pas d origine 1 2 DESCRIP...

Страница 114: ...1 Niveau de pression acoustique LpAm A dB 83 8 Niveau de puissance acoustique LwA A dB 103 5 Les donn es techiques et les mod les indiqu s ne sont pas contraignants Nous r servons le droit de les modi...

Страница 115: ...responsable La masse de la machine appara t dans la plaque d identification 8 Figure 4 Tendre le c ble pour niveler la machine Les points d attelage sont identifi s par la pr sence du symbole graphiq...

Страница 116: ...uvement vous risquez d y tre pris 7 Danger de cisaillement des mains Ne vous approchez pas des parites en mouvement 8 Danger d enroulement Ne pas retirer les protections avec la machine en marche orga...

Страница 117: ...s et en position de s curit 13 Il est absolument interdit de rester dans la zone de travail de la machine et notamment pr s des organes de mouvement 14 Il est absolument interdit d utiliser l quipemen...

Страница 118: ...oit Fig 7 A indicateur de position B feu de position rouge C feu de stop Arbre a cardans 38 L quipement attel ne peut tre command que par un arbre cardans dot des dispositifs de s curit n cessaires po...

Страница 119: ...ssures cutan es entra nant de graves infections Dans ce cas consulter imm diatement un m decin Si l huile avec des moyens chirurgicaux n est pas enlev e rapidement peut avoir lieu des allergies et ou...

Страница 120: ...droite et gauche d visser les crous et retirer l attelage B Fig 9 ins rer les pieds de support avant en position de stationnement Fig 10 3 2ATTELAGEAU EQUIPEMENT 3 2 1APPLICATIONDUTRIANGLERACCORDRAPI...

Страница 121: ...OTRA MP 85W 140 AGIP G R MU EP2 MASCHIO S pA 35011 Campodarsego PADOVA IT ALY 982 DC TIPO MOD Kg MATR ANNO DI FABBRICAZIONE 323 mm 6 9 0 m m R500 Raccomanded Oil AGIP ROTRA MP 85W 140 AGIP G R MU EP2...

Страница 122: ...0 R600 Raccomanded Oil AGIP ROTRA MP 85W 140 AGIP G R MU EP2 MASCHIO S pA 35011 Campodarsego PADOVA ITALY 1 R500 R600 Raccomanded Oil AGIP ROTRA MP 85W 140 AGIP G R MU EP2 MASCHIO S pA 35011 Campodars...

Страница 123: ...AGIP ROTRA MP 85W 140 AGIP G R MU EP2 MASCHIO S pA 35011 Campodarsego PADOVA IT ALY 98S VITO TIPO MOD Kg MATR ANNO DI FABBRICAZIONE 299 mm 6 8 5 m m R500 Raccomanded Oil AGIP ROTRA MP 85W 140 AGIP G R...

Страница 124: ...l ments 4 Avant de soulever la machine afin qu elle s accroche au semoir contr ler qu il n y ait pas ou qu il ne puisse pas y avoir d interf rences entre les organes m caniques des deux machines Contr...

Страница 125: ...pletement le tendeur A Fig 17 Attention NE PAS DESSERER l ecrou B Fig 17 Les courroies doivent toujours tre remplac es en couple en utilisant des pi ces de rechange d origine Si le capteur de la vites...

Страница 126: ...es coudes et des pliures pouvant provoquer des ruptures Au besoin les adapter en modifiant leur longueur comme l indique la Figure 22 3 2 6 TRANSMISSION Utiliser l arbre cardans fourni pour raccorder...

Страница 127: ...s du seul tracteur doit tre support par l essieu avant et que le poids support par les bras de levage ne doit pas tre sup rieur 30 du poids du tracteur Ces consid rations sont synth tis es dans les fo...

Страница 128: ...es limite la germination sur le sol L agitateur entra ne les graines vers le bas dans le rouleau doseur En situation normale l agitateur reste TOUJOURS l arr t Il n entre en fonction que lorsqu il y a...

Страница 129: ...l op rateur Les roues standard sont d cal es sur deux lignes Il existe plusieurs roues permettant diff rentes utilisations elles sont regroup es en trois familles de produit rouges 5 l ments 8 chambr...

Страница 130: ...toyage Le groupe est compos de 5 portes simples et la pression ressort garantit une solide force de serrage Les portes ne touchent pas la roue de semis lorsque le groupe est en marche Les s parateurs...

Страница 131: ...s repositionner dans leur logement pr sent revisser tranquillement le portillon Bien resserrer la main Observer la figure lorsque le portillon est d mont il est galement possible de retirer le rideau...

Страница 132: ...r avec portillon de semis et roue de semis d mont s Fig 42 Extraire tous les l ments de l agitateur Fig 43 Extraire l agitateur Fig 44 en pr tant attention ne pas faire tomber le palier et le disque d...

Страница 133: ...sur le c t gauche introduire le dernier l ment de l agitateur dans la partie droite Fig 48 Dans le logement de droite du palier introduire d abord le palier puis appliquer le disque de protection dro...

Страница 134: ...e son si ge et les d placer dans le sens de des fl ches USURE En pr sence d une consid rable couche oleagineus les l ments lastiques s usent rapidement en perdant l efficacit de leur fonction L usure...

Страница 135: ...Fig 55 Pour monter les secteurs faire de facon que en conditions de travail ceux actifs pr sentent les gorges distributives ne soit pas allignee D Fig 55 pour garantir continuit la distribution Monter...

Страница 136: ...s tous les cas il est n cessaire d effectuer un essai de semis Desserrer la vis de fixation plac e sur le r gleur de la bo te de vitesse Fig 57 puis agir sur la poign e de r glage Fig 58 pour placer l...

Страница 137: ...2 160 194 254 241 105 233 26 48 50 52 28 265 239 220 170 205 269 258 109 246 28 51 53 55 30 284 256 236 182 220 288 276 117 264 30 55 57 59 32 303 273 252 194 235 307 294 125 282 32 59 60 63 34 319 28...

Страница 138: ...aison Constructrice demeure Votre enti re disposition pour garantir une assistance technique imm diate et soign e et tout ce qui peut tre n cessaire pour le meilleur fonctionnement et le rendement max...

Страница 139: ...atteigne la pression souhait e indiqu e par le manom tre C Fig 62 R glage de la pression Le semoir est livr avec la pression correspondante la largeur de la machine Tableau 5 Si vous voulez augmenter...

Страница 140: ...vis C Fig 65 sert de but e pour tous les l ments de rayonnage Pour obtenir un semis r gulier r gler la but e C de la m me mani re pour tous les l ments de rayonnage Lorsque les conditions du sol sont...

Страница 141: ...la poign e 2 pour le r glage Une fois le r glage termin resserrer le collier de serrage ATTENTION Au cours des op rations d assemblage semoir quipement si le dispositif de levage hydraulique du ch ssi...

Страница 142: ...us A Fig 72 R GLAGEDESINSTALLATIONS L installation hydraulique ne contient pas d huile au moment de la livraison Par cons quent avant de l utiliser s assurer que tous les cylindres hydrauliques sont a...

Страница 143: ...donc interdit aux personnes aux enfants et aux animaux domestiques de s approcher IMPORTANT A fin que le travail soit ex cut au mieux il est important de semer pendant un bref trajet et puis de contr...

Страница 144: ...ret s des conduits Grease the transmission chains 5 0 3 TOUTES LES 20 30 HEURES DE TRAVAIL Check the tightness of the bolts on the listers Grease the transmission chains Graisser les disques traceurs...

Страница 145: ...ors de l essai de rotation on n a pas tenu compte du poids vide du r cipient de recueil en le retirant Les diff rences dues au glissement ou la distribution excessive en correspondance de la t te du c...

Страница 146: ...cod G19502661 g 146 Notes...

Страница 147: ...147 cod G19502661 g Notes...

Страница 148: ...cod G19502661 g 148...

Страница 149: ...etidos por el cliente Si se hicieran modificaciones sin la autorizaci n escrita del fabricante y si se hubiesen utilizado repuestos no originales 1 2 DESCRIPCI N DE LA SEMBRADORA Este apero agr cola p...

Страница 150: ...de identificaci n Fig 2 en la que se encuentran 1 Marca y direcci n del Fabricante 2 Tipo de la m quina 3 Peso seco en kilogramos 4 Peso a piena carga en kilogramos 5 Matr cula de la m quina 6 A o de...

Страница 151: ...responsable El peso de la m quina est indicado en la plaqueta de identificaci n 8 Fig 4 Halar el cable para nivelar la m quina Los puntos de enganche se identifican mediante el s mbolo gr fico gancho...

Страница 152: ...igro de captura permanecer lejos de los rganos en movimiento 7 Peligro de corte para las manos No acercarse con rganos de la maquina en movimento 8 Peligro de enganche Con la m quina en funcionamiento...

Страница 153: ...ispositivos de protecci n est n intactos instalados y en posici n de seguridad 13 Es absolutamente prohibido aparcarse en el rea de acci n de la m quina en donde se encuentren partes en movimiento 14...

Страница 154: ...encia de las indicaciones de los faros prev Fig 7 A indicador de direcci n B luz de posici n roja C luz de stop rbol Card n 38 El equipo aplicado puede ser controlado s lo a trav s del rbol card n com...

Страница 155: ...s En dicho caso consulte inmediatamente a un m dico Si el aceite con medios quir rgicos no se quita r pidamente puede ocurrir las alergias y o las infecciones serias Est terminantemente prohibido inst...

Страница 156: ...de apoyo delanteros A Fig 9 dcho e izqdo afloje las tuercas del enganche B Fig 9 coloque los pies delanteros en posici n de estacionamiento Fig 10 3 2 APLICACI N AL EQUIPO 3 2 1APLICACI N DELTRI NGUL...

Страница 157: ...GIP ROTRA MP 85W 140 AGIP G R MU EP2 MASCHIO S pA 35011 Campodarsego PADOVA IT ALY 982 DC TIPO MOD Kg MATR ANNO DI FABBRICAZIONE 323 mm 6 9 0 m m R500 Raccomanded Oil AGIP ROTRA MP 85W 140 AGIP G R MU...

Страница 158: ...00 R600 Raccomanded Oil AGIP ROTRA MP 85W 140 AGIP G R MU EP2 MASCHIO S pA 35011 Campodarsego PADOVA ITALY 1 R500 R600 Raccomanded Oil AGIP ROTRA MP 85W 140 AGIP G R MU EP2 MASCHIO S pA 35011 Campodar...

Страница 159: ...AGIP ROTRA MP 85W 140 AGIP G R MU EP2 MASCHIO S pA 35011 Campodarsego PADOVA IT ALY 98S VITO TIPO MOD Kg MATR ANNO DI FABBRICAZIONE 299 mm 6 8 5 m m R500 Raccomanded Oil AGIP ROTRA MP 85W 140 AGIP G...

Страница 160: ...ora y equipo est prohibido colocarse en el medio de ambos 4 Antes de levantar el equipo para que se enganche a la sembradora verifique que no haya o se puedan producir interferencias entre los rgnos m...

Страница 161: ...lojar totalmente la tension de las mismas usando la palanca A Fig 17 Attenci n NO QUITAR mai la tuerca B Fig 17 Sustituya siempre ambas correas usando recambios originales Si est montado el sensor de...

Страница 162: ...as Si fuera necesario ad ptelos modificando su longitud tal como muestra la Fi gura 22 3 2 6 TRANSMISSION Conecte la rueda motriz al rgano dosificador mediante el rbol card n suministrado como indicad...

Страница 163: ...que prescribe que por lo menos el 20 del peso del tractor solo debe descansar sobre el eje delantero y que el peso sobre los brazos del elevador no debe superar el 30 del peso del mismo tractor Estas...

Страница 164: ...tubular externa evitando as que eventuales da os a las semillas limiten su capacidad de germinar en el terreno El agitador arrastra la semilla siempre hacia abajo en el rodillo dosificador En condici...

Страница 165: ...gudos y provocar heridas al operador Las ruedas est ndar se producen desalineadas en dos filas y existen diferentes ruedas para los empleos m s variados subdivididas en tres grupos de productos rojas...

Страница 166: ...y la presi n del muelle garantiza una s lida fuerza de cierre Las puertas no tocan la rueda de siembra durante su funcionamiento Los separadores fijados entre una puerta y otra permiten accionar cada...

Страница 167: ...ta desplace los discos para colocarlos en su posici n A este punto es posible atornillar sin problemas la puerta apret ndola bien a mano Observe la figura cuando la puerta est desmontada tambi n puede...

Страница 168: ...con puerta de siembra y rueda de siembra desmontadas Fig 42 Extraiga todos los elementos del agitador Fig 43 Extraiga el agitador Fig 44 prestando atenci n a que no se caigan el cojinete y el disco de...

Страница 169: ...do izquierdo e introduzca el ltimo elemento del agitador en la parte derecha Fig 48 En el alojamiento derecho del cojinete introduzca primero el cojinete y luego aplique el disco de protecci n derecho...

Страница 170: ...opio asiento en el sentido de la flecha DESGASTE En presencia de un estrato oleoso considerable los elementos el sticos se desgastan r pidamente perdiendo la eficacia de su funci n El desgaste puede s...

Страница 171: ...rifique que en condiciones de trabajo las acanaladuras de los sectores activos se encuentren escalonadas las unas respecto a las otras D Fig 55 para garantizar continuidad en la distribuci n Coloque n...

Страница 172: ...es aproximadas de distribuci n En todo caso es necesario realizar una prueba de siembra Afloje el tornillo de fijaci n situado en la regulaci n del cambio Fig 57 y luego ponga el indicador graduado en...

Страница 173: ...2 160 194 254 241 105 233 26 48 50 52 28 265 239 220 170 205 269 258 109 246 28 51 53 55 30 284 256 236 182 220 288 276 117 264 30 55 57 59 32 303 273 252 194 235 307 294 125 282 32 59 60 63 34 319 28...

Страница 174: ...mas mencionadas De todas formas la Casa Fabricante est a completa disposici n para asegurar una inmediata y esmerada asistencia t cnica as como tamb n todo lo que podr precisarse para mejorar el funci...

Страница 175: ...indicada por el man metro C Fig 62 Regolaci n de la presion La sembradora se entrega con la pression relativa alla anchura de trabajo como da Tabla 5 Se es necesario aumentar incrementar el n mero de...

Страница 176: ...nillo C Fig 65 cumple la funci n de fin de carrera para cada elemento surcador Para obtener una siembra regular ajuste el fin de carrera C igual para todos los elementos surcadores Cuando el terreno p...

Страница 177: ...osca de bloqueo 1 y gire el regulador 2 para el ajuste Concluida la regulaci n apriete de nuevo la rosca de bloqueo CUIDADO Durante el acoplamiento de la sembradora y el equipo y si est instalado el d...

Страница 178: ...lica se suministra sin aceite Por lo tanto antes del uso es indispensable cerciorarse que todos los cilindros hidr ulicos se accionen lentamente en ambas direcciones hasta que los conductos y los prop...

Страница 179: ...de transportar substancias qu micas por lo tanto no se deber permitir que personas ni os o animales dom sticos se acerquen a la sembradora IMPORTANTE Es importante para el buen resultado del trabajo s...

Страница 180: ...s de la presencia de condensaci n y elimina las posibles impurezas Engrasar las cadenas de transmisi n 5 0 3 CADA 20 30 HORAS DE TRABAJO Verificar el apriete de los pernos surcadores Engrasar las cade...

Страница 181: ...nte la prueba de rotaci n se ha girado muy r pido la rueda de transmisi n Las razones por las cuales se distribuye una cantidad insuficiente de semillas pueden ser hay cuerpos extra os que atascan el...

Страница 182: ...Notes...
Страница 183: ...4254 1 2006 EN 14018 2006 assim como as especifica es t cnicas ISO 11684 1995 norma utilizada somente para as semeadoras EG Conformiteitsverklaring Wij verklaren onder onze volledige verantwoordelijkh...

Страница 184: ...ASPARDO SpA Sede legale e stabilimento produttivo Via Marcello 73 35011 Campodarsego Padova Italy Tel 39 049 9289810 Fax 390499289900 Email info maschio com www maschionet com MASCHIO GASPARDOUSAInc 1...

Отзывы: