


7
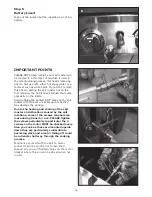
IMPORTANT SAFEGUARDS
• The power supply must be supplied through
a residual current device (RCD) having a
tripping current not exceeding 30mA.
• Only connect this rotisserie to a socket-
outlet having an earthing contact.
• DO NOT use the rotisserie during inclement
weather, rain or damp conditions.
• Unplug and remove rotisserie when not
in use.
• Never store rotisserie on spit roaster,
always remove.
• DO NOT operate the rotisserie with a
damaged cord or plug, or if rotisserie
malfunctions, or has been damaged
in any manner.
• To protect against electrical shock, DO NOT
immerse cord, plug or motor in water or
expose to rain.
• Avoid contact of the electrical cord with hot
spit roaster surfaces and grease.
• Never operate this rotisserie when you are
tired, drinking alcohol, taking drugs or if
taking medication that causes drowsiness.
• This rotisserie is not intended for use by
persons (including children) with reduced
physical, sensory or mental capabilities,
or lack of experience and knowledge,
unless they have been given supervision or
instruction concerning use of the rotisserie
by a person responsible for their safety.
• Children must be supervised to ensure that
they do not play with the rotisserie.
• Pets and animals must be kept away
from the work area so as to avoid
tripping dangers.
When using electrical appliances, basic
safety precautions should always be
followed, including the following:
• Never modify this rotisserie as damage
and injury may occur, and this will void
your warranty.
• Read and understand all instructions.
• DO NOT touch hot surfaces. Use handles or knobs.
• The use of accessory attachments not
recommended by the appliance manufacturer
may cause injuries.
• Extreme caution must be used when moving an
appliance containing hot oil or other hot liquids.
• DO NOT use this appliance for anything other
than intended use.
• Only connect this rotisserie to 240V AC power.
• DO NOT place on or near a hot gas or electric
burner, or in a heated spit roaster.
• Check for damaged parts before operating
this rotisserie.
• Do not touch any hot components.
• Ensure work area is clear of clutter and possible
trip dangers.
• Never wear loose clothing which could get
caught in moving parts.
• Long hair should be contained so it can not get
caught in moving parts.
• Never yank or pull the power cord to disconnect
it from the mains supply socket-outlet.
• Never carry the rotisserie by its power cord.
• Keep power cord away from heat, oil, solvents
and sharp edges.
• Check power cord for signs of damage before
each use. If damaged do not use.
• Power cord must only be replaced by an
authorised service facility.
• To clean rotisserie only use a damp soft cloth,
never use liquid or solvents of any type.
• Ensure rotisserie is disconnected when not in
use and before servicing, making adjustments or
when changing and accessories.
• Ensure rotisserie is turned off before connecting
to the mains power supply.
• Only use an extension cord intended and marked
“outdoor” use.
• Only use a ‘3’ core (earth pin) extension cord
with this rotisserie.
• DO NOT clean the spit motor while it is on or
plugged into the mains power supply.
• Always switch ‘OFF’ and un-plug before cleaning.
• DO NOT spray water or any liquid into the
spit motor.
• Repairs should only be carried out by quali
fie
d
personse using original spare parts. Failure to do so
may result in considerable danger to the operator.
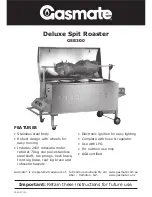
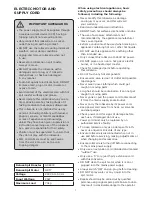
Deluxe Spit Roaster
GSB300
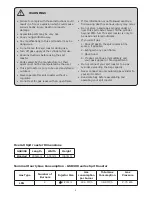
Deluxe Spit Motor
GRT7
Voltage
240V AC~50 Hz
Input Wattage
25W
Maximum Load
70kg
ELECTRIC MOTOR AND
SUPPLY CORD
Содержание GSB300
Страница 10: ...10 EXPLODED DIAGRAM ...


