4
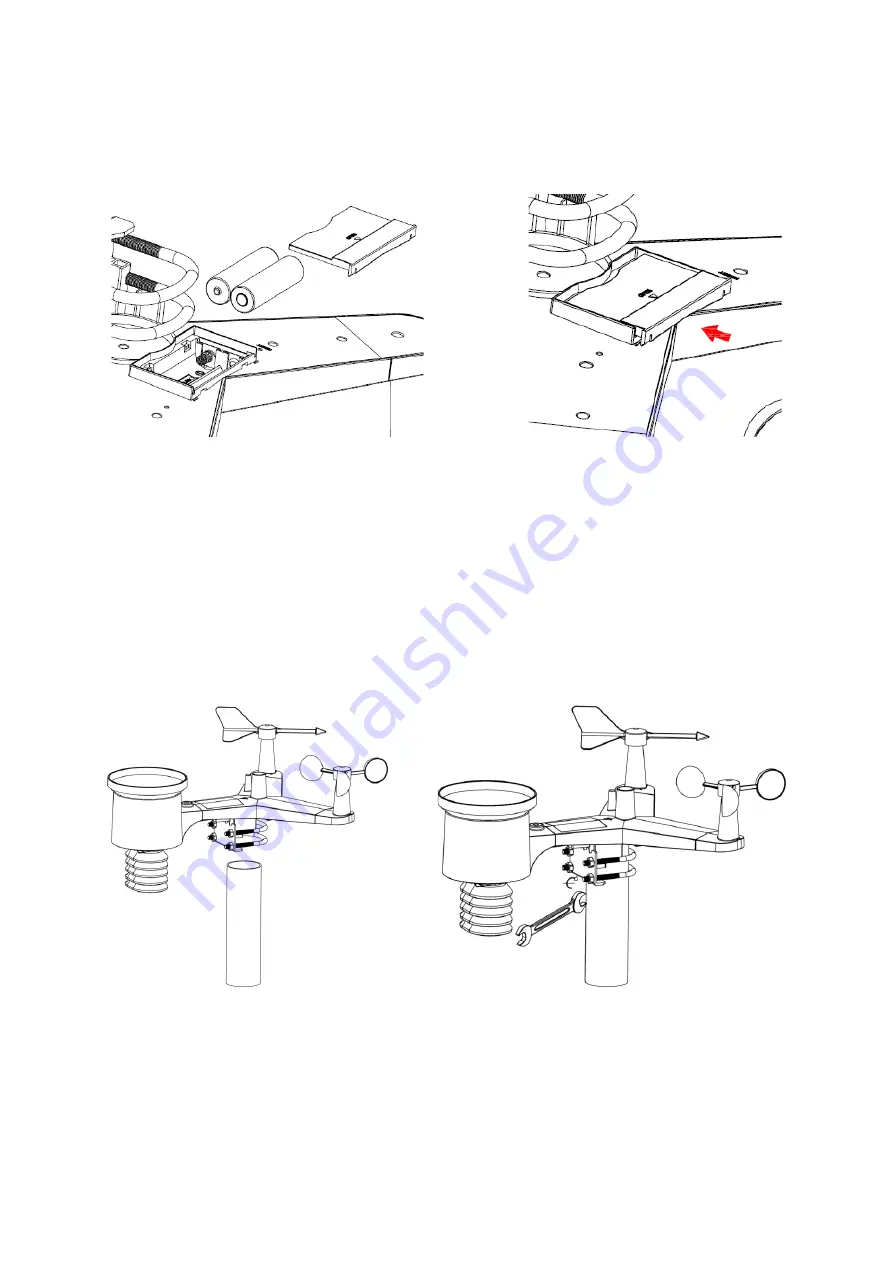
Battery installation
1) Remove the battery compartment cover on the underside of the integrated wireless sensor
2) Insert 2 AA-type batteries (lithium recommended, do not use rechargeable batteries),
note the correct polarity, and close the battery cover
3) The LED on the underside of the integrated wireless sensor lights up for 4 seconds
and then flashes every 16 seconds during data transmission to the main unit
Note:
If the LED does turn on after inserting the batteries, make sure the batteries are inserted with the
correct polarity. Press the RESET button with a thin utensil for 3 seconds. In some cases it is not
possible to receive a signal immediately due to interference.
Installation of the integrated wireless sensor
Install the integrated wireless sensor in an open space, away from obstacles such as other
buildings, trees, etc. that prevent free wind flow, to ensure undistorted measurements of individual
weather elements. Point the part with the vane and propeller north for correct wind direction
measurement. Place the integrated wireless sensor onto the stand (not included) at a minimum
distance of 1.5 metres from the ground to prevent the measured values being affected by the
ground surface and tighten the bolts. Use the spirit level on the top of the integrated wireless
sensor to ensure that it is level. Tighten the U-bolt nuts.
RESET button and LED
1) If the main unit does not receive any measured values from the integrated wireless sensor,
press the
RESET
button located on the underside of the integrated wireless sensor for 3
seconds using a thin utensil
2) Remove the batteries, cover the solar panel and wait for 1 minute
3) Replace the batteries and place the integrated wireless sensor at a maximum distance of 3
metres from the main unit to establish the connection


