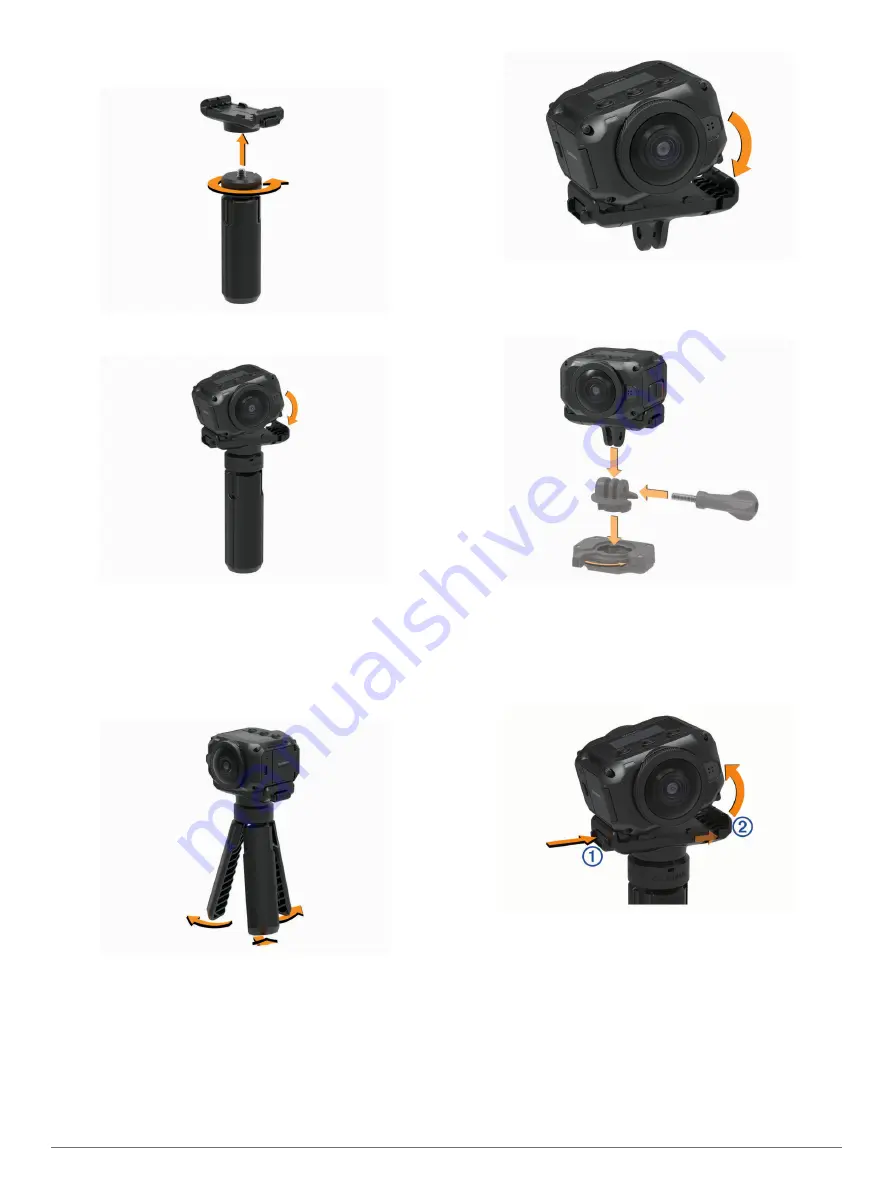
1
Screw the tripod into the threaded hole in the bottom of the
tripod cradle.
2
Place one side of the camera into the cradle, fitting the
grooves in the side of the camera onto the teeth.
3
Press the other side of the camera down until it clicks.
4
Select an option:
• To shoot handheld video, keep the tripod legs closed.
The tripod operates as a handheld grip when the legs are
closed.
• To shoot video from a stationary location, open the tripod
legs and place the camera at the shooting location.
Assembling the Action Cradle and Mounts
You can use the included action cradle to attach your camera to
compatible VIRB action camera mounting accessories (not
to purchase mounting
accessories.
1
Place one side of the camera into the cradle, fitting the
grooves in the side of the camera onto the teeth.
2
Press the other side of the camera down until it clicks.
3
Place the flanges on the bottom of the action cradle into the
compatible mount (not included), and secure the cradle with
a thumbscrew.
NOTE:
Some mounting accessories may use a different
method to secure the camera to the mount. See the
instructions included with the mounting accessory for more
information.
Removing the Camera from the Cradle
1
Press the button
À
to open the cradle.
TIP:
Avoid squeezing or obstructing the sliding portion of the
cradle
Á
when you press the button.
2
Tilt one side of the camera up, and remove the camera from
the mount.
Video
Preparing to Record a Video
Before you start recording, you should set up your camera for
the kind of footage you want to capture.
1
Select a lens mode to choose the size of the video and the
lens or lenses to use (
).
Video
3
Содержание VIRB 360
Страница 1: ...VIRB 360 Owner sManual...
Страница 4: ......
Страница 21: ......
Страница 22: ...support garmin com May 2017 190 02191 00_0A...


