background image

38 

GPSMAP 76CSx Owner’s Manual

M

AIN

 P

AGES

 > 

M

AP

 P

AGE

Map Page

The GPSMAP 76CSx comes with a built-in basemap 

that includes a database of cities, interstates, state and 

county highways, exit information, and lake and river 

outlines. The standard basemap can be enhanced with 

MapSource or BlueChart data.
Two map operating modes, position mode and pan 

mode, determine what cartography is shown on 

the map. Position mode pans the map to keep your 

present location in the screen area. The position 

marker   shows your travel on the Map Page. When 

you press the 

ROCKER

, the GPSMAP 76CSx enters 

pan mode, which moves the map to keep the white 

arrow   (map pointer) within the screen area.
When you are in pan mode, you can move the map 

pointer about the page to highlight and identify map 

items. If there is more than one map item under the 

pointer, a list appears with the item selected on the 

map and highlighted on the list. 

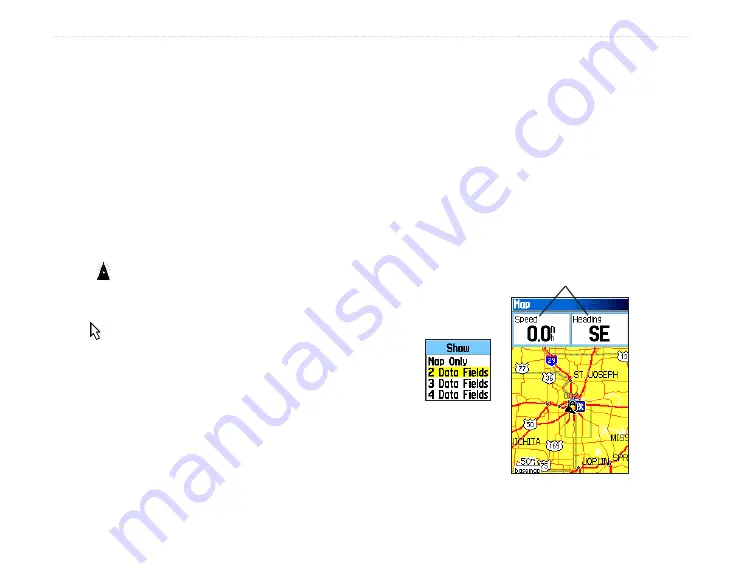
You can add and configure up to four optional data 

fields to the top of the page to provide a variety of 

travel and navigational information.

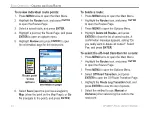
To show data fields on the Map Page:

1.  Press 

MENU

 to open the Map Page Options 

Menu. 

2.  Highlight 

Data Field

, and press 

ENTER

. The 

Show sub-menu appears.

3.  Select the number of data fields you want to 

show on the Map Page, and press 

ENTER

.

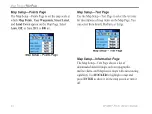
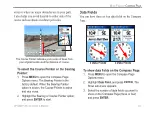
Data fields

Show sub-menu

Map Page with data fields

Содержание GPSMAP 76 CSx

Страница 1: ...GPSMAP 76CSx mapping gps with sensors owner s manual Shown with optional MapSource data...

Страница 2: ...tain the complete text of this copyright notice and provided further that any unauthorized commercial distribution of this manual or any revision hereto is strictly prohibited Information in this docu...

Страница 3: ...n and how to acquire satellites The Basic Operation section provides information about setting up waypoints routes and tracks The Main Pages section contains an overview of the Satellite Trip Computer...

Страница 4: ...alizing the GPS Receiver 5 Initialization Options 6 Using the GPSMAP 76CSx 6 Understanding Terms 6 Selecting Options and Entering Data 7 Using the Status Bar 8 On Screen Messages 9 Using the Databases...

Страница 5: ...Map Page 38 Using Additional Map Data 39 Changing the Zoom Range 40 Map Orientation 40 Map Page Options 40 Guidance Text 41 Setting up the Map Page 42 Measuring Distance 45 Turning Declutter On or Of...

Страница 6: ...71 Marine Setup 72 Time Setup 73 Units Setup 73 Heading Setup 74 Calibration Setup 75 Altimeter Setup 76 Welcome Setup 77 Jumpmaster 78 Proximity Waypoints 82 Calendar 82 Calculator 83 Stopwatch 84 Su...

Страница 7: ...o decompile disassemble modify reverse assemble reverse engineer or reduce to human readable form the Software or any part thereof or create any derivative works based on the Software You agree not to...

Страница 8: ...f these are used apply the liquid to the cloth and then gently wipe the screen with the moistened cloth Storage Do not store the GPSMAP 76CSx where prolonged exposure to temperature extremes may occur...

Страница 9: ...ns before continuing navigation Use the electronic chart in the GPSMAP 76CSx only to facilitate not to replace the use of authorized government charts Of cial government charts and notices to mariners...

Страница 10: ...ystem is subject to changes which could affect the accuracy and performance of all GPS equipment including the GPSMAP 76CSx Although the GPSMAP 76CSx is a precision navigation device any navigation de...

Страница 11: ...tachment slots Battery compartment cover External Data Auxilary Power Port under weather cap Internal antenna Interface keys Auxiliary GPS Antenna Connector under weather cap Battery compartment locki...

Страница 12: ...attery compartment 3 Reinstall the battery cover by aligning the back cover with the unit and turning the D Ring 1 4 turn clockwise Remove the batteries from your GPSMAP 76CSx when you do not expect t...

Страница 13: ...ys Press to zoom in or out on the Map Page Press to scroll up or down a list on any other page FIND MOB Key Press at any time to view the Find Menu Press and hold for MOB POWER Key Press and hold to t...

Страница 14: ...troduction Page appears followed by the Satellite Page Introduction Page Satellite Page 2 To turn off the GPSMAP 76CSx press and hold the POWER key again Adjusting the Backlight You might want to adju...

Страница 15: ...of you with the top tilted upward When the receiver has signals from at least three satellites the top of the page changes to indicate position accuracy and location coordinates 3 Press and release th...

Страница 16: ...section explains how to enter and select information with the GPSMAP 76CSx Understanding Terms As you progress through this owner s manual you are directed to press a speci c key or highlight a eld o...

Страница 17: ...the factory default settings when you select Restore Defaults Highlighted eld On screen buttons Field Selecting Options and Entering Data Use the ROCKER to highlight select or choose an item in a lis...

Страница 18: ...in to an external or USB power source Satellite signal status is shown when searching for or acquiring satellites when a 2D x is attained and when a 3D x is attained four or more satellites are receiv...

Страница 19: ...al MapSource City Navigator data you can view listings of nearby restaurants lodging shopping centers attractions and entertainment and even retrieve addresses and phone numbers for any listed locatio...

Страница 20: ...e at a location create a waypoint on the Map Page or enter coordinates for a waypoint manually Marking Your Current Location Use the ENTER MARK key to quickly capture your current location to create a...

Страница 21: ...ormation a No map information at this point Do you want to create a user waypoint here message appears Highlight Yes and press ENTER 4 To change any information on the Waypoint Page highlight the appr...

Страница 22: ...ect the waypoint you want to edit and press ENTER The Waypoint Page opens 4 Make changes by highlighting each eld and use the waypoint symbol chart and alphanumeric keypad to enter new data 5 Press QU...

Страница 23: ...map and press ENTER Original location New location Moving a waypoint Averaging the Waypoint s Location You can average a new waypoint location over time to produce a more accurate location NOTE You mu...

Страница 24: ...open the Find Menu 2 Highlight the Waypoints icon and press ENTER to open the Waypoints Page 3 Select the waypoint you want to project and press ENTER The Waypoint Page opens 4 Press MENU to open the...

Страница 25: ...oup of map points and press ENTER to open the information page for the item 5 With the Use button highlighted press ENTER to add the point to the list on the Proximity Waypoints Page 6 Use the ROCKER...

Страница 26: ...using the MOB feature 1 Press and hold the FIND MOB key to mark the MOB waypoint 2 Press ENTER to open the Map Page showing the path from your current location to the MOB point Use the Compass Page fo...

Страница 27: ...ing Find By Name 1 Press FIND to open the Find Menu 2 Use the ROCKER to highlight the icon for the type of item for which you want to search and press ENTER Or To search the entire database select the...

Страница 28: ...t and press ENTER an information page shows detailed information about the item Each information page contains three on screen buttons Different buttons appear depending on whether you are selecting a...

Страница 29: ...tables for this item location See page 85 for more information View Hunt and Fish view Hunt and Fish tables for this item location See page 86 for more information Map Information show the map from wh...

Страница 30: ...rrow pointer to the map location you want and press ENTER The Find list shows a list of items near the new map location Finding a Waypoint The Waypoints Page contains a list of all saved waypoints Way...

Страница 31: ...those that have not been found 3 Use the ROCKER to highlight a geocache on the list and press ENTER to open the information page 4 Highlight the Go To button and press ENTER to navigate to the geocach...

Страница 32: ...nterstate exit 1 Press FIND to open the Find Menu 2 Highlight the Exits icon and press ENTER The Exits Page shows a list of interstate exits near your location 3 Use the ROCKER to select an exit and p...

Страница 33: ...the possible number of address matches In place of a city you can use extended postal codes in select European areas Addresses Page Addresses icon 3 Highlight the Enter Number eld and press ENTER 4 Ty...

Страница 34: ...in the Enter City as the database has information for the entire region However you can select a city if you want to reduce the possible number of intersection matches 4 Highlight the Enter Street 1 e...

Страница 35: ...using the Options Menu 4 Highlight the item you want from the list and press ENTER to open the information page for the selected item If you are searching for a restaurant that is part of a national c...

Страница 36: ...ion x The percentage of memory used by the current track log appears at the top of the Tracks Page Tracks Page Percentage of memory used List of saved tracks To clear the track log 1 Press MENU twice...

Страница 37: ...ain Menu 2 Select the Tracks icon and press ENTER to open the Tracks Page 3 Highlight the Save button and press ENTER A message appears asking you if you want to save the entire track 4 Select Yes and...

Страница 38: ...e map On the Saved Track Page select the Map button and press ENTER to open the Map Page A map showing the entire track appears Begin and End markers and user waypoints are added to the track Use the...

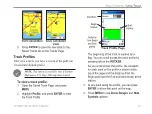
Страница 39: ...Page and press MENU 2 Highlight Pro le and press ENTER to view the Track Pro le Begin marker End marker Track Pro le Page Elevation Distance from Begin and End points The beginning of the track is mar...

Страница 40: ...on and press ENTER to open the TracBack Page A map showing the entire track appears and you are prompted to select the point you want to TracBack to 2 Use ROCKER to move the pointer to the point on th...

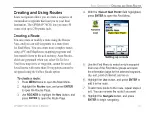
Страница 41: ...nnot be saved Saved routes with more than 50 waypoints cannot be navigated using the Follow Roads option To create a route 1 Press MENU twice to open the Main Menu 2 Highlight the Routes icon and pres...

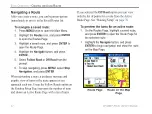
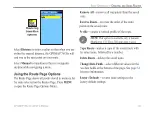
Страница 42: ...U select Stop Navigation and press ENTER When navigating a route a guidance message and graphic view of turns in the route appear as you approach each one Using the Follow Roads option on the Routing...

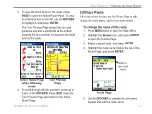
Страница 43: ...Preview Page 4 To scroll through all turn previews press up or down on the ROCKER Press QUIT close the Turn Preview Page and return to the Active Route Page Editing a Route After you create a route u...

Страница 44: ...ete a route 1 Press MENU twice to open the Main Menu 2 Highlight the Routes icon and press ENTER to open the Routes Page 3 Press MENU to open the Options Menu 4 Highlight Delete All Routes and press E...

Страница 45: ...he Routes Page Press MENU to open the Route Page Options Menu Remove All removes all waypoints from the saved route Reverse Route reverses the order of the route points in the saved route Pro le creat...

Страница 46: ...e added using the Page Sequence option on the Main Menu An Active Route Page appears when you are actively navigating Each page has an Options Menu which contains the setup options and functions that...

Страница 47: ...ion Using the Satellite Page Options Menu Press MENU to open the Options Menu Use With GPS Off On enables you to turn the GPS receiver on or off Track Up North Up indicates whether satellites are show...

Страница 48: ...SMAP 76CSx enters pan mode which moves the map to keep the white arrow map pointer within the screen area When you are in pan mode you can move the map pointer about the page to highlight and identify...

Страница 49: ...enhance the versatility of your GPSMAP 76CSx With MapSource CD ROMs you can view listings such as nearby restaurants lodging shopping centers attractions and entertainment and you can retrieve address...

Страница 50: ...zoom appears under the Zoom Range When using MapSource detailed maps mapsource appears below the scale Map zoom ranges Map Orientation There are two map orientation options North Up orients the map li...

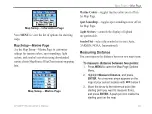
Страница 51: ...Distance Stop Measuring Measures the distance from your current location to the map pointer Turn Declutter On Off eliminates items on the map that can block road details when the map is zoomed out Res...

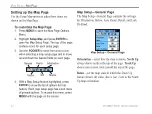
Страница 52: ...al Tracks Points Text Information Marine 4 With a Map Setup feature highlighted press ENTER to show the list of options for that feature Each map setup page has a sub menu of general options To access...

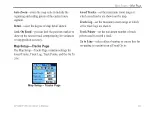
Страница 53: ...n map position accuracy Map Setup Tracks Page The Map Setup Tracks Page contains settings for Saved Tracks Track Log Track Points and the Go To Line Map Setup Tracks Page Saved Tracks set the maximum...

Страница 54: ...Points Page Map Setup Text Page Use the Map Setup Text Page to select the text size for descriptions of map items on the Map Page You can select from Small Medium or Large Map Setup Text Page Map Setu...

Страница 55: ...Spot Soundings toggles spot soundings on or off on the Map Page Light Sectors controls the display of lighted navigation aids Symbol Set select the symbol set to use Auto GARMIN NOAA International Mea...

Страница 56: ...ed REF Measured distance Turning Declutter On or Off You can remove unwanted items from the Map Page declutter the screen such as map item titles and icons This is useful when the map is zoomed to a s...

Страница 57: ...the Compass Page guides you to your destination with a graphic compass and a bearing pointer Compass Page The Compass Ring moves to indicate North Orientation Bearing Pointer When navigating the Comp...

Страница 58: ...pass ring is an electronic compass that functions like a magnetic compass when you are stationary When you are moving and reach a pre set speed it uses data from the GPS receiver to maintain your head...

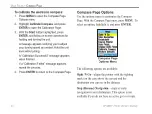
Страница 59: ...ctions Setting the speed and time for Compass Auto On Off 1 Press MENU twice to open the Main Menu 2 Highlight Setup and press ENTER to open the Setup Menu 3 Highlight the Heading icon and press ENTER...

Страница 60: ...ration Successful message appears when nished If a Calibration Failed message appears repeat the process 4 Press ENTER to return to the Compass Page Compass Page Options Use the options menu to custom...

Страница 61: ...lect the type of data you want to show in the data elds See page 54 for more information Calibrate Compass allows you to calibrate the electronic compass Restore Defaults restores the default settings...

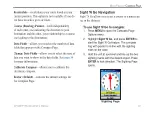
Страница 62: ...pointing straight up for example you are going directly to your destination If it points any direction other than up turn toward that direction until the arrow is pointing up and then continue in tha...

Страница 63: ...open the Compass Page Options menu The Bearing Pointer is the factory default When the Bearing Pointer option is shown the Course Pointer is active and vice versa 2 Highlight the Bearing or Course Po...

Страница 64: ...hange remaining data elds To restore data elds to default settings 1 Press MENU to open the Compass Page Options Menu 2 Highlight Restore Defaults and press ENTER to return the page to factory setting...

Страница 65: ...re available Plot Over Time Plot Over Distance plots the elevation over time or distance View Elevation Plot View Pressure Plot shows elevation or pressure plot Zoom Ranges allows you to set the Zoom...

Страница 66: ...ion Plots Select the View Elevation Plot option to plot a pro le of elevation changes that occur as you navigate over a set distance or period of time Select View Pressure Plot to view a record of cha...

Страница 67: ...ance plot Zoom ranges for Pressure over time plot Ranges for View Pressure Plot pressure values are shown when you press up or down on the ROCKER Values for time and distance are shown in the same man...

Страница 68: ...use the View Points option 1 Press MENU to open the Altimeter Page Options Menu 2 Select View Pressure Plot or View Elevation Plot and press ENTER to open the Plot Page 3 Press left or right on the R...

Страница 69: ...can reset the elevation data and the maximum elevation data by selecting these options from the Reset Page To reset the elevation data and max elevation elds 1 Press MENU to open the Altimeter Page Op...

Страница 70: ...o determine the elevation and the pressure at any given elevation can uctuate you can calibrate the altimeter to increase its accuracy You must know the elevation or pressure at your current location...

Страница 71: ...ess ENTER 3 Use the ROCKER to highlight a data eld and press ENTER to view a list of available data eld options Data eld options Data elds 4 Press up or down on the ROCKER to highlight an option and p...

Страница 72: ...tion by highlighting Reset from the Options Menu and pressing ENTER The Reset Page offers options for resetting trip computer data clearing the Track Log and deleting Saved Tracks Waypoints and Routes...

Страница 73: ...enu NOTE If a page is added to the page sequence the icon does not appear on the Main Menu Tracks The Tracks Page shows the percentage of track memory used and a list of saved tracks Use the Tracks Pa...

Страница 74: ...ge Use the Routes page to create a sequence of intermediate waypoints that lead you to your nal destination For more information see Creating and Using Routes beginning on page 31 Highway Page When na...

Страница 75: ...do the following Stop Navigation Con gure Data Fields from four to three with a destination guidance message Change the Data Fields or restore Defaults to factory settings Setup Menu Use the Setup Me...

Страница 76: ...disable WAAS page 97 Battery Type allows you to select the battery type you are using Alkaline or NiMH Text Language sets the unit s on screen language External Power Lost indicates whether the unit r...

Страница 77: ...display to Day Night or Auto mode Select Auto to automatically switch from day to night at sunset and change back at sunrise Daytime Color Scheme Nightime Color Scheme select the color scheme to use w...

Страница 78: ...oute track log and MapSource data with a PC NMEA In NMEA Out Supports input and output of standard NMEA 0183 version 3 01 data TEXT OUT Allows ASCII text output of location and velocity information No...

Страница 79: ...age highlight the Page Sequence icon and press ENTER To move insert or remove a page 1 To move a page in the order highlight the page and press ENTER Select Move and press up or down on the ROCKER to...

Страница 80: ...prompted to select a preference before the route is calculated Follow Road increases the number of turns the route contains Off Road creates a direct line from your current location to your destinatio...

Страница 81: ...oute but uses a longer calculation time Best Route generates the optimal route but takes the longest time to calculate Calculate Routes For sets route calculation for the vehicle you are operating to...

Страница 82: ...ne marine alarm settings To access the Marine Setup Page On the Setup Menu Page highlight the Marine icon and press ENTER Anchor Drag Alarm sets an alarm to sound when you exceed a speci ed drift dist...

Страница 83: ...ER Time icon Time Zone choose the time zone for your city so the GPSMAP 76CSx will show the correct local time Select Other to enter a UTC Offset Units Setup Use the Units Setup Page to customize the...

Страница 84: ...t WGS 84 datum for best overall performance Distance Speed select the unit of measurement to show your speed and distance traveled Elevation Vert Speed select the unit of measurement Feet ft min Meter...

Страница 85: ...Setup The Calibration Setup Page allows you to calibrate both the Compass and Altimeter for increased accuracy in navigation To calibrate the compass 1 On the Setup Menu Page highlight the Calibratio...

Страница 86: ...ction as a standard barometer Trip data is not recorded when in Fixed Elevation mode To manually calibrate the Altimeter 1 Highlight the Calibrate Altimeter button and press ENTER You can calibrate th...

Страница 87: ...CSx Adding a welcome message To access the Welcome Setup Page On the Setup Menu Page highlight the Welcome Message icon and press ENTER To add a welcome message 1 Use the on screen keypad and the ROCK...

Страница 88: ...ng the barometer and electronic compass You can set the Jumpmaster to one of three types of jumps HAHO HALO or Static The jump type selected determines what additional setup information is required Fo...

Страница 89: ...termine the direction and magnitude the aircraft will carry the user after jumping and before free fall or canopy drift begins A number of additional constants are entered on the Constant Setup page b...

Страница 90: ...wind direction Select Clear All from the Options Menu of this page to clear the list of wind speeds and directions Wind speeds and directions must be entered as a pair to be valid Those pairs left as...

Страница 91: ...ge from 3 0 for K freefall to 48 0 for HAHO K open Select Restore Defaults from the Option Menu of this page to reset the values The following is a list of abbreviations and acronyms commonly used AGL...

Страница 92: ...y Waypoints Use the Proximity Waypoints Page to de ne an alarm circle around a stored waypoint location The alarm circle can help you avoid restricted locations For more information on proximity waypo...

Страница 93: ...e point reference on the Day Page 6 To remove points from a Day Page press MENU to open the Options Menu Select Remove Points and press ENTER to display the Remove Points Options List Calculator Selec...

Страница 94: ...Stop button and press ENTER to stop the stopwatch To use the lap feature With the stopwatch running highlight the Lap button and press ENTER To reset the stopwatch With the stopwatch stopped highlight...

Страница 95: ...and moon and stop at a given time or date To view sun and moon locations for a speci ed time date and location 1 Press MENU twice to open the Main Menu 2 Select the Sun Moon icon and press ENTER Sun a...

Страница 96: ...ght the Date eld and press ENTER to open the on screen keypad 4 To view the predictions for a different location highlight the Location eld and press ENTER to open the New Location Options Menu Choose...

Страница 97: ...pen the Main Menu 2 Select the Games icon and press ENTER 3 Use the ROCKER to highlight a game and press ENTER A brief description of each game appears WARNING When playing any of the virtual games wh...

Страница 98: ...ht Start and press ENTER to begin the game 3 Highlight Re Center and press ENTER to place yourself back in the middle of the game board Virtual Maze This GPS based game creates a virtual maze on the s...

Страница 99: ...large Small elds are approximately 20 yards by 30 yards and large elds are 60 yards by 90 yards about the size of an American football eld The dif culty levels are Easy Normal and Hard These levels d...

Страница 100: ...curve or move you diagonally The game consists of several dif culty levels and an extended or limited visibility option When you lose a game the screen shows the layout of hazards slides and warning p...

Страница 101: ...acy 10 feet resolution 1 ft Subject to proper user calibration Power Source Two 1 5 volt AA batteries USB power 12 V Adapter Cable or up to 36 VDC external power Battery Life Up to 18 hours typical us...

Страница 102: ...P 76CSx and enables the unit to drive up to three NMEA devices The following are the sentences for NMEA 0183 version 3 01 output Approved sentences GPGGA GPGLL GPGSA GPGSV GPRMB GPRMC GPRTE GPVTG GPWP...

Страница 103: ...provides the parts and map data to use the GPSMAP 76CSx in an automobile Cigarette LighterAdapter provides auxiliary power from an automobile cigarette lighter GA 25MCX Remote GPS Antenna allows enhan...

Страница 104: ...ft the Serial Port protective cover from the back of the GPSMAP76CSx and insert the round indexed connector on the cable into the matching port 2 Connect the remaining cable end to your PC Serial port...

Страница 105: ...ting and comparing the GPS coordinates to a map chart or other reference set the map datum in the GPS unit to the same datum as the map to insure the most accurate navigation What is a Location Format...

Страница 106: ...When nished highlight Save and press ENTER If the active GRI Chain secondary stations or offsets have been changed since the waypoint was created the waypoint will now reference the active GRI chain a...

Страница 107: ...es to the MOPS Minimum Operational Performance Standard for global Satellite Based Augmentation Systems SBAS Eventually there will be several services of worldwide geostationary communication satellit...

Страница 108: ...r destination point Depth The depth of water from sonar NMEA input Descent Average The average vertical distance of descent Descent Maximum The maximum descent rate in feet meters per minute Descent T...

Страница 109: ...that indicates the direction to travel to the next point on a route Speed Your current vehicle speed can be measured in miles per hour kilometers per hour or knots Speed Maximum The maximum speed you...

Страница 110: ...ing since the Trip Computer was reset Turn The direction of and distance to the next turn on an active route Velocity Made Good The rate of closure on a destination based upon your current speed and c...

Страница 111: ...in accordance with the instructions However there is no guarantee that interference will not occur in a particular installation If this equipment does cause harmful interference to radio or television...

Страница 112: ...U SPECIFIC LEGAL RIGHTS WHICH MAY VARY FROM STATE TO STATE IN NO EVENT SHALL GARMIN BE LIABLE FOR ANY INCIDENTAL SPECIAL INDIRECT OR CONSEQUENTIAL DAMAGES WHETHER RESULTING FROM THE USE MISUSE OR INAB...

Страница 113: ...hrough an online auction International Purchases A separate warranty is provided by international distributors for units purchased outside the United States This warranty is provided by the local in c...

Страница 114: ...ing routes 33 editing waypoints 12 elevation 37 74 Enter Mark key 3 entering data 7 F FCC 101 eld 6 elds data 54 Find MOB key 3 nd menu 16 address 23 city 21 nd by name 17 geocache 21 intersection 24...

Страница 115: ...sition 34 P Page key 3 page sequence 69 plot over time 56 points track 43 view 58 point of interest 24 pojecting waypoints 14 position format 73 Power key 3 pressure 74 pressure plots view 56 preview...

Страница 116: ...64 saving 27 43 viewing 28 wrap when full 27 64 track up 37 40 42 trip computer 61 62 turning on off 4 U unit setup 73 W WAAS 66 97 warning i vii warranty 102 water immersion vi waypoints 10 11 avera...

Страница 117: ......
Страница 118: ...armin com Copyright 2005 Garmin Ltd or its subsidiaries Garmin International Inc 1200 East 151st Street Olathe Kansas 66062 U S A Garmin Europe Ltd Unit 5 The Quadrangle Abbey Park Industrial Estate R...

Отзывы: