background image

104 

Rino

®

 130 Owner’s Manual

A

PPENDIX

 > 

T

RANSFERRING

 M

AP

S

OURCE

 D

ATA

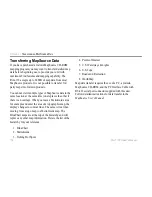
Transferring MapSource Data

If you have purchased a Garmin MapSource CD-ROM 

mapping program you may want to transfer detailed map 

data before beginning use, to provide your unit with 

maximum Find features and mapping capability. The 

Rino 130 accepts up to 24 MB of map data from most 

MapSource products. It is not possible to transfer 3rd 

party maps into Garmin products.
You cannot view multiple types of MapSource data in the 

same location at the same time (one replaces the other if 

there is an overlap). When you leave a MetroGuide area 

for example and enter the area of a topographic map, the 

display changes to contour lines. The same is true when 

moving from a topo map to a MetroGuide map. The 

BlueChart maps are at the top of the hierarchy and will 

replace any other map information. Here is the list of the 

hierarchy for your reference:

1.  BlueChart
2.  MetroGuide
3.  Fishing Hot Spots

4.  Points of Interest
5.  U.S. Waterways & Lights 
6.  U.S. Topo
7.  Roads and Recreation
8.  WorldMap

Map data transfer requires the use of a PC, a Garmin 

MapSource CD-ROM, and the PC Interface Cable with 

RS-232 serial port connector supplied with this unit. 

Follow detailed instructions for data transfer in the 

MapSource User’s Manual

.

Содержание GPSMAP 130

Страница 1: ...owner s manual 130 2 way radio personal navigator ...

Страница 2: ... change without notice Garmin reserves the right to change or improve its products and to make changes in the content without obligation to notify any person or organization of such changes or improvements Visit the Garmin Web site www garmin com for current updates and supplemental information concerning the use and operation of this and other Garmin products Garmin AutoLocate Personal Navigator ...

Страница 3: ...ge items its main intention is to describe each Main Page Option Menu and feature in detail This manual is organized into the following sections The Introduction section provides FCC safety warranty and product registration information as well as the Table of Contents The Getting Started section provides basic information about the Rino 130 The Unit Operation section provides information on each o...

Страница 4: ...7 Turn Radio GPS On Off 18 Informational Picture 18 GPS Status 18 Radio Transmission Status 18 Mark Waypoint s Indicators 19 Using the Rino 130 Radio Features 20 Peer to Peer Positioning 20 New Contact Page Overview 20 Sending a Location 23 Map Page 24 Map Page Options 26 Using the Pan Map Option 27 Programming the Data Fields 28 Setting up the Map 29 Measuring Distance 31 Navigation Page 32 Using...

Страница 5: ...rest 57 Finding an Address or Intersection 59 Finding a Last Found Place 61 Weather Radio 62 Sending a Note 63 Using a Goto 64 Routes Page 65 Creating and Using a Route 65 Editing a Route 66 Adding or Editing from the Route Map Page 69 Navigating a Route 70 Stopping Navigation 71 Data Fields for the Route Page 71 Tracks Page 72 Using the TracBack Feature 73 Setting up the Track Log 74 Proximity Pa...

Страница 6: ... FRS Limitations 100 GMRS 100 Specifications 101 Physical 101 Performance 101 Radio 102 Power 102 Accessories 103 Transferring MapSource Data 104 GPS Troubleshooting Guide 106 Radio Troubleshooting Guide 107 FRS Frequency Chart 108 Weather Radio Frequency Chart 108 GMRS Frequency Chart 109 Data Field Definitions 110 Interface Information 112 FCC Compliance Information 113 FCC Licensing Information 1...

Страница 7: ...y access all of the unit s functions The Rino 130 has a 160 X 160 pixel 4 level gray monochrome display for easy viewing The unit contains built in cartography of a North American basemap that includes Interstate and State Highways and Exit Information Using MapSource Garmin s map data software not included the Rino 130 could display up to 24 MB of a variety of different map information We current...

Страница 8: ...to cycle through main pages Used to quit or escape menu items Volume V button Press to open volume control window Microphone Hold unit 3 4 inches away when talking Zoom Map Z button From the Map Page press to open Zoom control window From any other page press to display Map Page and press again to open Zoom control Speaker Thumb Stick Press In to enter highlighted options and to confirm messages Mo...

Страница 9: ... RINO 130 Back of the Rino 130 2 way FRS GMRS Antenna Headset Connector with Weather cap External Power And Data Connector with Weather cap GPS Antenna Battery Compartment Cover Belt Clip Connector Mount Battery Compartment D Ring Mount Alignment Notches ...

Страница 10: ...isplay screens Simply press and release the Page button to cycle through the Radio Page Map Page Navigation Page Altimeter Page Trip Computer and Main Menu Page You can also access the Main Pages by pressing the on screen Main Page button Customize the Main Page sequence through the Main Menu see page 45 Main Menu Radio Page Map Page Trip Computer Navigation Page Altimeter Page ...

Страница 11: ...Thumb Stick Press In to enter highlighted options and to confirm messages Move Up Down Right or Left to move through lists highlight fields on screen buttons icons enter data or move the map panning arrow Press In and hold to display Shortcuts Menu To use the page Option Menu 1 Highlight the Option Menu on screen button at the top of the display screen and then press the Thumb Stick In to open the m...

Страница 12: ...Bar The current settings and operational icons on the Status Bar are displayed as you operate the unit The available icons are Battery Full Each bar represents 1 4 charge Battery 1 2 charge Battery Empty Using External Power Receiving Radio signal Transmitting Radio signal Backlight On Radio On Peer To Peer On Location Ready to Send Keylock On Alarm Clock On GPS On Position Ready GPS On Position N...

Страница 13: ...s The Weather Alert feature further enhances the Weather Radio by automatically notifying you of any weather alerts even when the Weather Radio is not is use and the FRS GMRS radio is in use These features are helpful while outdoors or planning a road trip Also use this page to control and setup the radio view current settings and see informational graphics of the unit s operation Radio Page Initi...

Страница 14: ...ou communicate with them You may enter a name using a combination of up to 10 letters numbers or spaces The Symbol field allows you to choose a face icon from a list to further personalize your ID My ID Field Symbol To enter a name 1 Using the Thumb Stick highlight the My ID field Press the Thumb Stick In to activate the field and display the keyboard 2 Move the Thumb Stick Up Down Left or Right to h...

Страница 15: ...s 2 Move the Thumb Stick Up or Down to scroll through the selections Because not all the selections can fit in the window a slider bar on the right side indicates your current position in the list Changing the user symbol TIP Hold the Thumb Stick Up or Down to scroll through the list more quickly Once you reach the end of the list you can wrap back to the top or bottom by releasing the Thumb Stick ...

Страница 16: ...os use standard FRS GMRS frequencies A chart of Rino frequencies may be found in the Appendix Squelch codes allow you to hear calls from only specific persons Thirty eight 38 Squelch Codes called Continuous Tone Coded Squelch System or CTCSS allow your Rino 130 to ignore unwanted calls from other persons using the same channel Simply select the same squelch code number as selected by the other pers...

Страница 17: ...change the channel back to 5 the squelch code changes back to its previous setting of 21 See the Appendix for more information on FRS GMRS and its operational aspects Choose from 38 squelch codes Setting the unit to zero will allow you to hear all transmissions on that channel but you must be on the same squelch code to radio back To change the Channel and or Squelch Code 1 Using the Thumb Stick h...

Страница 18: ...o Scan Current Codes or Scan All Codes Choosing Scan Current Codes scans only the Channel and Squelch Code combination in memory The Monitor option lets you listen to a single channel for any activity including static and weak voice signals The Rino series automatically squelches a frequency to filter out unwanted noise Using the Monitor option temporarily turns off the automatic squelch allowing y...

Страница 19: ...of the name Only channels that are checked will be scanned 3 To select all channels or clear all channels highlight either the Select All or Clear All buttons and press the Thumb Stick In 4 To Scan Current Codes highlight the Option Menu and press the Thumb Stick In Choose the desired setting and press the Thumb Stick In Scanlist Page The Radio Page Option Menu provides the following Setup Radio S...

Страница 20: ...e Allow Polling Enables disables your Rino 130 s ability to respond to a poll from another Rino VOX Level Controls the sensitivity level of any Voice Operated Transmission VOX accessory VOX accessories allow you to use the unit hands free A lower VOX setting is recommended for quiet environments while a higher VOX setting should be used in noisy environments Setting the VOX level to 5 is recommend...

Страница 21: ...eater Channel U S versions only Use this option to turn On Off GMRS repeater channels 15R 22R This option is only available when GMRS is enabled GMRS repeater channels are not available in Rino units sold in Canada Headset Type Allows you to choose which accessory headset or microphone you are using with the unit or have the unit automatically detect the type If you use more than one type of heads...

Страница 22: ... choose one of ten tones or set the tone to Off The Ring tone will not sound again until there has been 45 seconds of radio inactivity Vibrate Choose from On or Off to have the unit vibrate when an incoming transmission is received Once received the unit will not vibrate again until there has been 45 seconds of radio inactivity On Off Tone Enable or disable the tone the unit makes when it is turne...

Страница 23: ...gnals is shown in the informational picture on the Radio Page as shown to the right The FRS GMRS radio cannot be used when the Weather Radio is on Also you cannot scan or monitor FRS GMRS channels when the Weather Radio is in use The audio is unmuted when the Weather Radio is on so that you can listen to weather broadcasts Change the Weather Radio channel in the same manner as changing the FRS GMR...

Страница 24: ... highlighted Informational Picture The Informational Picture on the bottom half of the Radio Page features Garmin s Mr Mark Waypoint showing current GPS and radio status and radio actions As you operate the unit the graphics change depending on what actions you are taking and the unit settings GPS Status Four satellites are shown on at the top of the picture along with descriptive text to indicate...

Страница 25: ... and Weather Radio On FRS GMRS Radio Off GPS and FRS GMRS Radio On Ready to transmit Position Transmitting on FRS GPS and FRS GMRS Radio On Position not ready Transmitting on GMRS GPS and FRS GMRS Radio On Ready to transmit Position Receiving transmission GPS and FRS GMRS Radio On Ready to transmit Position Activity on channel GPS and FRS GMRS Radio On Position transmitted GPS and FRS GMRS Radio O...

Страница 26: ...s location This information is available to all other Rino users that are monitoring the same channel and squelch code This feature allows you to track the movement of other Rino users and even navigate to their location Locations may only be sent once every 30 seconds due to FCC restrictions Your Rino 130 can respond to polling requests from other units more frequently To transmit your location t...

Страница 27: ...layed in the Contact Bar on the Map Page see the Map Page section Contacts behave like waypoints and count towards the 500 maximum waypoint total If the contact did not have a GPS location on the last transmission a mark appears below the flag To view the contact details such as Direction Elevation Timestamp Location and Notes that have up to 30 characters highlight the details field and press Left ...

Страница 28: ...ess the Thumb Stick In 2 Highlight Contacts and press the Thumb Stick In 3 From the Contacts List select the desired contact and press the Thumb Stick In To change contact details 1 The Elevation Position and Note fields may be manually edited Select the desired field and press the Thumb Stick In 2 For Notes highlight Edit and press In to start entering data up to 30 characters For other fields highl...

Страница 29: ... etc To send a location highlight the Option Menu from the Waypoint Review Page and press In To send a location 1 Press the Thumb Stick In and hold it until the Shortcuts Menu is displayed 2 Highlight Find N Go and press the Thumb Stick In 3 Highlight the desired category and press the Thumb Stick In For the Contacts List select the desired contact and press the Thumb Stick In 4 Depending on which...

Страница 30: ...age you can choose to show either the Contact Bar Data Fields or only the Map As you highlight the contacts on the Contact Bar the Map page centers the map on that contact and displays its name direction and distance In many instances the map displays an Accuracy Circle surrounding the Position Icon The Rino 130 uses both map resolution and GPS accuracy in defining your location to a point within t...

Страница 31: ...nit allow you to zoom in and out on the map Press the Z Zoom button from any page other than the Map Page to open the Map Page To change scales on the Map Page 1 Press the Z Zoom button to open the Zoom window 2 Use the Thumb Stick and Z Zoom button to change the map scale in order to show more map area with less detail or less map area with more detail Press and hold Up or Down on the Thumb Stick...

Страница 32: ...n progress When you are not navigating to a destination the Stop Navigation option is grayed out and is non functional Show Allows you to choose to show either the Contact Bar four programmable Data Fields or show the Map Only Choosing either Contact Bar or Data Fields reduces the map area Setup Map Displays the Setup Map Pages which allow you to tailor the map to your requirements such as changin...

Страница 33: ...s nearly everything that is displayed Press the Thumb Stick In to mark the arrow location or display the map item information page The Option Menu allows you to send the location of that item project a waypoint from it save it as a waypoint set a proximity circle around it add it to a route or view the Sun Moon phase or view Hunt Fish information from it On screen buttons at the bottom of the page...

Страница 34: ... then press the Thumb Stick In to change the data field type Changing Data Fields Data Field Options Thee data field options apply to the Map Page data fields and the Trip Computer data fields For definitions of these all data fields used in the Rino 130 refer to the Appendix Bearing Course Current Destination Current Distance Current ETA Current ETE Elevation Final Destination Final Distance Final ETA ...

Страница 35: ...m the Option Menu and then press the Thumb Stick In to display the Map Setup Page 2 Press Up or Down on the Thumb Stick to highlight the desired sub page button which displays the options list for that sub page to the left 3 Press Left then Up or Down on the Thumb Stick to highlight an item on the list Press Right to return to the sub page buttons 5 Use the Thumb Stick to highlight the desired opt...

Страница 36: ...tting Lock on Road On or Off available only if MapSource Data is loaded when On the triangle icon locks to the road that you are traveling Display Mode Land or Water Tracks Setup Saved Tracks and Track Log Scale options Off Auto or 20 ft 500 miles sets the maximum scale at which the feature should appear on the screen Some types of data display only at certain zoom scales Goto Line Bearing or Cour...

Страница 37: ...e To use the Measure Distance option 1 Select Measure Distance from the Option Menu and then press the Thumb Stick In to display the Panning Arrow Ref displays under the arrow 2 Use the Thumb Stick to move about on the Map Page until you reach the point to which you want to measure A new Map Pointer field displays showing the location of the pointer and the direction and distance from where you beg...

Страница 38: ...y be found in the Appendix The Compass Ring functions as a magnetic compass when you are stationary When you are moving the heading is controlled by the GPS receiver based upon settings customized in the Heading Setup Page Times to Destination Straight Line Distance to Destination Selectable Data Fields Bearing Pointer Compass Ring Destination Name Waypoint NOTE The Compass should be calibrated fo...

Страница 39: ... away from the original line of travel to your destination the Course Deviation Indicator CDI provides graphic indication of drift right or left and displays the distance off course When you are not on an active Goto Track or Route in other words not traveling to a recorded destination the window at the top of the page is blank when Destination is selected The Compass Ring displays your heading wh...

Страница 40: ... needed to be back on course Show Data Fields Big Compass Toggles to display data fields on the right side of the display or removing the data fields and showing a larger compass Calibrate Compass Calibrates the electronic compass Follow the on screen instructions Restore Defaults Returns options and data field choices to factory designations Navigation Page Option Menu To change data fields 1 Use the...

Страница 41: ...rection 4 To navigate to your destination select Set Course and press the Thumb Stick Begin traveling to your destination using the pointer as a guide To view your destination as a waypoint select Project Waypoint and press the Thumb Stick To re sight the destination press the Thumb Stick In when Re Sight is highlighted Rino 130 held level for Sight N Go Sighting Marks Calibrating the Compass The ...

Страница 42: ...or you to adjust your turning speed as needed The Calibration Successful message displays when finished If a Calibration Failed message displays repeat the process When you manually turn the Compass Off it stays off until you manually turn it On again Sometimes however when you turn the Compass On the Rino 130 overrides the Compass and uses the GPS receiver to track your heading The criteria for sw...

Страница 43: ...allow you to display a variety of current and recorded pressure and elevation related data NOTE The Altimeter should be calibrated for the greatest accuracy Refer to page 41 for information on calibrating the Altimeter Status Window is located at the top of the page and displays the current elevation and your current rate of ascent or descent when moving It can also display the ambient pressure Pr...

Страница 44: ...ption Menu and vice versa View Pressure Elevation Plot Displays a record of changes in barometric pressure or elevation for a set period of time Zoom Ranges Sets the zoom range for elevation distance or time View Points Shows the elevation time of day and date a specific point was created Reset Clears recorded data from the page to begin recording new data Calibrate Altimeter Increases the accuracy...

Страница 45: ... and distance measurement as desired using the Elevation Plot Zoom Ranges feature explained below 3 To clear the plot and start a new one you must clear the Track Log Adjusting the Zoom Ranges You can set the Zoom Ranges for elevation distance or time when you display the View Elevation Plot You may change the ranges for the vertical distance and the time Ranges for View Pressure Plot are fixed at ...

Страница 46: ...l the profile past the pointer in the center of the page As the profile moves past the pointer the status window at the top of page changes to display the date time and altitude for the point beneath the pointer Resetting Data You can reset the elevation data and the maximum elevation data by selecting the Reset option from the Altimeter Page Option Menu To reset the elevation data and max elevation...

Страница 47: ...The Correct Elevation highlight the on screen Yes button and press the Thumb Stick In to enter your elevation When finished highlight OK and press it In to return to the Altimeter Page Or At the message asking Do You Know The Correct Pressure highlight the on screen Yes button and press the Thumb Stick In to enter your elevation When finished highlight OK and press it In to return to the Altimeter P...

Страница 48: ...pendix When the data field title is selected press the Thumb Stick In to select a new data field choice By selecting the information options that you prefer and arranging them in a desired order on the page you can customize the Trip Computer Page to meet your navigation needs Trip Computer Page Options The Option Menu allows you to reset the Trip Computer data when you are ready to start a new trip...

Страница 49: ... description of the items accessed through the Main Menu Mark Waypoint Page Allows you to mark and store a waypoint for your current location or a map pointer location Find N Go Menu Allows you to locate and Goto Waypoints Favorite Locations Cities Interstate Exits Points of Interest Addresses and Intersections Some require MapSource data Routes Page Allows you to create and store routes for repea...

Страница 50: ...lator feature available in two forms Standard or Scientific Stopwatch Page Allows you to use the unit as a stopwatch including a lap timer Sun Moon Page Shows a graphic display of both the Sun Moon locations at various times dates and locations Hunt Fish Page Provides you with a listing of best times for hunting and fishing for a chosen location Area Calculation Page Use this function to calculate a...

Страница 51: ...r remove a Main Page 1 From the Main Menu highlight the Option Menu on screen button and press the Thumb Stick In Highlight Page Sequence Setup and press In 2 To move a page in the page sequence highlight the page and press In Select Move then move the Menu item Up or Down using the Thumb Stick When the desired position is displayed and press the Thumb Stick In 3 To insert a new page highlight the...

Страница 52: ...lows you to customize the waypoint information as well as Goto or show on the Map Find N Go Opens the Find N Go Page From the Find N Go page you can find waypoints contacts cities and exits You may also find Points of Interest addresses and intersections if a MapSource product is loaded into the Rino 130 Weather Radio Toggles between the Weather Radio and the FRS GMRS Radio Send Note Sends a note to...

Страница 53: ...t location and open the Mark Waypoint Page 1 Press and hold the Thumb Stick In until the Shortcuts Menu opens 2 Highlight Mark Waypoint and press the Thumb Stick In The Mark Waypoint Page opens You can also access this page by highlighting Mark on the Main Menu Page and pressing the Thumb Stick In 3 To save the waypoint highlight OK and press the Thumb Stick In If you do not want to save it as a n...

Страница 54: ...e a waypoint using the panning arrow 1 With the Pan Map feature active move the panning arrow map pointer on the map to the location you want to mark then press the Thumb Stick 2 The Mark Waypoint Page displays automatically assigning a number to the waypoint To create a waypoint by manually entering its coordinates lat lon 1 Press In and hold the Thumb Stick to access the Shortcuts Menu Highlight...

Страница 55: ...rd Enter the new bearing or distance then highlight OK and press In to finish Project Waypoint Page Editing a Waypoint A waypoint or contact can be edited to add notes or change the map symbol name coordinates or elevation You can also delete a waypoint or contact To edit a waypoint 1 Use the Find N Go Menu to display the waypoint contact or highlight it on the Map Page and press the Thumb Stick In...

Страница 56: ...the panning arrow press In and release the Thumb Stick The word Move displays beneath the panning arrow 4 Use the panning arrow to drag the waypoint to the new location and then press the Thumb Stick In to place it Press the Page button before pressing the Thumb Stick to cancel moving the waypoint and return to the Main Pages To save Map or Find N Go items as waypoints 1 Access the Information Pag...

Страница 57: ...urce To access the Find N Go Menu 1 Press and hold the Thumb Stick In to access the Shortcuts Menu 2 Highlight Find N Go and press In Or 1 Press the Page button or the on screen Main Page Menu button to display the Main Menu 2 Highlight the Find N Go icon and press the Thumb Stick In Find N Go Menu Categories are listed in two different ways By Name and Nearest The By Name list contains every item...

Страница 58: ...d N Go Menu To find a waypoint by nearest 1 Use the Thumb Stick to select Waypoint from the Find N Go Menu Press the Thumb Stick In to select Nearest from the pop up menu Press the Thumb Stick In to display the Waypoints List 2 Use the Thumb Stick to select the desired waypoint from the list and then press the Thumb Stick In to display the Information Page for that waypoint 3 With the Information P...

Страница 59: ...waypoint list opens with the name closest to the name you entered on the top 4 Select the desired waypoint from the list and then press the Thumb Stick In to display the Information Page for that waypoint 5 With the Information Page displayed select Goto to create a direct line of travel to the waypoint Select Map to view the waypoint location on the map or select Delete to delete the waypoint 6 P...

Страница 60: ...played select Goto to create a direct line of travel to the contact Select Map to view the contact s location on the map or select Delete to delete the contact If the contact did not have a GPS location on the last transmission a question mark appears below the flag To view the contact details highlight the details field and press Left or Right on the Thumb Stick to change to the next data field Cont...

Страница 61: ...me displays the keyboard as an alternative scrolling through the list of nearest cities If you are currently panning the map the option Near Map Pointer appears in place of the Nearest option 2 If using find By Name begin spelling the name of the city by using the keyboard When you have entered enough characters to define the name a match list displays If you are using find By Nearest or Near Map Poi...

Страница 62: ...its Two fields at the bottom of the page indicate distance and bearing to the exit Scroll through the list to highlight the desired exit 4 Press the Thumb Stick In to display the Information Page for that exit This page contains the exit description with a list of available services near that exit along with the distance and bearing fields 5 Use the Thumb Stick to move to the list of services and hi...

Страница 63: ...ries Food Drink Services Lodging Transportation Attractions Emergency Govt Entertainment Manmade Places Shopping In many instances these categories are subdivided into types such as in the instance of Food Drink When you select Food Drink from the list of categories you are then presented with a list of types that includes All Types and cuisine options such as American Asian Barbecue Chinese and m...

Страница 64: ...ame or Nearest options Selecting By Name displays a keyboard allowing you to enter the characters of the name you want A list of matches displays when enough characters are entered 5 Use the Thumb Stick to highlight your selection from the list and then press it In to display the Information Page for that item Nearest Food Drink 6 Use the on screen buttons to Goto or view on the Map or use the pag...

Страница 65: ...yboard for entering numbers Entering an Address 3 Move to the Street field using the Thumb Stick 4 Press the Thumb Stick In to display the Select Street Name list Find the street by using the keyboard to enter characters until a list appears 5 With the desired street highlighted press the Thumb Stick In to place the street name on the Find Address page Repeat this process for city and postal codes ...

Страница 66: ...a entry method discussed in the Quick Start Guide Once you have spelled enough of the street name a list of matches displays often with several streets on the list Press the Thumb Stick In to move the highlight to the street list and then scroll up or down until you find the street name you want Press it In to place the name in the field Finding an Intersection 4 Highlight the best match and then pr...

Страница 67: ...which will display the options list for that sub page Points of Interest Cities Waypoints Contacts or Intersections to the left 3 Press Left then Up or Down on the Thumb Stick to highlight an item on the list and press the Thumb Stick In to display the Information Page for that item Press Right to return to the sub page buttons 4 With the Information Page displayed you can select Goto to create a ...

Страница 68: ...dio You can select Enable Weather Radio after the Weather Radio is on 4 To turn the Weather Radio off press the Thumb Stick In when Use FRS GMRS Radio is highlighted This will switch the Rino 130 back over to the FRS GMRS radio Radio Page with Weather Radio on NOTE You can also turn on and off the Weather Radio through the Shorcuts Menu Press and hold the Thumb Stick In to open the Shortcuts Menu ...

Страница 69: ...e appears in the Edit Note field Press the Thumb Stick In to edit the Saved Note Refer to the Quick Start Guide for information on entering data using the on screen keyboard When you are done editing the note push the Thumb Stick In when OK is highlighted on the keyboard 5 Select Send to send the note to all users Select Save to save the note Select Clear to delete the note To send a new note 1 Pre...

Страница 70: ...ould travel The time required to reach your destination displays when you begin to travel and establish a predictable rate of movement The Data Fields to the right of the page display information relative to your travel 4 Use the Page button or Main Page Menu to access the Map Page and observe your movements and a dark line indicating the direct path from your current location to your destination ...

Страница 71: ...as a New button a list of routes and the number of unused routes 2 Use the Thumb Stick to highlight the New button and press it In to display the Route Setup Page Routes List Page 3 With an empty row dashed in the route list highlighted press the Thumb Stick In to display the Find N Go Menu 4 Select a route waypoint from one of the Find N Go Menu categories and display the Information Page for the...

Страница 72: ...sage displays Editing a Route To remove all waypoints 1 From the Route Page select the on screen Option Menu button and press the Thumb Stick In to access the Option Menu 2 Highlight the Remove All option and then press the Thumb Stick In to remove all waypoints from the list When you see the prompt Do you really want to remove all waypoints from the route select Yes Route Options To reverse the r...

Страница 73: ...elete route select Yes To restore default settings for the route 1 From the Route Page select the on screen page Option Menu button and press the Thumb Stick In to access the Option Menu 2 Select Restore Defaults and then press the Thumb Stick In to restore factory settings To review a route point 1 Select the point from the Route Points List and press the Thumb Stick In to access the Option Menu ...

Страница 74: ...e a route point 1 Select the waypoint that you want to change from the Route Waypoints List and press the Thumb Stick In 2 Highlight Change and press the Thumb Stick In to display the Find N Go Menu or create a new waypoint and add it to the points list 3 Select a new waypoint access its Information Page and press the on screen Use button to replace the old route waypoint To move a route point 1 S...

Страница 75: ...of a route 4 Move the panning arrow to a map item or location where you would like to extend the route and press the Thumb Stick In to display the Information Page for the new point 5 Press the on screen Use button to return to the map page and then press the Thumb Stick In again to place the new waypoint To add a route point within a route 1 Follow steps 1 and 2 in the previous instructions 2 Use...

Страница 76: ... to view the next waypoint Navigating a Route A Route can be navigated using the Map Page or the Navigation Page The Map Page displays your movement the route line and waypoints on the route The Navigation Page shows compass direction and a bearing pointer To navigate a route 1 Select a route from the Routes List and then press the Thumb Stick In 2 Highlight the on screen Navigate button at the bo...

Страница 77: ...on the Route Page may be customized to provide useful navigation information To select data field options 1 Use the Thumb Stick to highlight a data field on the Route Page and then press In to display the data field options 2 Use the Thumb Stick to highlight the desired option and press In to select that option for the selected data field Changing the Route Data Fields Data field Options for Route Page...

Страница 78: ...icon and press the Thumb Stick In The Tracks page opens Tracks Page To save and use a Track 1 Access the Tracks page from the Main Menu Press the on screen Off button In to pause track logging When track logging is active the On button appears to be recessed 2 Highlight the Save on screen button and then press the Thumb Stick In to display the track log Save Back Through list 3 Use the Thumb Stick...

Страница 79: ...in track log or use the TracBack feature it is recommended that you clear the Track Log before you start traveling The percentage of memory used by the current track log is displayed in a window at the top of the page After the Track Log is Cleared it displays zero percent When the display reaches 100 the most recent track points start to overwrite the least recent if the default setting Wrap When...

Страница 80: ...ime or Automatic You can set the Track display resolution to High Medium Low and Lowest You can also use the Option Menu to delete all saved tracks To use Track Log Setup options 1 Highlight the Tracks Page Option Menu button at the top of the page and press the Thumb Stick In to display the menu 2 Highlight the Tracks Log Setup option and then press the Thumb Stick In You can check the Wrap When ...

Страница 81: ...nu 2 In the Main Menu scroll down and select Proximity To add a proximity point 1 Use the Thumb Stick to highlight an empty space on the Proximity list and press the Thumb Stick In to display the Find N Go screen Highlight an item from the list and press the Thumb Stick In to open the item 2 From the Review Page select Use Press In again to begin entry of the proximity radius Use the Thumb Stick t...

Страница 82: ...phic The Sky View graphic represents a view looking up at the sky from your current location showing satellites and their assigned numbers The outer ring represents the horizon around you The inner ring represents a view above you at a 45 angle from vertical The center represents directly overhead Signal Strength Bars for each satellite are shown to the left of the Sky View Satellites and their si...

Страница 83: ... numbers 32 or below a D displays in the signal bar beneath the skyview It is helpful to orient the unit antenna toward the WAAS satellite shown in the skyview To learn more about the WAAS System refer to the Federal Aviation Administration Web site http gps faa gov Because the Rino 130 relies on satellite signals to provide you with navigational guidance the unit s view of the sky determines how ...

Страница 84: ...is option when you are indoors your view of the sky is obstructed or you want to save battery power You can enter data create routes etc but cannot navigate in this mode Track Up North Up You can orient the satellite skyview by selecting Track Up your direction of travel or North Up the satellite skyview oriented to the north New Location If you are more than 600 miles from where you last used the...

Страница 85: ...ton at the top of the page and then press it In to display the Option Menu 2 Highlight either the Track Up or North Up option depending on which is currently in use and press the Thumb Stick In to activate To enter a new location 1 Use the Thumb Stick to highlight the Option Menu button at the top of the page and then press it In 2 Highlight New Location and press the Thumb Stick In to display cho...

Страница 86: ...enu 1 Press the Page button or the Menu icon to open the Main Menu 2 In the Main Menu scroll down and select Setup There are then several more icons to choose from in the Setup Menu Time Setup Page You can set the time to match your location or for a projected location anywhere in the world To access the Time Setup page 1 Press the Page button or the Menu icon to open the Main Menu 2 In the Main M...

Страница 87: ...e 4 Use the Thumb Stick to highlight the Time Zone field Press the Thumb Stick In to display the time zone list 5 Highlight a time zone from the list and then press the Thumb Stick In 6 If you choose Other you must enter a UTC offset value 7 The correct time displays at the bottom of the page Units Setup Page The Units features are best used by individuals with a working knowledge of map grids and ...

Страница 88: ...ts using LORAN TD coordinates you must set the correct LORAN chain number and secondary stations in the Setup TD field before storing the waypoint After the waypoint is stored in unit memory it always references the LORAN chain number and secondary stations currently selected in the Setup TD field If you enter a different LORAN chain number change the secondary stations or offsets in the Setup TD fie...

Страница 89: ... map selecting the one that provides the best positioning at a known point If necessary you also may choose the User datum for custom designed grids NOTE The User datum is based on a WGS 84 Lo cal datum and is an advanced feature for unlisted or custom datums To learn more check your local library or the Internet for educational materials on datums and coordinate systems Distance Speed Choose from...

Страница 90: ...cklight Timeout field and then press the Thumb Stick In 2 Highlight the desired option and then press the Thumb Stick In To adjust the contrast 1 Highlight the contrast slider and then press the Thumb Stick In 2 Move the Thumb Stick up or down to move the slider to set the contrast Heading Setup Page You can select the type of heading displays the types of North References or enter the magnetic var...

Страница 91: ... entered above for the time entered here the Rino 130 switches from GPS to the compass To select either option 1 Highlight the field and then press the Thumb Stick In to display the options 2 Highlight the option and press the Thumb Stick In to activate Interface Setup Page The Interface Settings Page allows you to choose from different input output serial data formats This feature is used when con...

Страница 92: ...ities RTCM In NMEA Out Allows DGPS input using a standard RTCM SC 104 format and supports the output of standard NMEA 0183 version 3 0 data RTCM In Text Out Allows DGPS input using a standard RTCM SC 104 format and simple ASCII text output of location and velocity information None Provides no interfacing capabilities If Garmin DGPS or RTCM In NMEA Out format is selected additional fields are provid...

Страница 93: ...o open the System Setup page The Option Menu allows you restore defaults or display the current version of unit operating software and the Unit I D Number Software updates and instructions for downloading are available from the Garmin Web site www garmin com Choose one of the four GPS options other than Normal to significantly save battery power The Battery Saver mode reduces the rate of satellite ...

Страница 94: ...s the Page button or the Menu icon to open the Main Menu 2 In the Main Menu scroll down and select Calendar To change the month and year Highlight the left or right arrows on either side of the date and press the Thumb Stick In The left arrow shows past months years and the right arrow shows future months years To use the current month and year Choose Set To Current Date from the Option Menu To cr...

Страница 95: ...he keyboard as shown in the image to the right Press OK when you are finished editing the note Editing a note To delete notes by week 1 Choose Delete Notes from the Option Menu 2 From the Older Than window choose the desired option and press the Thumb Stick In To view information for a date 1 In the calendar select the desired date using the Thumb Stick 2 Review the note in the note window below th...

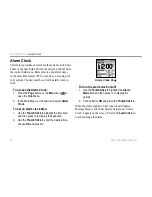
Страница 96: ...the Main Menu 2 In the Main Menu scroll down and select Alarm Clock To set an alarm clock time 1 Use the Thumb Stick to highlight the time field and then press In to display the keyboard 2 Use the Thumb Stick to enter the desired time choose OK and press In Alarm Clock Page To turn the alarm clock on off 1 Use the Thumb Stick to highlight the Alarm Mode field and then press In to display the options...

Страница 97: ...eared either manually or when you turn off the Rino 130 To access the Calculator 1 Press the Page button or the Menu icon to open the Main Menu 2 In the Main Menu scroll down and select Calculator Calculator Page To change calculator options 1 Highlight the page Option Menu and press the Thumb Stick In to display the Scientific Standard and Radian Degrees options 2 Highlight the option you want to ...

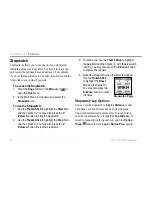
Страница 98: ...pwatch 2 Use the Thumb Stick to highlight the Stop field and then press In You may also press the V Volume button to stop the stopwatch 3 To mark a lap use the Thumb Stick to highlight the Lap field and then press In with the stopwatch running You may also press the Z Zoom button to capture the lap time 4 Reset the stopwatch when the timer is stopped Use the Thumb Stick to highlight the Reset field a...

Страница 99: ...ry of individual characters 2 To display the current date and time highlight the page Option Menu and press the Thumb Stick In to display Use Current Time and then press the Thumb Stick In To set the location 1 Highlight the Location field and then press the Thumb Stick to display the New Location options list 2 Highlight the option desired and then press In on the Thumb Stick to activate If you ch...

Страница 100: ...In To set the location 1 Highlight the Location field and then press In on the Thumb Stick to display the New Location options list 2 Highlight the option desired and then press In on the Thumb Stick to activate If you choose Current Location the field values displayed on the page reflect the times at your current location 3 If you choose Use Map a map page displays Use the map pointer to identify th...

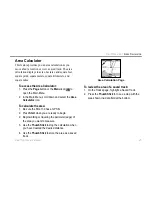
Страница 101: ...nu 2 In the Main Menu scroll down and select the Area Calculator icon To calculate the area 1 Be sure the Rino 130 has a GPS fix 2 Press Start when you are ready to begin 2 Begin walking or traveling the perimeter edge of the area you want to measure 3 Use the Thumb Stick to stop the calculation when you have traveled the desired distance 4 Use the Thumb Stick to store the area as a saved track Are...

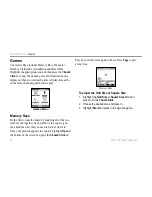
Страница 102: ...ry Race Be the first to clear the board by matching all of the two symbols sets together Each symbol is in a square you can adjust the size that you need to walk or travel to Once your position appears in a square highlight Open at the bottom of the screen and press the Thumb Stick In Play by yourself or race against others Press Page to quit at any time Memory Race To adjust the Grid Size or Squar...

Страница 103: ...message that you have been hit You must wait 30 seconds between shots to reload Either have a timed game with the winner being the one with the least amount of hits on their radio or play until someone gets a specified number of hits that person loses Waypoint Bomber HINT Mark stationary objects such as trees and poles and drop a bomb when an opposing player is near that object Adjust the rules to ...

Страница 104: ...me You can set a time limit so the largest team wins or play until the other team is completely assimilated Set your own rules and enjoy Beast Hunt The objective is to find and kill the beast with an arrow before it incinerates you or you fall into one of several pits while navigating a maze of platforms You can be transported by slides that curve or move diagonally When you think you know where th...

Страница 105: ...s intended for use throughout the United States its territories and possessions It may also be used in Canada FRS is not approved outside of these areas and may interfere with local government communication frequencies fire police etc FRS Features More sophisticated FRS radios also include call functions squelch codes channel scan features and voice scramble capabilities Call functions allow you to...

Страница 106: ...e UHF FRS frequencies are line of sight meaning that the signals do not follow the surface of the earth but instead radiate in a straight line from the transmitting antenna If there is an obstruction between the transmitting FRS radio and the receiving FRS radio the signal will not be received Smaller obstructions such as trees cars and even crowds of people cause some loss of signal resulting in ...

Страница 107: ...h contrast LCD Performance GPS Receiver WAAS Enabled Differential ready 12 parallel channel Acquisition time Approx 15 seconds warm start Approx 45 seconds EZinit cold start Approx 5 minutes First Time AutoLocate Update Rate 1 second continuous GPS Accuracy 15 meters 49 ft RMS 95 typical1 DGPS USGC Accuracy 3 5 meters 10 16 ft 95 typical with DGPS corrections2 DGPS WAAS Accuracy 3 meters 10 ft 95 ...

Страница 108: ... Garmin Differential Beacon Receiver Input such as Garmin GBR 23 3 The temperature rating for the Rino 130 may exceed the usable range of some batteries Alkaline batteries can rupture at high temperatures External power can only be applied using the Garmin Auto Power Adapter or PC Interface Cable with Auto Power Adapter These cables contain a 12 VDC to 4 5 VDC voltage regulator Modifications or oth...

Страница 109: ...rtable earpiece for better hearing ability of your Rino Headset with VOX Boom Mic Hands free at its best Utilize the Rino s VOX Voice Operated Transmission feature with this headset and voice activated boom mic Instructional Video For getting accustomed to your Rino basic operations quickly MapSource Map Data CD ROMs An excellent tool for creating waypoints and routes on your PC and downloading th...

Страница 110: ... the other if there is an overlap When you leave a MetroGuide area for example and enter the area of a topographic map the display changes to contour lines The same is true when moving from a topo map to a MetroGuide map The BlueChart maps are at the top of the hierarchy and will replace any other map information Here is the list of the hierarchy for your reference 1 BlueChart 2 MetroGuide 3 Fishi...

Страница 111: ...able to the PC serial port 3 Connect the remaining cable connector to the back of the Rino 130 by orienting the slot on the connector with indexing bar on the back of the unit Then slide the connector in place Be sure that the cable is pushed all the way into the back of the unit 4 Turn on the Rino 130 and follow instructions for map data transfer provided in the MapSource User s Manual See also t...

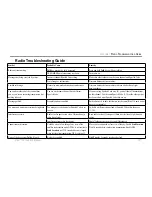
Страница 112: ...is set to something other than Normal and or interface setting is set for RTCM Set system GPS to Normal and interface to other than RTCM Or simply turn off WAAS Cannot obtain a differential position from WAAS You have not collected enough information from the WAAS satellite Wait 10 20 minutes for the initial collection then 1 2 minutes afterwards Cannot access Point of Interest Street or Intersect...

Страница 113: ...Code 1 38 as the other party or use Scan to find what Squelch Code they are on Message garbled Scramble option is enabled Both radios need to have this feature set the same Rino 110 units do not have voice scramble Too many unwanted conversations being heard Too many users on channel or Squelch Code is set to zero Switch to a different channel and or Squelch Code other than zero 1 38 Interference o...

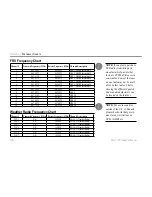
Страница 114: ...75 FRS 13 14 467 7125 467 7125 FRS 14 Weather Radio Frequency Chart Channel Transmit Frequency MHz Receive Frequency MHz Channel Description WX 1 N A 162 550 NOAA 1 Weather Radio WX 2 N A 162 400 NOAA 2 Weather Radio WX 3 N A 162 475 NOAA 3 Weather Radio WX 4 N A 162 425 NOAA 4 Weather Radio WX 5 N A 162 450 NOAA 5 Weather Radio WX 6 N A 162 500 NOAA 6 Weather Radio WX 7 N A 162 525 NOAA 7 Weather...

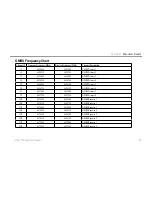
Страница 115: ...62 6250 GMRS Primary 4 19 462 6500 462 6500 GMRS Primary 5 20 462 6750 462 6750 GMRS Primary 6 21 462 7000 462 7000 GMRS Primary 7 22 462 7250 462 7250 GMRS Primary 8 15R 467 5500 462 5500 GMRS Repeater 1 16R 467 5750 462 5750 GMRS Repeater 2 17R 467 6000 462 6000 GMRS Repeater 3 18R 467 6250 462 6250 GMRS Repeater 4 19R 467 6500 462 6500 GMRS Repeater 5 20R 467 6750 462 6750 GMRS Repeater 6 21R 4...

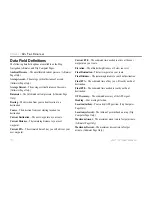
Страница 116: ...g distance to your next waypoint Current ETA The estimated time of day you will arrive at your next waypoint Current ETE The estimated time needed to arrive at the next waypoint on your route Elevation The altitude height above or below sea level Final Destination The last waypoint on your route Final Distance The remaining distance to your final destination Final ETA The estimated time of day you ...

Страница 117: ...h the sun rises on this day Sunset The time at which the sun sets on this day Time of Day The time for the selected time zone To Course The compass direction you must go in order to get back to the original course Trip Odometer A running tally of distance travelled since last reset Trip Time Moving A running tally of movement time elapsed since last reset Trip Time Stopped A running tally of stopp...

Страница 118: ...proved Sentences GPGGA GPGLL GPGSA GPGSV GPRMB GPRMC GPRTE GPVTG GPWPL GPBOD GARMIN Proprietary Sentences PGRME estimated error PGRMM datum string PGRMZ altitude PSLIB beacon receiver control DGPS Differential GPS corrections are accepted in RTCM SC 104 version 2 0 format through the Data IN line The Garmin GBR 21 and GBR 23 are the recommended beacon receivers for use with the Rino 130 Other beac...

Страница 119: ... guarantee that interference will not occur in a particular installation If this equipment does cause harmful interference to radio or television reception which can be determined by turning the equipment off and on the user is encouraged to try to correct the interference by one or more of the following measures Reorient or relocate the receiving antenna Increase the separation between the equipm...

Страница 120: ...an download the application forms from the FCC web site at http www fcc gov Forms You can also request them through the FCC forms hotline at 1 800 418 FORM 1 800 418 3676 You can file Form 605 online at http wireless fcc gov uls A filing fee which may change from time to time is associated with this application For information on fees see the FCC fee information web page at http wireless fcc gov fee...

Страница 121: ...OR OTHERWISE THIS WARRANTY GIVES YOU SPECIFIC LEGAL RIGHTS WHICH MAY VARY FROM STATE TO STATE IN NO EVENT SHALL GARMIN BE LIABLE FOR ANY INCIDENTAL SPECIAL INDIRECT OR CONSEQUENTIAL DAMAGES WHETHER RESULTING FROM THE USE MISUSE OR INABILITY TO USE THIS PRODUCT OR FROM DEFECTS IN THE PRODUCT Some states do not allow the exclusion of incidental or consequential damages so the above limitations may n...

Страница 122: ...components from any package purchased through an online auction International Purchases A separate warranty is provided by international distributors for units purchased outside the United States This warranty is provided by the local in country distributor and this distributor provides local service for your unit Distributor warranties are only valid in the area of intended distribution Units pur...

Страница 123: ...ble reverse engineer or reduce to human readable form the Software or any part thereof or create any derivative works based on the Software You agree not to export or re export the Software to any country in violation of the export control laws of the United States of America Product Registration Help us better support you by completing our online registration today Have the serial number of your ...

Страница 124: ...Ds visual sightings charts etc For safety always resolve any discrepancies before continuing navigation MAP DATA INFORMATION One of the goals of Garmin is to provide customers with the most complete and accurate cartography that is available to us at a reasonable cost We use a combination of governmental and private data sources which we identify as required in product literature and copyright mes...

Страница 125: ...e if it comes into contact with your skin a minor burn can result Electronic Devices Most modern electronic equipment is shielded from RF signals However certain equipment may not be shielded against the RF signals from your wireless radio Pacemakers The Health Industry Manufacturers Association recommends that a minimum separation of six inches 6 be maintained between a handheld wireless radio an...

Страница 126: ...ding an aircraft or check the airline rules Blasting Areas To avoid interfering with blasting operations turn your radio OFF when in a blasting area or in areas posted Turn off two way radio Obey all signs and instructions Potentially Explosive Atmospheres Turn your radio OFF and do not remove your battery when you are in any area with a potentially explosive atmosphere Obey all signs and instruct...

Страница 127: ...librate 35 Contact 20 54 Course Deviation Indica tor 33 Course Pointer 33 34 CTCSS 10 108 Current location 47 D Data Fields 28 34 40 41 71 Definitions 110 For Route Page 71 Data Transfer 105 Defaults 4 26 34 38 42 67 87 Delete Waypoint 50 Descent 37 110 DGPS 112 Display Mode 30 E Editing Routes 66 Waypoints 49 Electronic Compass 36 Elevation 37 38 39 Cchanges 39 Changes 37 Plot 39 Exit 56 F Family ...

Страница 128: ...Page 32 Options 34 Restore Defaults 34 Near Map Pointer 55 New Contact 20 New Location 78 79 NMEA 0183 112 North Heading 30 North Up 30 78 79 Note 63 88 O Operating the Rino 5 Options Menu 5 Orientation 30 P Page Sequence Setup 45 Pan Map 26 27 PC 104 112 PC Interface Cable 104 Peer to Peer 14 20 PIT 15 Points of Interest 57 58 104 Poll location 54 Pressure 39 Changes 37 Plot 38 39 View Plot 39 Pr...

Страница 129: ...p Navigation 26 34 Sun Moon 52 53 55 56 58 Symbol 8 9 T Text Setup 31 Thumb Stick 2 5 Time Page 80 Tones 16 90 Call 16 Ring 16 Roger 16 Setup 16 Topo map 104 TracBack 73 Track Log 72 Page 72 Points 30 Setup 30 Track Up 30 78 79 Transmit Location 20 23 Trip Computer Page 42 Two way Radio 1 99 114 U UHF 99 Units Page 81 Unlock Buttons 5 46 V Vibrate 16 Voice Operated Transmis sion 14 Voice Scramble ...

Страница 130: ......

Страница 131: ......

Страница 132: ...rmin com Copyright 2003 2005 Garmin Ltd or its subsidiaries Garmin International Inc 1200 East 151st Street Olathe Kansas 66062 U S A Garmin Europe Ltd Unit 5 The Quadrangle Abbey Park Industrial Estate Romsey SO51 9DL U K Garmin Corporation No 68 Jangshu 2nd Road Shijr Taipei County Taiwan www garmin com Part Number 190 00284 00 Rev B ...

Отзывы: