


, select See All Devices in this
Bundle, and compare the installed software version to the
software version listed for your product.
If the software on your device is older than the one listed on the
website, follow the steps to load the software on a memory card
(
Loading the New Software on a Memory Card
), and
then update the device software (
).
Loading the New Software on a Memory Card
You must copy the software update to a memory card using a
computer that is running Windows
®
software.
NOTE:
You can contact Garmin customer support to order a
preloaded software update card if you do not have a computer
with Windows software.
1
Insert a memory card into the card slot on the computer.
2
Go to
www.garmin.com/support/software/marine.html
.
TIP:
You can also download updated owner's manuals to
load on the chartplotter from this web page.
3
Select
GPSMAP Series with SD Card
.
4
Select
Download
next to
GPSMAP Series with SD Card
.
5
Read and agree to the terms.
6
Select
Download
.
7
Choose a location, and select
Save
.
8
Double-click the downloaded file.
A Garmin folder containing the software update is created in
the selected location. A dialog box opens to assist in
transferring the software update to a memory card.
9
Select
Next
.
10
Select the drive associated with the memory card, and select
Next
>
Finish
.
A Garmin folder containing the software update is created on the
memory card. The software update can take several minutes to
load onto the memory card.
Updating the Device Software
Before you can update the software, you must obtain a
software-update memory card or load the latest software onto a
memory card (
Loading the New Software on a Memory Card
).
1
Turn on the chartplotter.
2
After the home screen appears, insert the memory card into
the card slot.
NOTE:
In order for the software update instructions to
appear, the device must be fully booted before the card is
inserted.
3
Follow the on-screen instructions.
4
Wait several minutes while the software update process
completes.
5
When prompted, leave the memory card in place and restart
the chartplotter manually.
6
Remove the memory card.
NOTE:
If the memory card is removed before the device
restarts fully, the software update is not complete.
Digital Switching
Your chartplotter can be used to monitor or control circuits when
a compatible system is connected.
For example, you can control the interior lights and navigation
lights on the vessel. You can also monitor live well circuits.
To access the digital switching controls, select
NAV INFO
>
Circuit Control
.
For more information about purchasing and configuring a digital
switching system, contact your Garmin dealer.
Pairing the GRID Remote Input Device with
the Chartplotter
Before you can use a GRID remote input device with a
chartplotter, you must pair the devices.
You can initiate the paring of the devices from the chartplotter or
from the GRID remote input device.
Pairing the GRID Device with the Chartplotter from
the Chartplotter
1
Select
Settings
>
System
>
Station Information
>
GRID™
Pairing
>
Add
.
2
On the GRID remote input device, press
SELECT
.
Pairing the GRID Device with the Chartplotter from
the GRID Device
1
On the GRID remote input device, press
+
and
HOME
at the
same time.
A selection page opens on all of the chartplotters on the
Garmin Marine Network.
2
Rotate the wheel on the GRID remote input device to
highlight
SELECT
on the chartplotter you want to control with
the GRID remote input device.
3
Press
SELECT
.
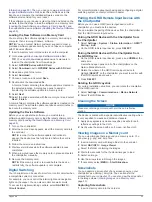
Rotating the GRID Joystick
For certain installation situations, you can rotate the orientation
of the GRID joystick.
1
Select
Settings
>
Communications
>
Marine Network
.
2
Select the GRID device.
Cleaning the Screen
NOTICE
Cleaners containing ammonia will harm the anti-reflective
coating.
The device is coated with a special anti-reflective coating which
is very sensitive to waxes and abrasive cleaners.
1
Apply an eyeglass lens cleaner specified as safe for anti-
reflective coatings to the cloth.
2
Gently wipe the screen with a soft, clean, lint-free cloth.
Viewing Images on a Memory card
You can view images that are saved on a memory card. You
can view .jpg, .png, and .bmp files.
1
Insert a memory card with image files into the card slot.
2
Select
NAV INFO
>
Image Viewer
.
3
Select the folder containing the images.
4
Wait a few seconds for the thumbnail images to load.
5
Select an image.
6
Use the arrows to scroll through the images.
7
If necessary, select
MENU
>
Start Slideshow
.
Screenshots
You can capture a screenshot of any screen shown on your
chartplotter as a bitmap (.bmp) file. You can transfer the
screenshot to your computer. You can also view the screenshot
in the image viewer (
Viewing Images on a Memory card
).
Capturing Screenshots
1
Insert a memory card into the card slot.
Appendix
55
Содержание GPSMAP 1000 Series
Страница 1: ...GPSMAP 1000 1200SERIES Owner sManual...
Страница 8: ......
Страница 70: ...support garmin com June 2018 190 02145 00_0D...


