background image

2

GMI 10 Installation Instructions

Step 1: Select a Location for the GMI 10

Consider the following when you select an installation location: 
•  Provides optimal viewing as you operate your vessel.
•  Allows easy access to the keypad on the GMI 10.
•  Is strong enough to support the weight of the GMI 10 and protect it from excessive vibration or shock.
•  Allows room for the routing and connection of the cables. There should be at least a 3 inch (8 cm) clearance behind 

the case.

•  Is at least 9 

1

/

2

 in. (241 mm) from a magnetic compass, to avoid interference.

•  Mount the GMI 10 in an area that is not exposed to extreme temperature conditions.

NOTE:

 The temperature range for the GMI 10 is from 5°F to 158°F (from -15°C to 70°C). Extended exposure to 

temperatures outside this range (in storage or operating conditions) may cause failure of the LCD screen or other 

components. This type of failure and related consequences are not covered by the manufacturer’s limited warranty.

Step 2: Flush Mounting the GMI 10

In addition to four of the included mounting screws (number 8 ANSI (4.2 × 1.4 DIN7981)), flush mounting the GMI 10 

requires the following tools:
•  Phillips screwdriver
•  Drill and 

1

/

8

 in. (3.2 mm) drill bit for mounting holes

•  3 

17

/

32

 in. (90 mm) hole saw for pilot hole

•  Scissors
•  Center punch and hammer
•  File and sandpaper
•  Anti-seize lubricant (optional)
•  Counterbore bit (for fiberglass installations)

NOTE:

 Ensure that the surface on which you mount the GMI 10 has sufficient open space behind it to accommodate 

the GMI 10 and the connected wires.

To flush mount the GMI 10:

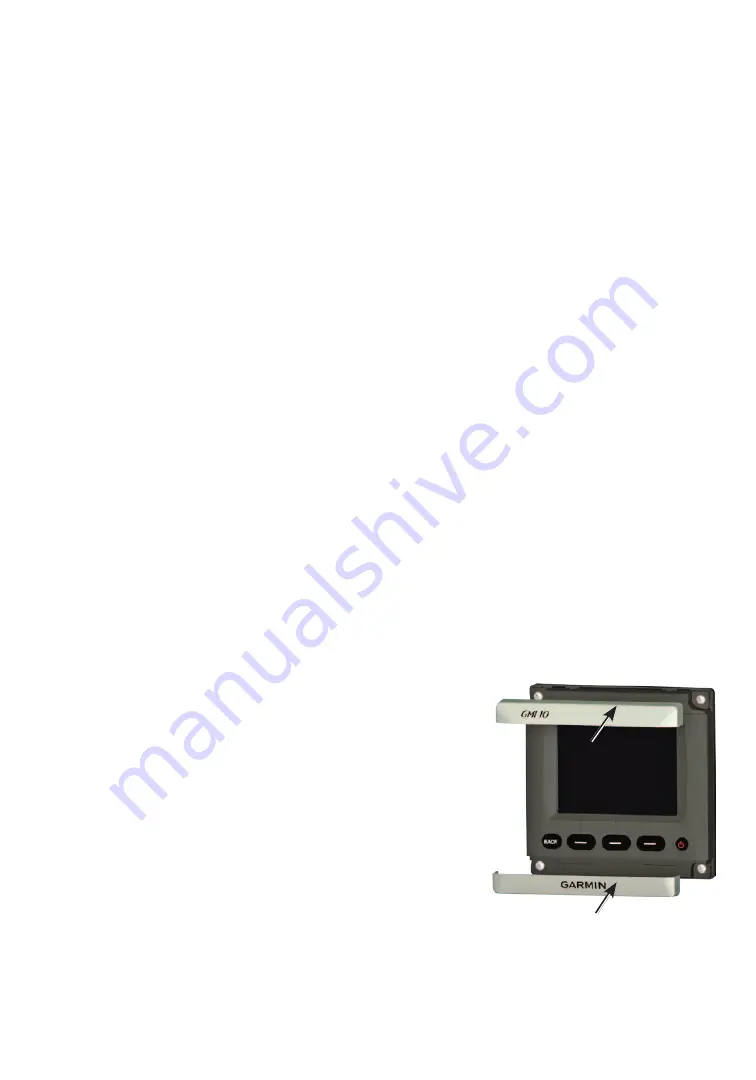
1.  The flush-mount template is included in the product box. Trim the template 

and ensure that it will fit in the location at which you want to flush mount the 

GMI 10.

2.  The flush-mount template has adhesive on the back. Remove the protective 

liner and apply the template to the location where you want to flush mount 

the GMI 10. 

3.  Using the 3 

17

/

32

 in. (90 mm) hole saw, cut the mounting surface along the 

inside of the dashed line indicated on the flush-mount template. Use a file 

and sandpaper to refine the size of the hole.

4.  Place the GMI 10 into the cutout to confirm that the four mounting-holes are 

correct after refining the hole. If not, mark the correct locations of the four 

mounting holes. Remove the GMI 10 from the cutout.

5.  Using the center punch, indent the center of each of the four mounting-hole locations.
6.  Using a 

1

/

8

 in. (3.2 mm) drill bit, drill the four mounting holes.


NOTE:

 If you are mounting the chartplotter in fiberglass, it is recommended to use a countersink bit to drill a 

clearance-counterbore through only the top gel-coat layer. This will help to avoid any cracking in the gel-coat layer 

when the screws are tightened.

Содержание GMI 10

Страница 1: ...e USA go to www garmin com support or contact Garmin USA by phone at 913 397 8200 or 800 800 1020 In the UK contact Garmin Europe Ltd by phone at 0808 2380000 In Europe go to www garmin com support and click Contact Support for in country support information or contact Garmin Europe Ltd by phone at 44 0 870 8501241 Packing List and Accessories Before installing your GMI 10 confirm that your packag...

Страница 2: ... Scissors Center punch and hammer File and sandpaper Anti seize lubricant optional Counterbore bit for fiberglass installations NOTE Ensure that the surface on which you mount the GMI 10 has sufficient open space behind it to accommodate the GMI 10 and the connected wires To flush mount the GMI 10 1 The flush mount template is included in the product box Trim the template and ensure that it will f...

Страница 3: ...luded T connector for the GMI 10 in the NMEA 2000 backbone by connecting it to the side of the T connector you disconnected 4 Route the included drop cable to the bottom of the T connector you just added to your NMEA 2000 network If the included drop cable is not long enough you can use a drop cable up to 20 ft 6 m long not included 5 Connect the drop cable to the T connector and the GMI 10 Notice...

Страница 4: ...nnector not included Connecting the GMI 10 to an Existing NMEA 2000 Network Drop cable included T connector included NMEA 2000 device not included NMEA 2000 device not included GMI 10 Existing NMEA 2000 network Notes To add additional sensors to your NMEA 2000 network follow the instructions included with the sensor To learn more about NMEA 2000 and building a NMEA 2000 network visit www garmin co...

Страница 5: ...WN GREEN WIRE COLOR GMI 10 Device Battery 12 Vdc BLUE WHITE YELLOW RED BLACK GRAY WHITE RED WIRE COLOR WHITE WHITE ORANGE ORANGE GPS 17 17x NMEA 0183 HVS Antenna Wiring the GMI 10 to a GPS 17x NMEA 0183 HVS Antenna BROWN GREEN WIRE COLOR WIRE FUNCTION POWER POWER GND Tx A Tx B NMEA 0183 Compliant Device GMI 10 Device Battery 12 Vdc Wiring the GMI 10 to a Standard NMEA 0183 Device Notes Consult the...

Страница 6: ...ransmitted by a GMI 10 when communicating with a NMEA 2000 compliant device Receive Transmit 059392 ISO Acknowledgment 059392 ISO Acknowledgment 059904 ISO Request 059904 ISO Request 060928 ISO Address Claim 060928 ISO Address Claim 126208 NMEA Command Request Acknowledge Group Function 126208 NMEA Command Request Acknowledge Group Function 126464 Transmit Receive PGN List Group Function 126992 Sy...

Страница 7: ...O BE BOUND BY THE TERMS AND CONDITIONS OF THE FOLLOWING SOFTWARE LICENSE AGREEMENT PLEASE READ THIS AGREEMENT CAREFULLY Garmin Ltd and its subsidiaries Garmin grant you a limited license to use the software embedded in this device the Software in binary executable form in the normal operation of the product Title ownership rights and intellectual property rights in and to the Software remain in Ga...

Страница 8: ...site at www garmin com 2011 Garmin Ltd or its subsidiaries Garmin International Inc 1200 East 151st Street Olathe Kansas 66062 USA Garmin Europe Ltd Liberty House Hounsdown Business Park Southampton Hampshire SO40 9LR UK Garmin Corporation No 68 Zhangshu 2nd Road Xizhi Dist New Taipei City 221 Taiwan R O C www garmin com ...

Отзывы: