background image

© 2009 Garmin Ltd. or its subsidiaries

Garmin International, Inc. 
1200 East 151

st

 Street,  

Olathe, Kansas 66062, USA 
Tel. (913) 397.8200 or  
(800) 800.1020 
Fax (913) 397.8282

Garmin (Europe) Ltd. 
Liberty House 
Hounsdown Business Park,  
Southampton, Hampshire,  
SO40 9LR UK 
Tel. +44 (0) 870.8501241  
(outside the UK)  
0808 2380000 (within the UK) 
Fax +44 (0) 870.8501251

Garmin Corporation  
No. 68, Jangshu 2

nd

 Road,  

Shijr, Taipei County, 
Taiwan 
Tel. 886/2.2642.9199 
Fax 886/2.2642.9099

May 2009 

Part Number 190-01068-00 Rev. A 

Printed in Taiwan

All rights reserved. Except as expressly 
provided herein, no part of this manual may be 
reproduced, copied, transmitted, disseminated, 
downloaded or stored in any storage medium, 
for any purpose without the express prior 
written consent of Garmin. Garmin hereby 
grants permission to download a single copy 
of this manual onto a hard drive or other 
electronic storage medium to be viewed and 
to print one copy of this manual or of any 
revision hereto, provided that such electronic 
or printed copy of this manual must contain 
the complete text of this copyright notice 
and provided further that any unauthorized 
commercial distribution of this manual or any 
revision hereto is strictly prohibited.

Information in this document is subject to 
change without notice. Garmin reserves 
the right to change or improve its products 

and to make changes in the content without 
obligation to notify any person or organization 
of such changes or improvements. Visit the 
Garmin Web site (

www.garmin.com

) for 

current updates and supplemental information 
concerning the use and operation of this and 
other Garmin products.

Garmin

®

, Foretrex

®

, and the Garmin logo are 

trademarks of Garmin Ltd. or its subsidiaries, 
registered in the USA and other countries. 
GSC

 10 is a trademark of Garmin Ltd. or 

it’s subsidiaries. These trademarks may not 
be used without the express permission of 
Garmin. Windows

®

 is a registered trademark of 

Microsoft Corporation in the United States and 
other countries. Mac

®

 is a registered trademark 

of Apple Computer, Inc. Other trademarks 
and trade names are those of their respective 
owners.

Содержание foretrex 301

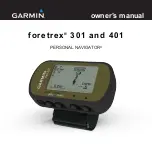
Страница 1: ...foretrex 301 and 401 owner s manual PERSONAL NAVIGATOR...

Страница 2: ...ereto provided that such electronic or printed copy of this manual must contain the complete text of this copyright notice and provided further that any unauthorized commercial distribution of this ma...

Страница 3: ...ple Press page enter select TRACKS Product Registration Help us better support you by completing our online registration today Go to http my garmin com Keep the original sales receipt or a photocopy i...

Страница 4: ...Yes Barometer No Yes Cadence optional accessory required No Yes Electronic compass No Yes Heart rate optional accessory required No Yes Timer Yes Yes Waterproof Yes Yes Wireless transfer No Yes Optio...

Страница 5: ...ng GPS Satellite Signals 3 Using the Backlight 3 Using the Main Pages 4 Map Page 5 Compass Page 6 Elevation Page 7 Trip Computer 7 Main Menu 7 Waypoints Tracks and Routes 8 Waypoints 8 Editing Waypoin...

Страница 6: ...reless Data Transfers 23 Connecting Your Foretrex to a Computer 24 Jumpmaster 25 Storing the Foretrex 25 Battery Information 25 Optimizing Battery Life 26 Resetting the Foretrex 26 Clearing User Data...

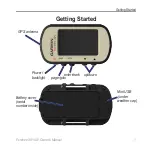
Страница 7: ...Foretrex 301 401 Owner s Manual 1 Getting Started Getting Started Mini USB under weather cap page goto enter mark up down GPS antenna Power backlight Battery cover serial number inside...

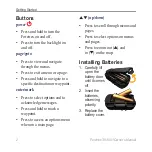
Страница 8: ...to a speciic destination or waypoint enter mark Press to select options and to acknowledge messages Press and hold to mark a waypoint Press to access an options menu when on a main page up down Press...

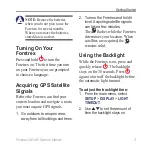
Страница 9: ...gate a route you must acquire GPS signals 1 Go outdoors to an open area away from tall buildings and trees 2 Turn on the Foretrex and hold it level Acquiring satellite signals can take a few minutes T...

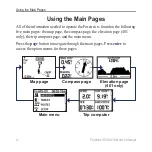
Страница 10: ...rex is found on the following ive main pages the map page the compass page the elevation page 401 only the trip computer page and the main menu Press the page button to navigate through the main pages...

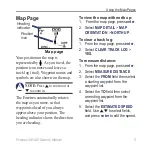
Страница 11: ...ys appear above your position The heading indicator shows the direction you are heading To view the map with north up 1 From the map page press enter 2 Select MAP DETAIL MAP ORIENTATION NORTH UP To cl...

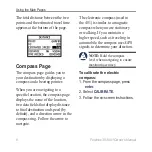
Страница 12: ...data ields that display distance to inal destination and speed by default and a direction arrow in the compass ring Follow the arrow to navigate The electronic compass used in the 401 is similar to a...

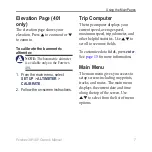
Страница 13: ...TER CALIBRATE 2 Follow the on screen instructions Trip Computer The trip computer displays your current speed average speed maximum speed trip odometer and other helpful statistics Use to scroll to se...

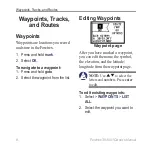
Страница 14: ...avigate to a waypoint 1 Press and hold goto 2 Select the waypoint from the list Editing Waypoints Waypoint page After you have marked a waypoint you can edit the name the symbol the elevation and the...

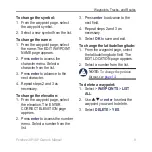
Страница 15: ...sary To change the elevation 1 From the waypoint page select the elevation The ENTER CORRECT ELEVATION page appears 2 Press enter to access the number menu Select a number from the list 3 Press enter...

Страница 16: ...and Moon page shows sunrise time sunset time moonrise time moonset time and moon phase for a speciied date To view the sun and moon page 1 From the main menu select WAYPOINTS LIST ALL 2 Select the way...

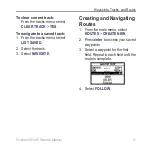
Страница 17: ...To navigate to a saved track 1 From the tracks menu select LIST SAVED 2 Select the track 3 Select NAVIGATE Creating and Navigating Routes 1 From the main menu select ROUTES CREATE NEW 2 Press enter to...

Страница 18: ...waypoints See page 5 for instructions on measuring distance MAP DETAIL set map preferences MAP ORIENTATION select how the map is shown on the page NORTH UP shows North at the top of the page TRACK UP...

Страница 19: ...e press enter to access the trip computer menu CHANGE FIELDS change the data ields on the trip computer page See page 15 for more information on changing data ields RESET TRIP DATA select YES to reset...

Страница 20: ...t and display contrast UNITS set position format and map datum Select units of measurement for distance speed elevation vertical speed and pressure HEADING customize compass settings and calibrate the...

Страница 21: ...view See page 21 JUMPMASTER enter the Jumpmaster setting Set the jump type and information See page 25 Data Field Options The following table lists all of the Foretrex data ields and descriptions Onl...

Страница 22: ...inal destination FINAL ETA estimated time of arrival The estimated time of day you will reach your inal destination Data Field Description FINAL ETE estimated time en route The estimated time needed...

Страница 23: ...vation reached MOV N AVG moving average Average speed of the unit while moving Data Field Description MOV N TIME moving time A running tally of movement time elapsed since the last reset NEXT DEST des...

Страница 24: ...travel OVER L SPD overall speed Your average speed SPEED Display rate of current speed STOP TIME Time spent stopped Data Field Description SUNRISE Time of sunrise based on your GPS position SUNSET Tim...

Страница 25: ...last the reset TURN The angle difference in degrees between the bearing to your destination and your current line of travel L means turn left R means turn right Data Field Description VERT SPEED vert...

Страница 26: ...er page press enter to start the timer NOTE Use to change the countdown time 2 Press enter to stop the timer 3 Press to reset the timer to the original countdown time NOTE When the timer is at 0 00 pr...

Страница 27: ...GPS accuracy satellite locations and signal strength Signal Strength To view the satellite page select GPS from the main menu The bars indicate GPS satellite strength White bars indicate that the For...

Страница 28: ...ensor After you pair the irst time your Foretrex 401 automatically recognizes the wireless sensor whenever they are turned on and within range of each other To pair the Foretrex 401 with a wireless se...

Страница 29: ...DATA message appears A TRANSFER COMPLETE message appears when data is received To send a waypoint 1 From the main menu select WAYPOINTS LIST ALL 2 Select the waypoint you want to send 3 From the waypo...

Страница 30: ...etrex under the weather cap 2 Connect the larger end of the USB cable to an available USB port on your computer 3 Select YES to enter mass storage mode Your Foretrex appears as a removable drive in My...

Страница 31: ...atures can occur because it can cause permanent damage User information such as waypoints and routes will be retained in the unit s memory without the need for external power It is always a good pract...

Страница 32: ...tones off if not needed From the main menu select SETUP SYSTEM BEEPER OFF Turn off the compass when it is not being used Foretrex 401 only Select SETUP HEADING COMPASS OFF Resetting the Foretrex If yo...

Страница 33: ...nd of the Foretrex strap through the plastic ring on the extension strap 2 Thread the other end of the extension strap through the plastic ring on the Foretrex strap 3 Adjust as necessary Cleaning the...

Страница 34: ...ome batteries Some batteries can rupture at high temperatures Power Source Two AAA batteries alkaline or NiMH Accuracy GPS 33 ft 10 m 95 typical Subject to accuracy degradation to 100 m2 2DRMS under t...

Страница 35: ...ht treaties You further acknowledge that the structure organization and code of the Software are valuable trade secrets of Garmin and that the Software in source code form remains a valuable trade sec...

Страница 36: ...dio frequency energy and if not installed and used in accordance with the instructions may cause harmful interference to radio communications However there is no guarantee that interference will not o...

Страница 37: ...4 contacting Garmin i custom data ields 15 D data transferring 23 data ields 15 changing 12 13 distance measuring 5 E elevation page 6 plot 13 zoom 13 F iles adding 24 transferring 23 G Garmin Product...

Страница 38: ...gnals 3 21 sensors 22 serial number 1 speciications 28 storing 25 T time 14 timer options 20 setting 12 13 tracks navigating 10 recording 10 trip computer options 13 page 7 U USB connecting 24 W waypo...

Страница 39: ......
Страница 40: ...m 2009 Garmin Ltd or its subsidiaries Garmin International Inc 1200 East 151st Street Olathe Kansas 66062 USA Garmin Europe Ltd Liberty House Hounsdown Business Park Southampton Hampshire SO40 9LR UK...

Отзывы: