background image

The metal disc remains attached to the windshield.

6

Using your finger, press firmly on the disc for 30 seconds.
This helps to ensure the disc adhesive has proper contact 

with the windshield.

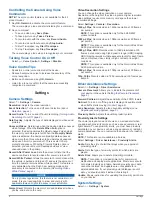
7

Wait 

24 hours

 before installing the Garmin Dash Cam .

It takes 24 hours for the adhesive to bond properly to the 

windshield.

Installing and Setting Up the Garmin Dash 

Cam

NOTICE

Before installing the Garmin Dash Cam , you must install the 

mount and allow the adhesive to bond to the windshield for 

24 

hours

. Failure to allow adequate bonding time may cause the 

mount to detach from the windshield, which could result in 

damage to the product or mount.

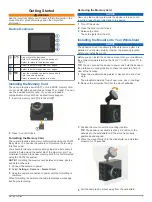
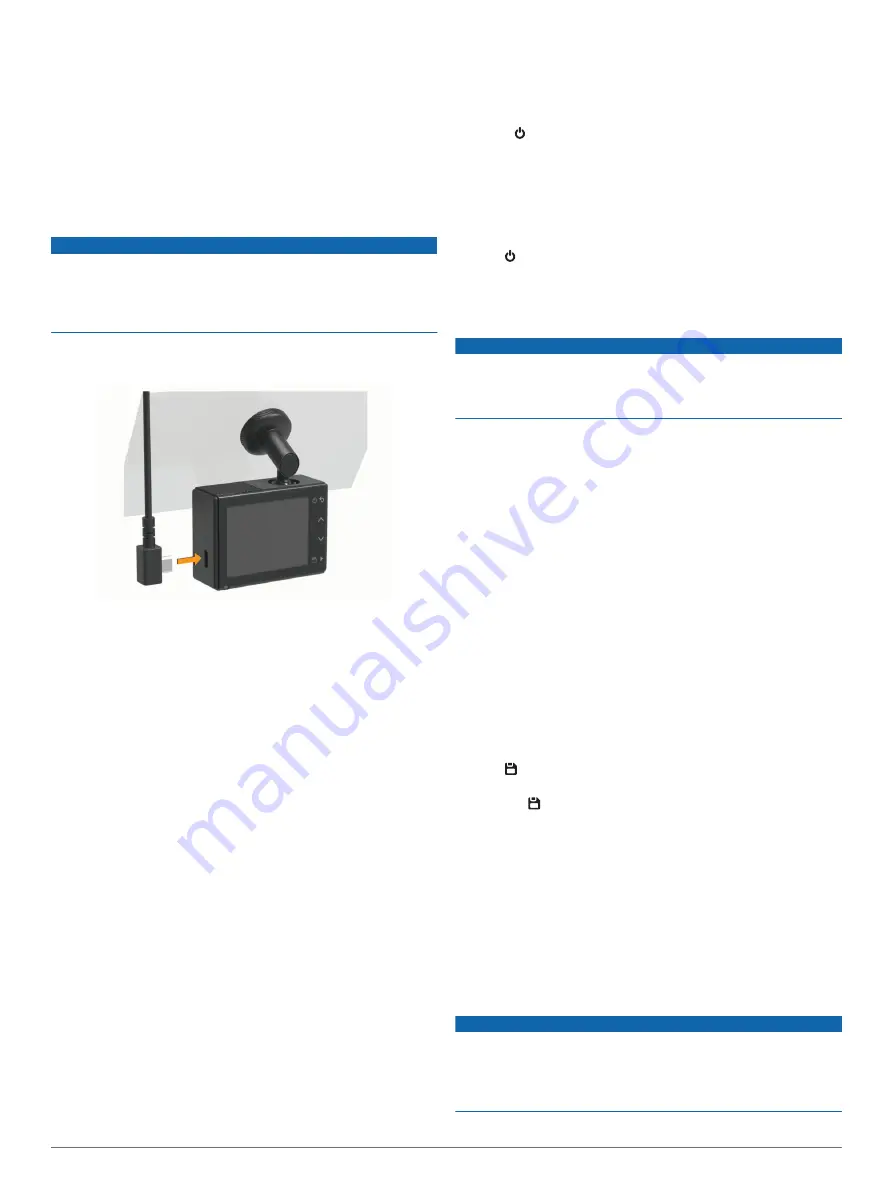
1

Place the camera and mount onto the metal disc.

2

Plug the vehicle power cable into the USB port on the device.

3

Route the power cable to your vehicle power outlet.
The included vehicle power cable is designed to be routed 

out of sight. It is long enough to route around the windshield 

in most vehicles, and you can hide the thin cable along or 

behind the trim or headliner.

4

Plug the other end of the vehicle power cable into a power 

outlet in your vehicle.

5

If necessary, turn on the vehicle ignition switch to provide 

power to the power outlet in your vehicle.
The device turns on.

6

Follow the on-screen instructions to complete the initial 

device setup.
The camera view appears.

7

Adjust the position of the camera to capture the desired field 

of view.

Setting the Camera Placement

You can mount the device in the left, center, or right of your 

windshield. For the best performance, you should set the 

Camera Placement option to indicate the location of your device 

in the vehicle.

1

Select 

Settings

 > 

Driver Assistance

 > 

Camera Placement

.

2

Select 

Horizontal Placement

, and select the horizontal 

placement of your camera.

3

Select 

Vehicle Height

.

4

Select an option:
• If you are driving a large vehicle, like a full size van or 

truck, select 

Tall

.

• If you are driving a car, select 

Normal

.

Turning On the Device Manually

NOTE: 

When the device is connected to an ignition-switched 

power outlet, it turns on automatically when you turn on the 

vehicle.

Select  .
The device turns on.

Turning Off the Device Manually

NOTE: 

When the device is connected to an ignition-switched 

power outlet, it turns off automatically when you turn off the 

vehicle.

Hold   for 3 seconds.
The device turns off.

Dash Cam Recording

NOTICE

Some jurisdictions regulate or prohibit use of this device. It is 

your responsibility to know and comply with applicable laws and 

rights to privacy in jurisdictions where you plan to use this 

device.

The dash cam records video to the camera memory card 

(

Installing the Memory Card

, page 1

). By default, the device 

immediately starts recording video when it turns on, and it 

continues recording until it is turned off. If the memory card is 

full, the device automatically deletes the oldest unsaved video to 

create space for new video.
When the option to promptly delete unsaved video is enabled, 

the device continually deletes unsaved video more than three 

minutes old and deletes all unsaved video each time it is 

powered off. This feature is available only for specific regions 

and is enabled by default for some of those regions. When the 

camera is set to a supported region, you can enable or disable 

this feature in the camera settings (

Camera Settings

, page 6

).

You can save a video recording to prevent it from being 

overwritten or deleted.

Saving a Video Recording

By default, the device uses a sensor to detect a possible 

incident and automatically saves video footage before, during, 

and after the detected event. You can also save video files 

manually at any time.

Hold  .
The device saves the video footage before, during, and after 

you hold  .

The memory card has limited storage. After you save a video 

recording, you should transfer the recording to your computer 

(

Videos and Photos on Your Computer

, page 4

) or to your 

smartphone (

Editing and Sharing a Video

, page 4

).

Event Detection

By default, the device uses a sensor to detect possible incidents 

and saves video footage automatically before, during, and after 

the detected event. The video footage is stamped with the time, 

date, and location of the event.

Turning Audio Recording On or Off

NOTICE

Some jurisdictions may prohibit recording audio in the vehicle or 

may require that all passengers have knowledge of the 

recording and provide consent before you record audio in the 

vehicle. It is your responsibility to know and follow all laws and 

restrictions for your jurisdiction.

2

Dash Cam Recording

Содержание DASH CAM 45

Страница 1: ...GARMINDASHCAM 45 54 55 65W Owner sManual ...

Страница 2: ...com for current updates and supplemental information concerning the use of this product Garmin the Garmin logo and VIRB are trademarks of Garmin Ltd or its subsidiaries registered in the USA and other countries Garmin Dash Cam Garmin Express and Travelapse are trademarks of Garmin Ltd or its subsidiaries These trademarks may not be used without the express permission of Garmin Apple is a trademark...

Страница 3: ...otos on Your Computer 4 Connecting the Device to Your Computer 4 Driver Awareness Features and Alerts 4 Forward Collision Warning System 4 Forward Collision Warning System Performance Tips 5 Lane Departure Warning System 5 Lane Departure Warning Performance Tips 5 Go Alert 5 Red Light and Speed Cameras 5 Voice Control 5 Controlling the Camera Using Voice Commands 6 Turning Voice Control On or Off ...

Страница 4: ......

Страница 5: ...ct the camera to power 2 Select Settings Camera Format Card 3 Keep the camera connected to power until the formatting is complete When formatting is complete the camera displays a message and begins recording Removing the Memory Card NOTICE Removing the memory card while the device is turned on can result in a loss of data or damage to the device 1 Turn off the device 2 Press the card in until it ...

Страница 6: ... NOTE When the device is connected to an ignition switched power outlet it turns off automatically when you turn off the vehicle Hold for 3 seconds The device turns off Dash Cam Recording NOTICE Some jurisdictions regulate or prohibit use of this device It is your responsibility to know and comply with applicable laws and rights to privacy in jurisdictions where you plan to use this device The das...

Страница 7: ...ily injury 1 Route the parking mode cable accessory to a location in the vehicle with constant power switched power and a ground connection 2 Connect the BATT wire to a constant power source 3 Connect the ACC wire to a switched power source 4 Connect the GND wire to the bare metal of the vehicle s chassis using an existing bolt or screw 5 Plug the parking mode cable accessory into the USB port on ...

Страница 8: ...rites the oldest unsaved video when the storage space for unsaved videos is full Connecting the Device to Your Computer You can view videos and photos on your computer using a micro USB cable 1 Plug the small end of the micro USB cable into the port on the device 2 Plug the larger end of the micro USB cable into a port on your computer Depending on your computer operating system the device appears...

Страница 9: ...ay prevent the LDWS feature from detecting lane departures The LDWS feature provides alerts only when your vehicle speed exceeds 65 km h 40 mph The LDWS feature does not provide alerts on certain types of roads such as highway ramps or merging lanes The LDWS feature may not function properly if the camera is incorrectly aligned The LDWS feature may not function properly if the camera placement set...

Страница 10: ...n the card Video Resolution Settings You can change the video resolution on your camera Resolution is the height of the video in pixels Higher resolution video settings require more memory card space than lower resolution settings Select Settings Camera Resolution 1440p 30fps Records video in 1440p resolution at 30 frames per second NOTE This option is available only for the 54 55 65W product mode...

Страница 11: ...ngs menu scroll to the bottom of the menu 2 Select System 3 Select Regulatory Restarting the Device You can restart your device if it stops functioning Hold the power key for 12 seconds Specifications Operating temperature range From 20 to 55 C from 4 to 131 F Charging temperature range From 0 to 45 C from 32 to 113 F Memory card Class 10 or higher microSDHC from 4 to 64 GB Garmin Dash Cam 45 wire...

Страница 12: ...r location with less wireless interference or try transferring videos to the smartphone Editing and Sharing a Video page 4 Transfer important recordings to a computer or smartphone and format the memory card Formatting the Memory Card page 1 If the device displays a memory card error alert first try formatting the memory card Formatting the Memory Card page 1 and then if necessary replace the memo...

Страница 13: ...ring the device 7 updating software 7 L lane departure warning system LDWS 5 M memory card 1 7 installing 1 microSD card 1 7 mounting windshield 1 P parking mode cable 3 photos viewing 3 4 power key 2 product registration 7 proximity points alerts settings 6 R red light cameras 5 registering the device 7 resetting device 7 resolution 6 S settings 6 setup 2 software updating 7 version 7 speed camer...

Страница 14: ...support garmin com September 2019 190 02164 00_0D ...

Отзывы: