background image


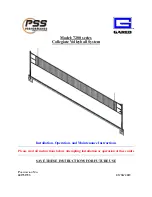
Model: 7200 series  

Collegiate Volleyball System 


Installation, Operation, and Maintenance Instructions 

Please read all instructions before attempting installation or operation of these units 


SAVE THESE INSTRUCTIONS FOR FUTURE USE 


P

UBLICATION

 N

O

601751793  

09/30/2019 

Содержание 7200 Series

Страница 1: ...lleyball System Installation Operation and Maintenance Instructions Please read all instructions before attempting installation or operation of these units SAVE THESE INSTRUCTIONS FOR FUTURE USE PUBLI...

Страница 2: ...em 1 Table of Contents Section Page No Introduction 2 Parts List by Sub Assembly 2 3 Specifications 4 5 Floor Sleeve Installation 6 7 Floor Cover Installation 8 Post and Net Installation Instructions...

Страница 3: ...from shortening the life of the unit preventative maintenance inspections and repairs should be performed at least once per year If the units are subject to high or unusual usage inspections should be...

Страница 4: ...4127 DECAL GARED TALL BLACK 12 2 121974128 DECAL G 6000 7200 POST 13 4 234 10 32 8Z SCREW MACH PAN HD PHIL 10 32 UNF X 0 5 14 2 509 5 18 10 HEX SOCKET BUTTON HEAD 5 16 18 X 0 625 15 2 544 5 18 HEX JAM...

Страница 5: ...7200 Collegiate Volleyball System 4 MODEL 7200 COLLEGIATE VB SYSTEM MODEL 7205 COLLEGIATE VB SYSTEM less SLEEVES AND COVERS...

Страница 6: ...7200 Collegiate Volleyball System 5 MODEL 7202 COLLEGIATE TWO COURT VB SYS MODEL 7207 COLLEGIATE TWO COURT VB SYS less SLEEVES AND COVERS...

Страница 7: ...debris from falling in or grout from entering the bottom of sleeve 6 Insert the 4 1 4 O D steel sleeve and work it down into the grout until the inside bottom of the sleeve is 14 below the TOP surfac...

Страница 8: ...7200 Collegiate Volleyball System 7 Installation Instructions for Ground Sleeves...

Страница 9: ...7200 Collegiate Volleyball System 8 Counterbore Details and Floor Cover Installation...

Страница 10: ...5 Attach the net cable to the J hook on the end post with Attach the net cable to the winch belt with a snap link 6 Next turn the winch handle clockwise to tighten the net cable Note that the height...

Страница 11: ...to be retightened periodically Expect some initial stretch in the net 9 Minor height adjustments can be made by screwing the foot pads on the bottom of the posts in or out Posts must be removed from t...

Страница 12: ...ll system down a Remove antenna b Unhook net straps from posts at both ends c Crank winch counterclockwise until net cable can be unhooked from snap links d Fold net up and transport net and posts to...

Страница 13: ...bolts or nuts should be tightened 5 Check Sliding components and strap for wear Maintenance Check Sheet Date Unit Anchors Floor Sleeves Anchors bolts OK Repair Replace Floor sleeves covers OK Repair...

Страница 14: ...ed Holdings LLC Performance Sports Systems Gared Sports 9200 E 146th Street 9200 E 146th Street Noblesville IN 46060 Noblesville IN 46060 800 848 8034 800 325 2682 www perfsports com www garedsports c...

Отзывы: