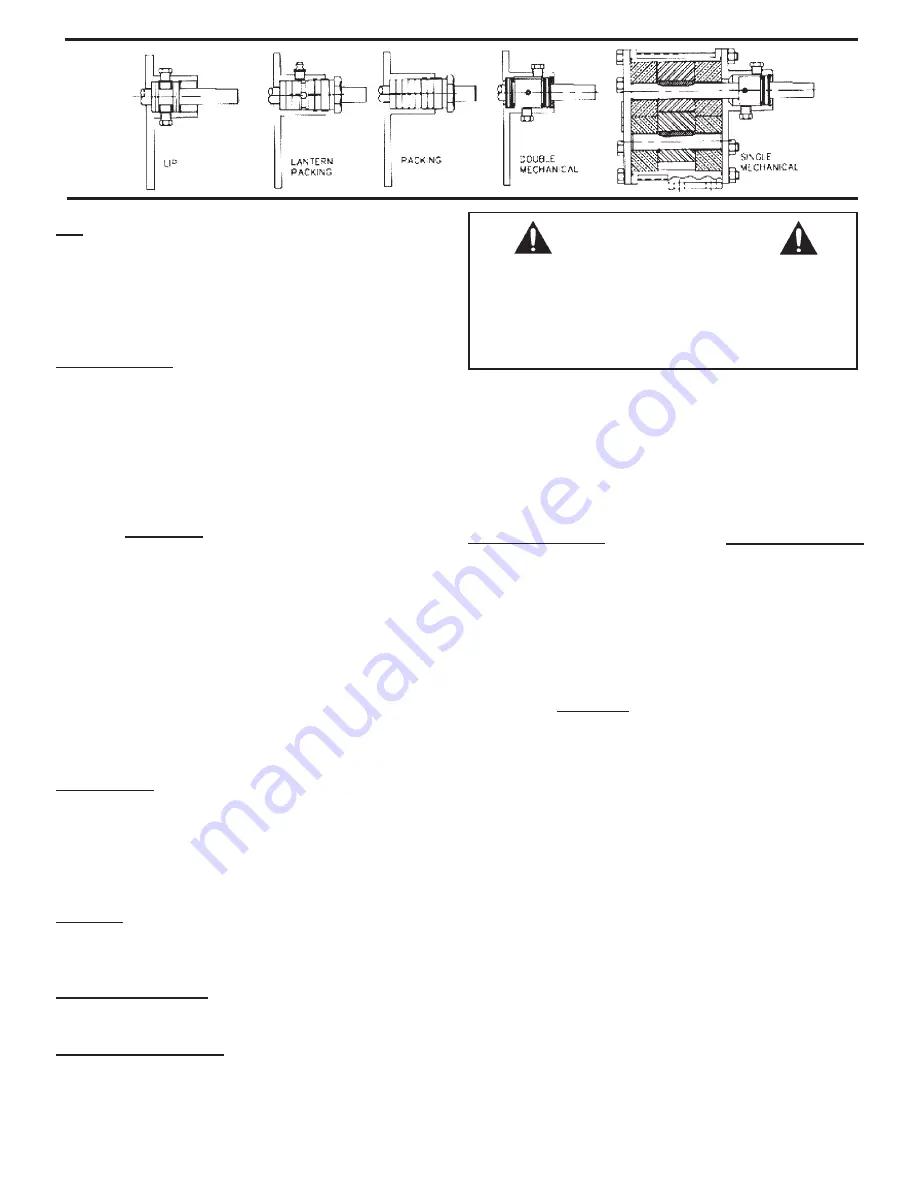
Lip:
Pumps supplied with two lip seals and flush chamber
arrangement come factory supplied with a small amount of lubri-
cant applied to the outer lip seal. The design is intended to be used
with an eternally supplied flush fluid. Remove the pipe plugs and
install "in" and "out" connections to the flush source. Failure to
supply flush fluid will lead to outer lip seal breakdown.
Mechanical Seals:
(see above)
Two types are offered as standard:
single internal (in both the wedge and bellows styles) and double
mechanical seals (in both the wedge and bellows styles). Both
require cooling and lubrication to perform properly. Do not run
pump dry. Ensure that the seal surfaces are wet prior to start-up
and operation. If a seal flush system is to be used, make sure the
system is connected to the cover ports correctly. Keep abrasives
out of the seal area. Dirty flush streams can destroy seal faces.
Operation
Pre-Startup
Prior to start-up, recheck installation as described above. Verify
desired rotation by jogging the motor and make corrections if nec-
essary. Before initial startup, pre-wet the gears and seal, make
sure the pump is adequately primed. Failure to do so could cause
immediate damage to pump components. Make sure that dis-
charge valves are open.
Startup
Start pump and check for proper operation.
Packing Styles:
Adjust packing as necessary, allowing adequate
time to run in. Do not overtighten the packing nut else damage to
the packing and the shaft can occur. A properly packed and adjust-
ed packing nut will leak at about 10 drops every 3 to 5 minutes.
A packing nut runs hot, it is generally a sign that the packing is
too tight.
Lip Styles:
No adjustment is necessary during operation. For two
lip arrangements, insure that flush fluid continues to be
supplied
to the
chamber.
Single Mechanical Seals
: No seal adjustment is necessary. Check
mechanical seal flush arrangements where used.
Double Mechanical Seals:
Pressurized flush must be in opera-
tion at an inlet pressure of 10 to 15 psi above intended pump dis-
charge pressure prior to and when operating the pump. Flush must
continue when pump is stopped until pump pressure is reduced to
within 20 psi of double seal chamber pressure.
If the pump's bearing areas or seal area runs hot, shut the pump
down and determine the cause. It is recommended that the line
mounted pressure relief setting should be 5 psig above the oper-
ating pressure in the discharge line. If start-up screens were used,
be sure they are removed prior to placing the system into regular
operation. Depending on suction conditions, it may be necessary
to reprime the pump for subsequent restarts.
Maintenance
Frequency
Since each installation differs, the frequency and extent of pump
maintenance is best established based upon past performance.
Keeping detailed maintenance records of past performance aids in
determining future preventative maintenance intervals. During
routine operating inspections, pay particular attention to seal and
bearing areas of the pump. Consult the motor manufacturer for
motor maintenance instructions.
Changing Applications
Verify that all wetted parts of the pump are compatible with the
new fluid to be handled and that the motor is adequately sized.
Check with your Oberdorfer distributor if in doubt.
Inspect for Wear
If your Chemsteel® Gear Pump exhibits reduced flow, an inabil-
ity to maintain pressure, is noisy or performs otherwise abnor-
mally, first refer to the Troubleshooting Matrix below. If the prob-
lem persists, the pump should be inspected for wear or damage.
Oberdorfer Chemsteel® Gear pump internals may be readily
inspected in the field usually without removal from the drive or
Dry running leads to immediate damage to pump components.
Due to tight running clearances, liquids containing
solids and abrasives will accelerate pump wear.
When possible, flush the pump after each usage.
Allowing liquid to freeze in the pump can cause damage.
WARNING
Before attempting to service the pump: Disconnect motor power
and release all pressure within the system. Flush the pump thor-
oughly with a neutralizing fluid before attempting to disassemble.
Wear appropriate personal protection equipment and handle the
equipment with care.
CAUTION
3


