36
37
www.Deuba24online.de
www.Deuba24online.de
blade.
Keep hands and feet away from the
openings when the machine is running.
•Make sure that the feed hopper is empty
objects (such as stones, glass, metal, earth,
product.
This may blunt the blades and damage
the motor.
mechanism or the product makes unusual
noises or vibrates abnormally, immediately stop
the motor and allow the product to come to a
•Never put hands, other parts of the body or
or in the vicinity of other moving parts.
•Always remove the cut material from the
In this way, you
avoid blocking the product or allowing cut
material to enter the feed hopper opening via
kickback. This may lead to accidents.
there should be no people or animals as they
may be hurt by flying objects.
•Do not operate the product on paved or
cemented areas.
The cut material may rebound
and cause injuries.
the motor is running.
the product runs for approximately 5 seconds.
•Ensure that the
On/Off
switch is set to
Off
when you put the plug into the socket.
when working with the product.
Never stand
higher than the product when feeding in material.
RESIDUAL RISK
impossible to completely eliminate certain residual
risk factors. The following hazards may arise in use and
following:
Exposure to noise can cause hearing injury. Wear ear
mechanism. Keep unprotected body parts away from
Extension Cable
Only use extension cables approved for outdoor use
or greater than 1.5 mm2 for a length of up to 75 m.
Extension cables over 30 m in length reduce the
performance of the machines.
Product overview
Figure 1 -page55
1.Feed hopper
2.Push bar
3.Handle
6.On/Off switch
7. Power cord with plug
8.Clearance adjustment screw
10.Wheels
11.Wheel cap
12.Axle
Unpacking and assembly
Unpack the product and make sure all of the
pieces are there.
Scope of delivery
•Shredder
•Frame bars
•Axle
•Wheels (2x)
•Push bar
Assembly
DANGER! Risk of injury!
The product must be assem-
bled on an even,
flat
and solid
surface. You will need at least
two people to assemble the
product.
Assembling the undercarriage
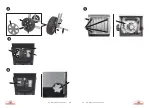
Figure 2 -page56
– Push the axis (12) through the frame bars.
– Undo the wheel cap (11) from the wheels (10)
and secure to the ends of the axis (12) using nuts
and washers .
wheels (10).
11


