


7
Choose automatically the proper horizontal
position and vertical position and size of the
screen image.
5-2 H-Position
Adjust the position of the display horizontally (left
or right).
5-3 V-Position
Adjust the position of the display vertically (up or
down).
5-4 Phase
Remove any horizontal noise and clear or
sharpen the image of the characters.
5-5 Clock
Adjust the width (horizontal size) of the screen
image.
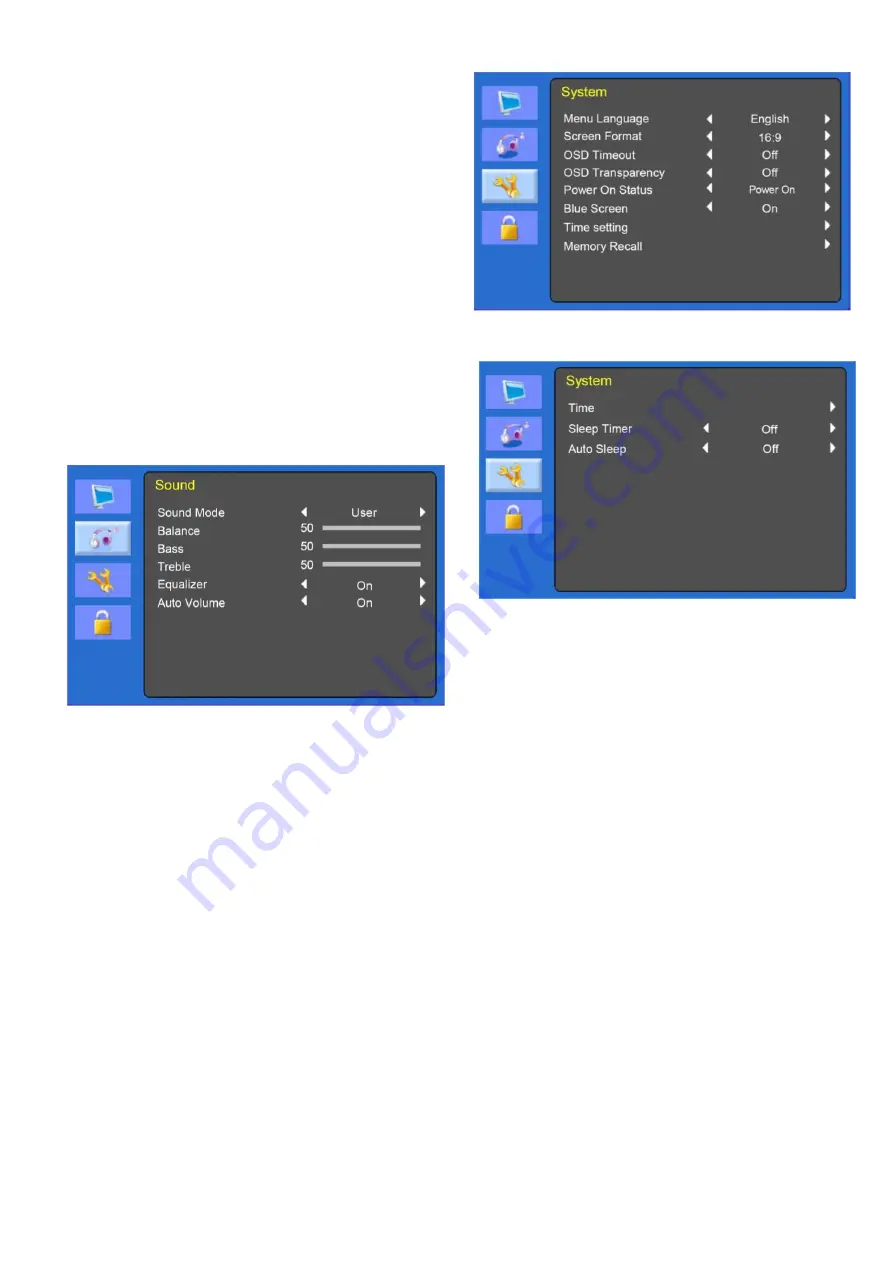
Sound(optional)
1.
Sound Mode
Choose a different preset sound mode or your
own customized sound. (Standard/ Speech/
Music/ User)
2. Balance
Adjust the sound balance of the left and right
speakers.
3.
Bass
When you select the user mode, adjust the
bass sound.
4.
Treble
When you select the user mode, adjust the
treble sound.
5. Equalizer
Provide an enhanced listening experience.
6. Auto Volume
Automatically remains on the same level of the
volume if you change the program.
System
(Time setting)
1. Menu Language
Select language for OSD.
2. Screen Format
Select the aspect ratio.
(FULL/16:9/4:3/ZOOM1/ZOOM2)
3. OSD
Time
out
Adjust the display of the OSD menu
4. OSD Transparency
Adjust the OSD. Transparency
5. Power
status
Not used
6. Blue
Screen
Select the background color.
7. Time
Setting
7-1 Time
Not used.
7-2 Sleep Timer
Set sleep timer
7-3 Auto Sleep
Содержание LED-19
Страница 1: ...CCTV Monitor User Manual...
Страница 18: ...MEMO...
Страница 19: ...MEMO...
Страница 20: ...SN 99786W0685...