


8
OVERVIEW
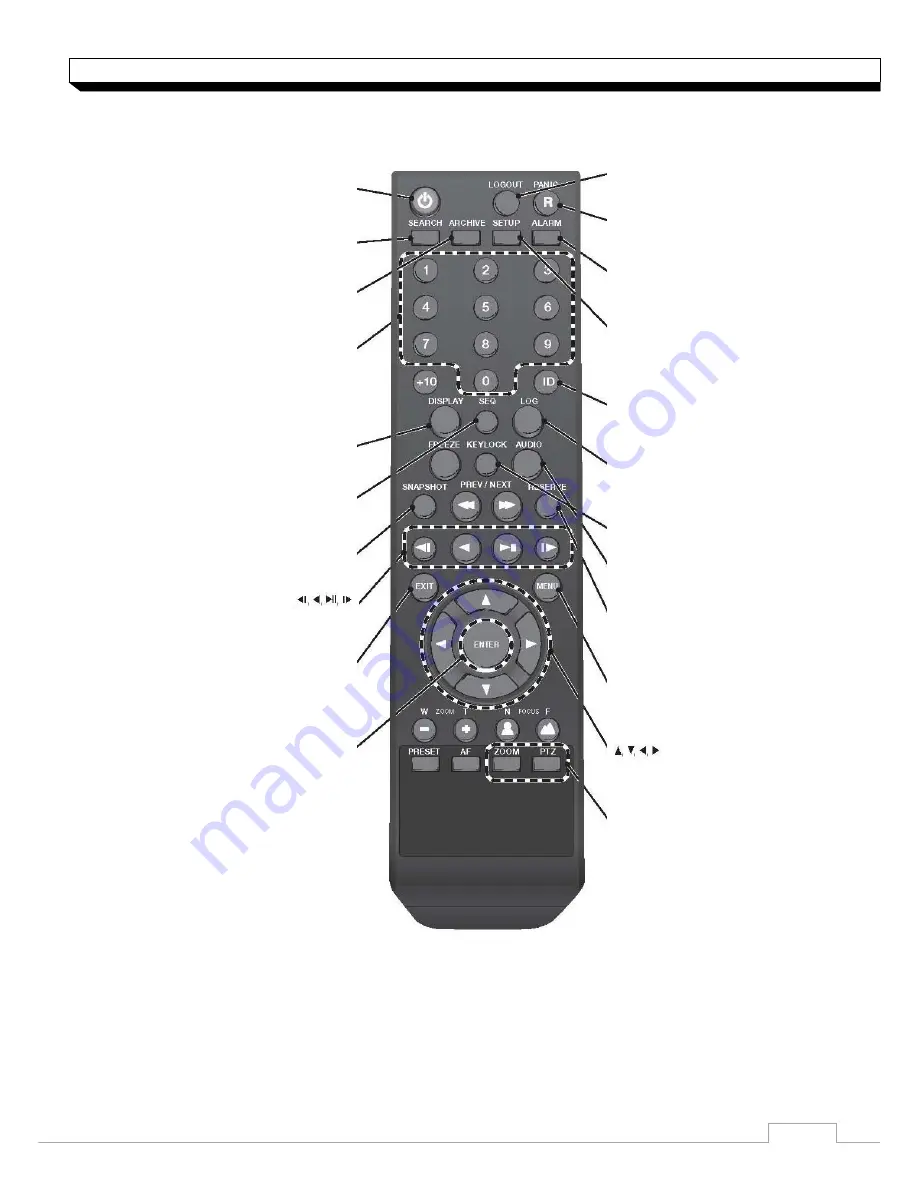
Remote Control At a Glance
LOGOUT
LOGOUT
POWER
Turn on or off the power.
PANIC
Start the emergency recording.
SEARCH
Display the search window.
ALARM
Show the alarm status with
a popup window.
ARCHIVE
Display the backup window.
SETUP
Display the system setup menu.
Channel
Function as channel selection
button in live or playback mode.
Or used for entering the password.
ID
Set the remote control ID.
DISPLAY
Switch the split mode.
SEQ
Switch to sequence mode.
SNAPSHOT
Turn on or off the power.
Used to change the direction
or adjust the play speed
in playback mode.
EXIT
Exit from the current screen
and return to the previous
screen.
ENTER
Select a menu item or apply
your settings.
LOG
Display the log list.
KEYLOCK
Lock any operation on the unit.
AUDIO
Display the audio channel
selection window.
RESERVE
Turn on or off the power.
MENU
Display the tool bar on the live
screen.
Use to move through the menus
PTZ/ZOOM
Enter the PTZ or digital zoom
Mode and control the operation.
Содержание digimaster DR-16FX5
Страница 1: ...1...


