Storm Form and Storm Form DMX User Guide
Version 1.1 – 2/25/2021
STANDALONE OPERATION
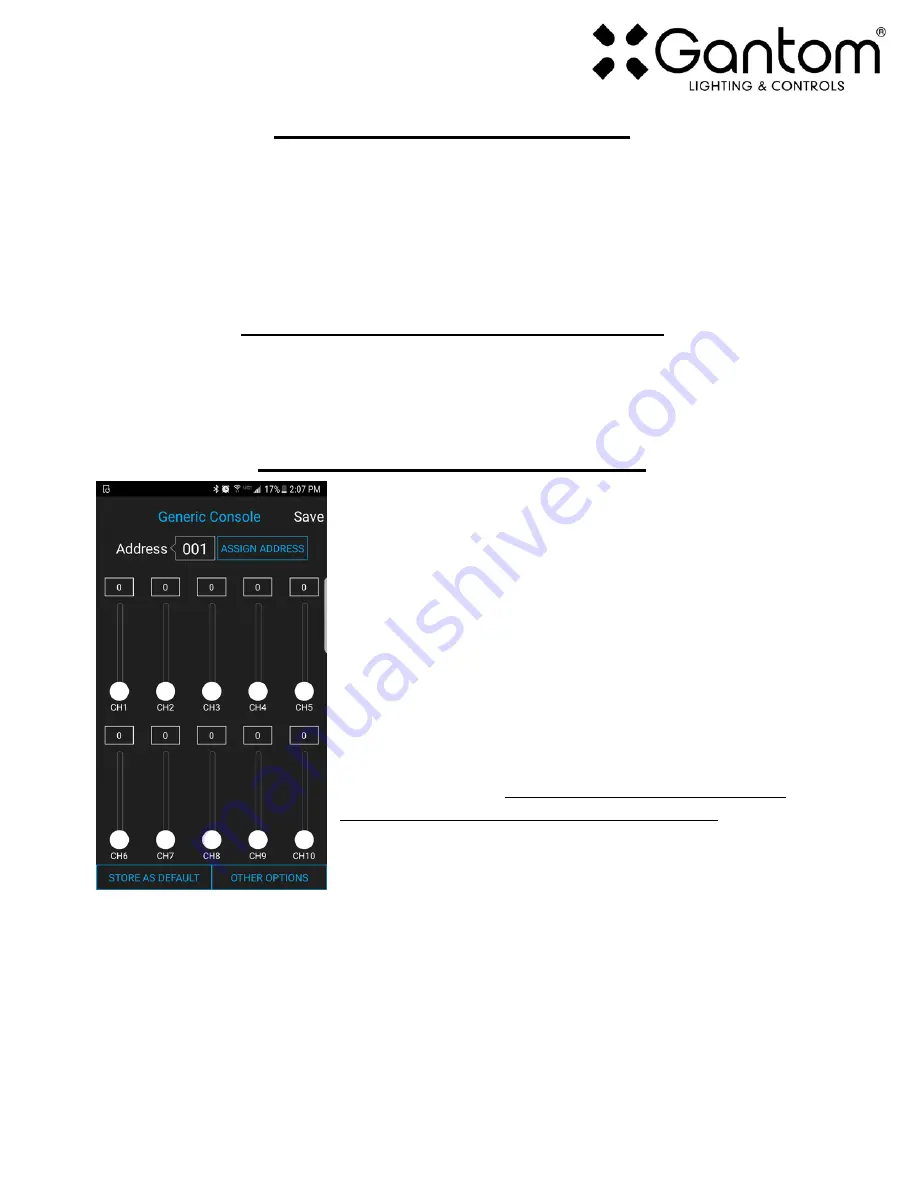
Some applications may not require live DMX control. In order to configure your Storm Form DMX for
standalone operation, all you must do is use the CH1 slider on the Generic Console control screen to set
the desired intensity level. Once the light has the desired output, tap the “STORE AS DEFAULT” button at
the lower left portion of the screen to save this setting directly into the light fixture. Now, when the light
fixture receives power it will automatically go to this newly saved DEFAULT setting once it’s boot
sequence is complete. Please note that if DMX signal is passed to the fixture while it is operating in
standalone mode, the DMX signal will override the standalone setting.
DMX CONTROLLED OPERATION
The Storm Form DMX was designed for use with standard DMX512 control systems. The Storm Form
DMX occupies a single DMX channel and can be given any DMX starting address from 1-512. Please note
that the Storm Form DMX does not feature any RDM functionality.
ADDRESSING YOUR FIXTURE
To set the DMX address, first connect the Storm Form DMX to the
DMX Programmer app by Gantom as was outlined earlier in this
document. With the Generic Console control screen open, you should
have full control of the fixture using the CH1 slider. If the light fixture
is connected to the app but is not responding, try power cycling the
light fixture.
Once you have verified that the light fixture is responding to control
signal from the app, tap the number field next to the word “Address”.
A new screen will pop up, prompting you to enter a DMX address.
After you enter your desired DMX address, the app will return to the
Generic Console screen. Finally, you must hit the ASSIGN ADDRESS
button in order to save the new address into the fixture. Hitting the
“Save” button will not save anything to the light fixture’s memory.


