Reference 3000
™
Potentiostat/Galvanostat/ZRA Quick-Start Guide
988-00008
Gamry Instruments, Inc. © 2008
11
Attach Cell Leads to Calibration Side of
UDC 4 (or UDC3)
When calibrating a Reference 3000 Potentiostat, use the
Universal Dummy Cell 4 that is included with the potentiostat.
The Universal Dummy Cell 3 is also fine.
The older Universal
Dummy Cell 2 is not sufficient for calibrating a Reference
3000 Instrument.
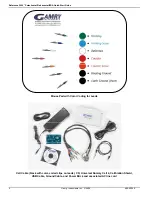
It is easy to connect the cell leads correctly, because they are
color coded. You can always refer to your Gamry mouse pad
for the meanings of the cell cable lead colors.
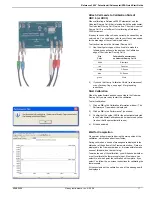
To attach cell leads to the Universal Dummy Cell:
1)
Use the alligator clips on the cell cable to make the
following connections to the posts on the Calibration
edge of the Universal Dummy Cell 4.
Clip
Color
Calibration Connector Label
on Universal Dummy Cell 4
white Reference
red Counter
orange C.
Sense
blue W.
Sense
green Work
2)
If you use the Gamry Calibration Shield (recommended)
or any Faraday Cage
, see page 16 for grounding
instructions.
Start Calibration
When the potentiostat has been connected to the Universal
Dummy Cell you are ready to start the calibration:
To start calibration:
1) Click
on
OK
in the Calibration Information window
.
The
Performance Tips window is displayed.
2) Click
on
OK
in the Performance Tips window.
3)
Confirm that the virtual LED for the potentiostat selected
in the Potentiostat Calibration window has turned yellow
(to show that the potentiostat is in use).
4)
Sit back and wait.
Wait for Completion
No operator action is required during the main portion of the
calibration, which takes about ten minutes.
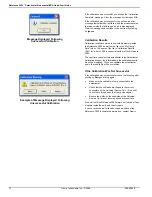
During calibration, a series of messages are displayed in the
status bar at the bottom of the Framework window. Data are
displayed in the Framework window. It is impossible to make
sense of this data; don’t bother trying!
Towards the end of the calibration, you will be asked whether
or not to calibrate the thermocouple input. Most users can
select No, at which point the calibration will complete. If you
select Yes, follow the on-screen instructions for calibrating the
thermocouple.
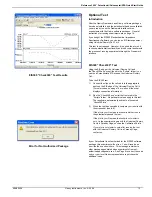
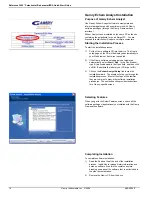
At the conclusion of the calibration, one of two messages will
be displayed.


