INSTALLING THE USB HUB
5 / 7
INSTALLATION - Power
It is recommended to have at least 5A avaialble to power the hub. The input is 10-40Vdc.
1.
It is recommended to wire the hub to ignition or a timer to prevent the battery from draining.
2.
LED lights will turn on next to the ethernet port and USB stack when the hub recieves power.
3.
Make sure power is off before performing any install steps.
4.
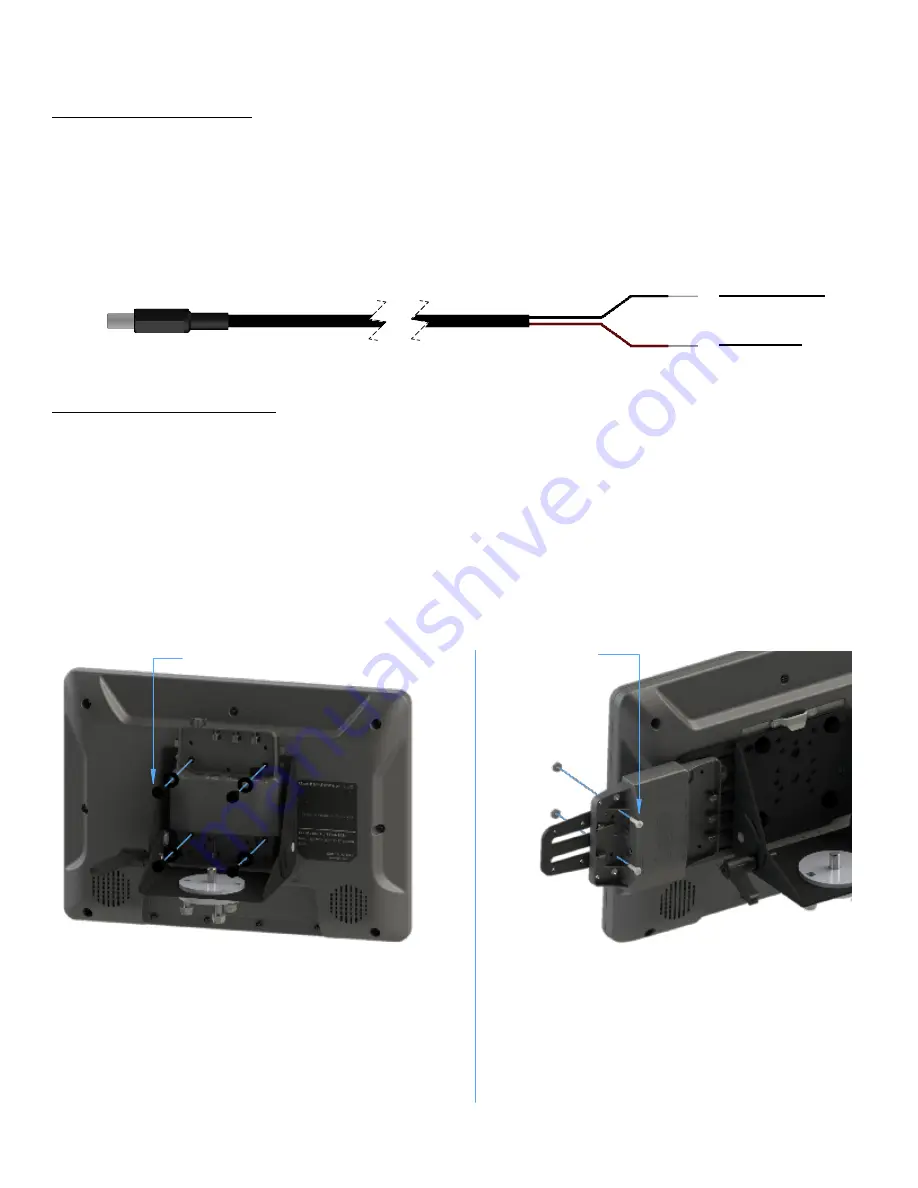
Bare wire power cable installation:
5.
Attach the red cable to the positive power source.
Attach the black cable to the ground.
INSTALLATION - Mounting
It is required to secure and zip-tie the ports listed on page 4, to guarantee performance.
1.
Data input most go through the USB-C port on the hub. A USB-C cable is built into the DeX
2.
docks (sold seperately) and a USB-AtoC cable is inluded in SKU -02 for other applications
needing a USB-A connection.
The dual lock included can be used to securely adhere the hub to a variety of surfaces
3.
including the inside of a dash or console box. Adhere the dual lock to the bottom of the hub.
There are also a variety of hard mounting options available using the holes on the hub. These
4.
options do not include the hardware needed.
The VESA 75mm hole pattern features a 0.265" hole diamter for 1/4-20 bolts.
All other holes feature a 0.160" hole diamter for #6 or #8 bolts.
RED WIRE
- to power
BLACK WIRE
- to ground
1/4-20 Bolts and washers (x4)
If mounting with a Gamber-Johnson
clevis, there is an option to use (4) 1/4-20
bolts through the VESA 75mm hole
pattern to attach the hub to the back of
the clevis. Not all clevises will work.
(Bolts are included with the dock or touch screen.)
If mounting with the Gamber-Johnson
DeX Heads Up Plate, there is an
option to use (2) #6 x 0.500" long
screws and nuts to attach the hub to
the back of the plate.
(Screws and buts are not included)
#6 Bolts
and nuts
(x2)


