background image

5

2. Programming the Irrigation Controller

This section describes the programming steps for a simple irrigation 
schedule. It is followed by a section dealing with more advanced irrigation 
controller operations.

    The irrigation controller is programmed with the aid of 4 buttons:
  Programming Step Selector - used to select the desired programming  
  mode (e.g., clock setting mode)

  Parameter Selection Button - used to select the parameter to be  


  changed (e.g., hour, minute, etc.). The selected parameter can only be  
  changed when its entry is blinking on the display.
 
  Increment Button  - increases the value of the selected parameter (e.g.,  
  when hours is selected, from 06:00 to 07:00).

  Decrement Button  - decreases the value of the selected  parameter    
  (e.g.,whenhours is selected, from 06:00 to 05:00).

To enable the irrigation controller to operate 
the irrigation system at the correct times, the 
current time and current day of the week 
must first be set. 
1. Press   several times until the   appears.

2. Press   The hour digits blink. Set the
  current hour using   and 


(Note the AM

  and PM designations).

3. Press   The minute digits blink. Set the
  current minute using   and  .

4. Press   A blinking up arrow appears at
  the top of the display. Move the arrow to
  the current day of the week using the 


or   button.        

If the most recent data item stops blinking before you finish programming it, 
press     to continue the programming process.

2.1 Setting the Current Time and Day of the Week

Содержание DC-11SF

Страница 1: ...o once every thirty days in the cyclical program Irrigation window in cyclical program mode Weather resistant Irrigation duration modifiable as a function of percentage entered Operation of one to 11...

Страница 2: ...yclical Irrigation 3 3 Setting the Day of the Week and Time for Cyclical and One Time Irrigation Programs 3 4 Irrigation Window In the Cyclical Program Mode 3 5 Opening an Irrigation Window after Star...

Страница 3: ...e controller s left side under the main cover Figure 1 3 Mount the controller to the wall or to the control closet by inserting the mounting screws through the holes indicated Figure 2 Cover the crews...

Страница 4: ...both sides of panel B black wire R red wire VM main valve V1 valve 1 etc Fertilizer Connect the ferrtilizer to terminal number 12 The sensor wires must be connected to the SENS sensor connectors close...

Страница 5: ...e g when hours is selected from 06 00 to 07 00 Decrement Button decreases the value of the selected parameter e g whenhours is selected from 06 00 to 05 00 To enable the irrigation controller to oper...

Страница 6: ...ches from AM PM to a 24 hour time display or vice versa You can switch the time display format at any step in the programming process 2 3 Valve Selection Program an irrigation schedule for each valve...

Страница 7: ...ut fertilization Subsequently fertilization will be added for fertilization will not commence the next 12 minutes 20 of the irrigation duration then regular irrigation will continue for the next 24 mi...

Страница 8: ...ceed to the next step When the blinking arrow reaches Sunday pressing again displays in the center of the display and at the top right of the display To return to the Selecting Adding Irrigation Days...

Страница 9: ...k Press or until the hour displays 2 Press The minute digits blink Press or until the minute displays 30 6 Press v appears 7 Press A blinking appears at the top of thedisplay under Monday Press until...

Страница 10: ...ogram the irrigation controller to operate the irrigation system in a cyclical manner once every x days for the irrigation duration Note Duration for which valve stays open set as described in Section...

Страница 11: ...ays program starts today 1 day program starts tomorrow etc up to 30 days 1 Press until START I appears The last opening time entered appears on the display 2 Press The hour digits blink 3 Set the desi...

Страница 12: ...ed during the hot hours of the day 1 Press until appears on the display next to W OPEN The word OFF or the last OPEN WINDOW time setting entered is displayed 2 Press The word OFF blinks on the display...

Страница 13: ...lay will display the next start time taking into account the window you have set 3 6 Example Programming a Cyclical Irrigation Schedule Let s assume you want to program the irrigation controller to op...

Страница 14: ...pears on the display 4 To close the valve manually before the end of the irrigation duration press until ON appears again on the display Press to close the valve Up to two valves can be operated simul...

Страница 15: ...made to operate a valve manually while the irrigation controller has been suspended or when a valve is meant to open sequentially the word rAin appears on the display and the valve will not open 3 10...

Страница 16: ...pen the third valve enters into wait mode A blinking appears above the number of the waiting valve When one of the first two valves closes the waiting valve opens During manual operation of a waiting...

Страница 17: ...ion controller operation Programmed data are retained if batteries are replaced within 30 seconds 4 3 Permanent Low Battery Warning When the batteries are low and not replaced in a timely maner the ba...

Страница 18: ...long as the conditions defined for activation of the sensor are not met the irrigation schedule will not be implemented The lockout sensor contact remains closed Any valve connected to the controller...

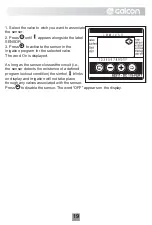
Страница 19: ...gation program for the selected valve The word On is displayed As long as the sensor clossesthe circuit i e the sensor detects the existence of a defined program lockout condition the simbol blinks on...

Страница 20: ...ugh an irrigation line unless a solenoid is fitted on the hydraulic valve Recommended water pressure 1 8 ATM bar Problem Event Cause Solution Move valve handle to AUTO position Replace batteries Repla...

Страница 21: ...h F Sa Su Date ___________________ Valve No The irrigation vegetation area window box porch balcony lawn 1 2 3 4 5 6 7 8 9 10 11 M Tu W Th F Sa Su M Tu W Th F Sa Su M Tu W Th F Sa Su M Tu W Th F Sa Su...

Страница 22: ...22 0 2 0 0 0 0 0 0 0 4 2 0 5 5 1 2 3 4 5 6...

Страница 23: ...23 0 4 4 4 7 8 9 10 11 12 13...

Страница 24: ...GDB162...

Отзывы: