background image

53

Português

O que fazer em caso de interrupção do procedimento 

de descalcificação

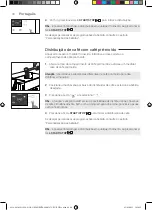
Pode sair do procedimento de descalcificação mantendo pressionada durante 

alguns segundos a tecla 

ON/OFF


ON/OFF

 no painel de controlo. Caso o procedimento 

de descalcificação seja interrompido antes de ser concluído, efetue o seguinte:

1

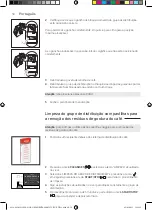
  Esvazie o reservatório de água e lave-o bem.

2

  Encha o reservatório de água com água corrente até à indicação de nível 

CALC CLEAN e volte a ligar a máquina. A máquina aquece e efetua um ciclo de 

enxaguamento automático.

3

  Antes de preparar qualquer bebida, efetue um ciclo de enxaguamento manual 

conforme descrito no respetivo capítulo.

Obs.

: se o procedimento não tiver sido concluído, assim que possível, será 

necessário efetuar outro procedimento de descalcificação. 

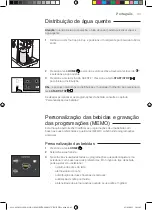
Programações variadas

Ao pressionar a tecla 

CLEAN/SET


clean/setting

, e selecionar "PROGRAMAÇÕES", no visor, 

podem restabelecer-se ou modificar alguns parâmetros da máquina como:


-

Idioma.


-

Filtro de água


-

Tempo de stand-by.


-

Unidade de medida.


-

Dureza da água.


-

Contador de bebida.


-

Som das teclas


-

Programações predefinidas.

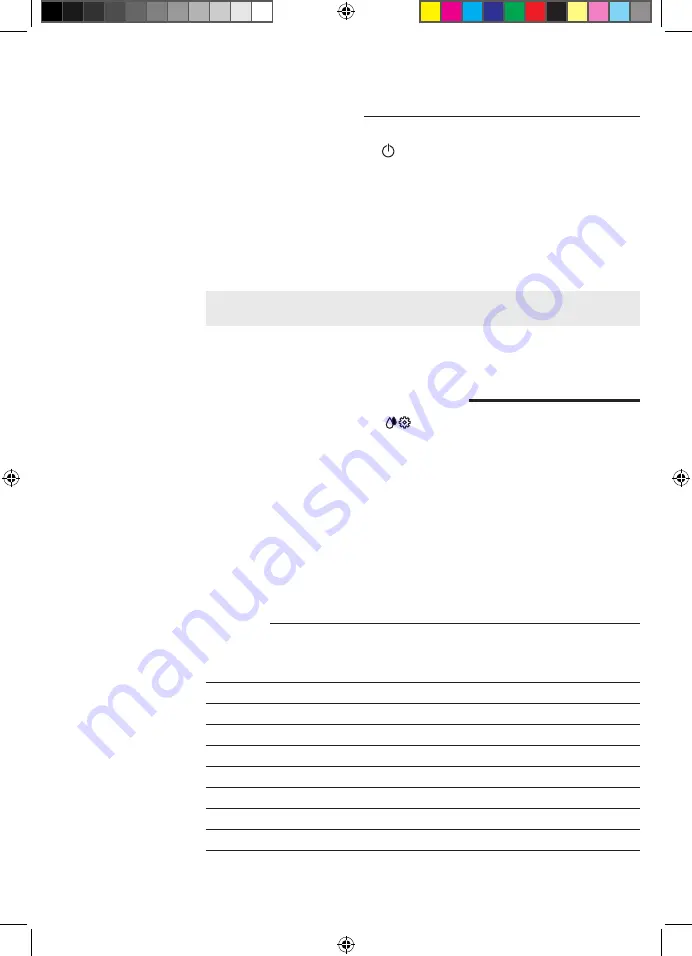
Idioma

Depois de selecionar o ícone de programação dos idiomas, abre-se a lista de 

idiomas disponíveis.

Idiomas disponíveis

PORTUGUÊS

DINAMARQUÊS

CHECO

INGLÊS

GREGO

ESLOVACO

ALEMÃO

POLACO

LITUANO

FRANCÊS

RUSSO

JAPONÊS

ESPANHOL

ROMENO

COREANO

PORTUGUÊS

HÚNGARO

CHINÊS (TRADICIONAL)

HOLANDÊS

BÚLGARO

CHINÊS (SIMPLIFICADO)

4219-465-05211 MAN. GAG. MAGENTA Milk 127V EN-PT Rev 02.indd   53

05/05/2021   16:19:16

Содержание MAGENTA MILK

Страница 1: ...ENGLISH PORTUGUÊS RI8701 SUP 051P GAGGIA MAGENTA MILK Operating instructions Instruções de utilização 4219 465 05211 MAN GAG MAGENTA Milk 127V EN PT Rev 02 indd 1 05 05 2021 16 16 54 ...

Страница 2: ...L 13 14 12 3 29 1 28 15 27 16 17 10 19 18 2 20 21 30 5 4 6 26 25 22 23 24 11 9 8 7 02 4219 465 05211 MAN GAG MAGENTA Milk 127V EN PT Rev 02 indd 2 05 05 2021 16 16 58 ...

Страница 3: ...anual provided separately and store it for future use ENGLISH Obrigado por ter adquirido a Gaggia Magenta Milk Com esta máquina obterá sempre resultados excelentes com simplicidade Graças à interface intuitiva pode escolher entre 9 bebidas e personalizá las em função das suas preferências Antes de ser embalada cada máquina é submetida a rigorosos testes nos nossos laboratórios para garantir a elev...

Страница 4: ... 23 27 28 29 Confermi di voler cambiare la lingua in Italiano In the next steps we will set the correct water hardness level 1 sec 1 min 03 08 26 14 30 23 24 25 15 17 16 18 19 09 10 11 13 04 05 06 07 12 4219 465 05211 MAN GAG MAGENTA Milk 127V EN PT Rev 02 indd 4 05 05 2021 16 17 15 ...

Страница 5: ...stem 14 Brewing coffee based and frothed milk beverages 14 Dispensing hot water 15 Customising beverages and saving settings MEMO 16 Beverage Customisation 16 Coffee grind settings 17 Cleaning and maintenance 18 Cleaning table 18 Cleaning the Capp in Cup system 19 Cleaning the brew group 20 Lubricating the brew group 23 Descaling 24 Descaling procedure 24 What to do if the descaling process is int...

Страница 6: ...buttons 22 Glass milk carafe 8 Espresso tray insertion slot 23 Glass milk carafe lid 9 Full drip tray indicator 24 Capp in Cup system Spout 10 Water tank 25 Milk suction tube 11 Coffee grinder adjustment knob 26 Main body of Capp in Cup system 12 Coffee bean container 27 Water hardness tester 13 Brew group 28 Grinder adjustment key and pre ground coffee measuring spoon 14 Service door 29 Lubricant...

Страница 7: ...nu 5 CLEAN SET clean setting button To open the cleaning and settings menu 6 START STOP START STOP button To start stop the dispensing of the selected beverage or to start stop the procedure indicated on the display Note HOME HOME and CLEAN SET clean setting also work as ESC buttons You can exit the screen by pressing one of the two buttons to go back to the main menu This will not be possible if ...

Страница 8: ... spout scroll through the different pages and select a ESPRESSO LUNGO 2 Press the button until is selected without adding pre ground coffee LUNGO LUNGO 3 Press the START STOP START STOP button to start dispensing The machine will dispense hot water 4 Empty the container and remove the Capp in Cup system from the steam tube 5 Place the container under the steam tube and select HOT WATER 6 Press the...

Страница 9: ...es turn red 3 Use the green and buttons to select the water hardness according to the table below Confirm the setting by pressing Small red squares Value to set Water hardness INTENZA 1 very soft water A 2 soft water A 3 hard water B 4 very hard water C INTENZA water filter We recommend using the INTENZA water filter to limit limescale formation This ensures a longer operating life of your machine...

Страница 10: ...re press the START STOP START STOP button again Remove the INTENZA water filter from the water Set the machine according to the detected water hardness see the Measuring water hardness chapter On the filter base please set one of the following A soft water 1 or 2 small squares B hard water standard 3 small squares C very hard water 4 small squares Replacing the INTENZA water filter When the INTENZ...

Страница 11: ...ma and is served in a medium large cup Coffee 120 ml American coffee American coffee is a less intense long coffee prepared with an espresso to which hot water is added Coffee Water 40 ml 110 ml Cappuccino The cappuccino is an Italian classic among the most loved in the world It is prepared with espresso milk and a milk froth which must be no less than 1 cm thick It is served in a large cup Milk C...

Страница 12: ...e drawing 2 Browse the various pages to find and select the desired coffee Coffee Brewing Brewing coffee using coffee beans Warning only use coffee beans when making espresso Do not put any pre ground unroasted freeze dried or instant coffee in the coffee bean container as they may damage the machine Tip Preheat the cups with hot water to enjoy a warmer coffee 1 Upon positioning the espresso tray ...

Страница 13: ... coffee Use the measuring scoop provided to insert the correct dose in the pre ground coffee compartment 1 Lift the lid of the pre ground coffee compartment and add a little less than one level scoop of pre ground coffee Warning do not insert anything other than pre ground coffee as it may damage the machine 2 Place a cup under the coffee dispensing spout and select the desired beverage 4 Finally ...

Страница 14: ...ilk beverages Tip use only cold milk at a temperature of 5 C approx and with at least a 3 protein content so as to obtain a perfect milk froth You can use either whole milk or semi skimmed milk Also you can use skimmed soy or lactose free milk 1 Lift the carafe lid and pour the milk into the carafe the milk must reach a level between the minimum MIN and the maximum MAX level marks available on the...

Страница 15: ...t to complete the quick cleaning procedure of the milk circuit within 10 seconds However the procedure can also be carried out later by accessing the cleaning menu via the CLEAN SET clean setting button Press the CLEAN button and select the QUICK CLEAN option Then press the button Then follow the instructions shown on the display Note We suggest that you carry out a quick clean at least once a day...

Страница 16: ...he type of beverage you can adjust and or select coffee and milk amount coffee temperature brewing two cups at a time pre ground coffee use aroma intensity only when using coffee beans 4 Once the COFFEE or MILK button has been pressed use the green and buttons to select the desired amount Press to confirm and return to the previous screen where the new quantity will be displayed 5 Press the TEMP b...

Страница 17: ...nter and save the settings indicated in the Beverage type section Coffee grind settings You can adjust the grind setting using the grinder adjustment knob on the coffee bean container The ceramic coffee grinder guarantees a perfect and homogeneous grinding for the preparation of every cup of coffee The aroma is thus preserved ensuring the perfect flavour every time Warning to avoid damages to the ...

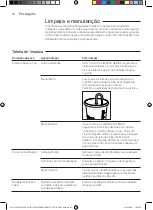
Страница 18: ...cycle by following the instructions described in the chapter Capp in Cup System Cleaning For this cleaning cycle use the Philips Milk Circuit Cleaner Remove the Capp in Cup system and wash all its components under running water Brew group Weekly Remove the brew group and clean it under running water Depending on usage See the Cleaning and lubricating the brew group chapter Monthly Clean the brew g...

Страница 19: ... in Cup system quick and deep clean Both programmes can be selected with the CLEAN SET clean setting button Press the CLEANING button upon selection Quick clean is also recommended after dispensing a milk based beverage For both programmes follow the instructions shown on the display Quick clean programme The quick clean programme includes the milk circuit cleaning with hot water Deep clean progra...

Страница 20: ... Disassemble the glass milk carafe Fig 30 8 Wash all components under running water 9 After cleaning reassemble all the components by following the same procedure in reverse order Cleaning the brew group Warning do not wash the brew group in the dishwasher and do not use dishwashing detergents since they may cause the malfunctioning of the brew group and alter the coffee flavour Removing the brew ...

Страница 21: ...rew group air dry Note to avoid the build up of fibres in its interior do not dry the brew group with cloth 5 Remove the coffee residues drawer Reinserting the brew group 1 Before placing the brew group back into the machine make sure that the two yellow reference marks on the side match If this is not the case perform the following step Make sure that the lever is in contact with the base of the ...

Страница 22: ...or the removal of oily coffee residues Warning use only Gaggia cleaning tablets to remove oily coffee residues 1 Place a container under the coffee dispensing spout 2 Press the CLEAN SET clean setting button and select the CLEAN button shown on the display 3 Select BREW GROUP CLEANING and press the button then press START STOP START STOP button to start the cleaning procedure 4 Follow the instruct...

Страница 23: ...urn off the appliance and disconnect the power cord 2 Remove the brew group and rinse it using lukewarm water see the Cleaning the brew group under running water chapter 3 Apply a thin layer of the lubricant provided around the insertion pin on the lower part of the brew group 4 Apply a thin layer of lubricant to the guides on both sides see figure 5 Reinsert the brew group see the Reinserting the...

Страница 24: ...er if in place 6 Place a large recipient 1 5l under the steam tube and the coffee dispensing spout 7 Follow the instructions shown on the display to launch the descaling procedure This procedure lasts approximately 25 minutes and consists of a descaling cycle and a rinse cycle carried out with dispensing at regular intervals 8 Once the descaling cycle is complete rinse the water circuit and tank b...

Страница 25: ...if the procedure has not been completed it will be necessary to carry out another descaling procedure as soon as possible Other settings By pressing the CLEAN SET clean setting button and selecting SETTINGS on the display you can reset or modify some of the machine parameters including Language Water filter Stand by Time Units Water hardness Beverage counter Button sound Factory settings Language ...

Страница 26: ...r oz SETTING WATER HARDNESS BEVERAGE COUNTER BUTTON SOUND UNITS Beverage counter It is possible to display the number of cups of each beverage that have been dispensed since the first operation of the machine These data cannot be reset Factory settings You can reset the machine to factory default values The machine will require a double confirmation before proceeding Water hardness With WATER HARD...

Страница 27: ...lubricated Switch off the machine Remove the brew group and clean it thoroughly Refer to the Cleaning the Brew Group chapter The brew group is not positioned correctly Switch off the machine Remove the brew group and reinsert it Ensure that the brew group is in the correct position before inserting it Refer to the Reinserting the brew group chapter 05 A problem occurred in the water circuit There ...

Страница 28: ...nter does not reset In this case the display shows the icon even if the container is not full The coffee pucks container has been placed back too quickly Always wait about 5 seconds when you replace the coffee pucks container This way the counter will reset to zero The machine requests to empty the coffee pucks container even if it is not full The machine has not reset the counter last time the co...

Страница 29: ... menu temperature to MAX The machine grinds the coffee beans but no brewing happens The coffee grinder is set to a too fine grinding Adjust the coffee grinder to a coarser grinding The coffee dispensing spout is blocked Dispense a long coffee from pre ground coffee but without actually adding pre ground coffee The nozzles of the coffee dispensing spout are blocked Clean the nozzles of the coffee d...

Страница 30: ... water filter There is some water under the machine The drip tray is too full and has spilled over Empty the drip tray when the mark appears though the tray Always empty the drip tray before starting the descaling procedure The machine is in DEMO mode While switching on the machine you pressed a combination of buttons HOME HOME CLEAN SET clean setting HOME HOME CLEAN SET clean setting Switch the m...

Страница 31: ...Dimensions 224 x 357 x 435 mm Weight 7 7 kg Power cord length 1200 mm Control panel Front panel Water tank 1 8 litres Removable type Coffee bean container capacity 250 g Coffee pucks container capacity 15 Pump pressure 15 bar Boiler Stainless steel boiler Safety devices Thermal Fuse 4219 465 05211 MAN GAG MAGENTA Milk 127V EN PT Rev 02 indd 31 05 05 2021 16 18 29 ...

Страница 32: ...é e leite emulsionado 41 Distribuição de água quente 43 Personalização das bebidas e gravação das programações MEMO 43 Personalização das bebidas 43 Ajuste do grau de moagem 45 Limpeza e manutenção 46 Tabela de limpeza 46 Limpeza do sistema Capp in Cup 47 Limpeza do grupo de distribuição 48 Lubrificação do grupo de distribuição 51 Descalcificação 52 Procedimento de descalcificação 52 O que fazer e...

Страница 33: ...etora 22 Jarra de leite de vidro 8 Ranhura de introdução do espresso tray 23 Tampa da jarra de leite de vidro 9 Indicador de bandeja de limpeza cheia 24 Bico do sistema Capp in Cup 10 Reservatório de água 25 Tubo de aspiração do leite 11 Alavanca de ajuste do moinho de café 26 Corpo central do sistema Capp in Cup 12 Recipiente de café em grãos 27 Tester da dureza da água 13 Grupo de distribuição 2...

Страница 34: ...u das bebidas 5 Tecla CLEAN SET clean setting Para aceder ao menu da limpeza e das programações 6 Tecla START STOP START STOP Para iniciar parar a distribuição da bebida selecionada ou iniciar parar o procedimento indicado no visor Obs as teclas HOME HOME CLEAN SET clean setting também são teclas ESC É possível sair dos ecrãs ao pressionar uma destas teclas que fazem regressar ao menu inicial exce...

Страница 35: ... percorra as várias páginas e selecione um ESPRESSO LUNGO 2 Pressione a tecla até selecionar sem adicionar café pré moído LUNGO LUNGO 3 Pressione a tecla START STOP START STOP para iniciar a distribuição A máquina distribuirá água quente 4 Esvazie o recipiente e remova o sistema Capp in Cup do tubo de vapor 5 Posicione o recipiente por baixo do tubo de vapor e selecione a bebida ÁGUA QUENTE 6 Pres...

Страница 36: ...ilize as teclas verdes e para selecionar o valor da dureza que pretende configurar segundo a tabela apresentada abaixo Em seguida confirme através da tecla Número de quadrados vermelhos Valor a definir Dureza da água INTENZA 1 água muito mole A 2 água mole A 3 água dura B 4 água muito dura C Filtro de água INTENZA É aconselhável instalar o filtro de água INTENZA para limitar a formação de calcário...

Страница 37: ...ento de ativação do filtro pressione novamente a tecla START STOP START STOP Remova o filtro de água INTENZA da água e programe o em função da dureza da água detetada consulte o capítulo Medição da dureza da água e e especificada na base do filtro A água mole corresponde a 1 ou 2 quadrados B água dura padrão corresponde a 3 quadrados C água muito dura corresponde a 4 quadrados Substituição do filt...

Страница 38: ...lação ao expresso Tem um aroma mais suave e é servido em chávena média grande Café 120 ml Americano O americano é um café longo menos intenso preparado com um expresso ao qual é adicionado água quente Café Água 40 ml 110 ml Cappuccino O cappuccino é um clássico italiano entre os mais adorados no mundo É preparado com café expresso leite e espuma de leite que deve ter pelo menos 1 cm É servido em c...

Страница 39: ... Percorra as várias páginas para encontrar e selecionar o café desejado Distribuição do café Distribuição do café com café em grãos Atenção utilize apenas café em grãos para espresso Não introduza café moído café não torrado café liofilizado ou solúvel no recipiente do café em grãos pois poderão danificar a máquina Conselho para obter um café mais quente pré aqueça as chávenas com água quente 1 Po...

Страница 40: ...o Através do respetivo medidor fornecido introduza a dose correta no compartimento de café pré moído 1 Abra a tampa do compartimento de café pré moído e adicione um medidor raso de café pré moído Atenção não introduza substâncias diferentes de café pré moído para não danificar a máquina 2 Posicione uma chávena por baixo do distribuidor de café e selecione a bebida desejada 4 Por fim pressione a te...

Страница 41: ...a bloquear se na posição Distribuição das bebidas à base de café e leite emulsionado Conselho utilize leite frio a uma temperatura de cerca de 5 C com um conteúdo proteico de pelo menos 3 para garantir um resultado ideal para a espuma Pode utilizar leite gordo ou parcialmente desnatado Pode utilizar também leite desnatado leite de soja e leite sem lactose 1 Levante a tampa da jarra e deite o leite...

Страница 42: ...istema Capp in Cup na jarra de leite até alcançar o fundo da jarra QUICK MILK CLEAN to start press 6 Depois de cada preparação de bebidas à base de café e leite emulsionado poderá efetuar o procedimento de limpeza rápida do circuito do leite no prazo de 10 segundos De qualquer forma o procedimento pode ser realizado posteriormente ao entrar no menu de limpeza através da tecla CLEAN SET clean setti...

Страница 43: ...o Personalização das bebidas Personalização das bebidas e gravação das programações MEMO Esta máquina permite lhe modificar as programações de uma bebida com base nas suas preferências e guardá las MEMO substituindo programações anteriores Personalização das bebidas 1 Pressione a tecla HOME HOME 2 Selecione a sua bebida 3 No ecrã são visualizadas todas as programações que poderá ajustar e ou selec...

Страница 44: ...tre 5 graus de intensidade diferentes Sempre que pressionar a tecla a intensidade muda um grau O visor exibe a intensidade escolhida ou a seleção do café pré moído 1 Muito suave 2 Suave 3 Normal 4 Forte 5 Muito forte 6 Pré moído Obs a função Pré moído permite distribuir apenas um café de cada vez 9 Depois de personalizar a bebida em função dos seus gostos pode distribuí la através da tecla START S...

Страница 45: ...mpa do recipiente de café em grãos 2 Pressione e rode o botão de ajuste da moagem colocado dentro do recipiente de café em grãos um nível de cada vez Utilize a chave para o ajuste da moagem As marcas de referência no compartimento do recipiente de café em grãos indicam o grau de moagem 3 Pode selecionar entre 5 graus de moagem diferentes Quanto mais pequena é a marca mais forte e denso é o café Ob...

Страница 46: ...ra Também a pode lavar na máquina de lavar loiça Mensalmente Inicie o ciclo de LIMPEZA INTENSA seguindo as instruções descritas no capítulo Limpeza do sistema Capp in Cup Para este ciclo de limpeza utilize o produto para a limpeza do circuito do leite da Philips Milk Circuit Cleaner Em seguida desmonte o sistema Capp in Cup e lave todos os componentes debaixo de água corrente Grupo de distribuição...

Страница 47: ...o superior Limpeza do sistema Capp in Cup Programa de limpeza do sistema Capp in Cup A máquina tem dois programas para limpar o sistema Capp in Cup a limpeza rápida e a limpeza intensa Ambos os programas podem ser selecionados através da tecla CLEAN SET clean setting ao pressionar em seguida a tecla LIMPEZA A limpeza rápida também é proposta no final da distribuição das bebidas à base de leite Par...

Страница 48: ... fig 30 8 Lave todos os componentes debaixo de água corrente 9 No final da limpeza volte a montar todos os componentes ao efetuar o mesmo procedimento por ordem inversa Limpeza do grupo de distribuição Atenção não lave o grupo de distribuição na máquina de lavar loiça e não utilize detergentes pois poderá provocar o funcionamento irregular do grupo de distribuição e o sabor do café poderá ser afet...

Страница 49: ...ão ao ar Obs não seque o grupo de distribuição com panos para evitar a acumulação de fibras no seu interior Reintrodução do grupo de distribuição 1 Antes de reintroduzir o grupo de distribuição na máquina certifique se de que as duas marcas de referência amarelas na parte lateral coincidem Caso contrário efetue o passo seguinte Certifique se de que a alavanca está em contacto com a base do grupo d...

Страница 50: ...ição do café 2 Pressione a tecla CLEAN SET clean setting e selecione a tecla LIMPEZA visualizada no visor 3 Selecione LIMPEZA DO GRUPO DE DISTRIBUIÇÃO e pressione a tecla em seguida pressione a tecla START STOP START STOP para iniciar o procedimento de limpeza 4 Siga as instruções visualizadas no visor para limpar corretamente o grupo de distribuição 5 O procedimento dura cerca de 5 minutos e pode...

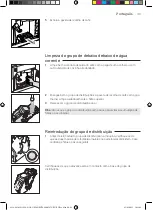
Страница 51: ...abo de alimentação 2 Remova o grupo de distribuição e enxague o com água morna consulte o capítulo Limpeza do grupo de distribuição debaixo de água corrente 3 Aplique uma camada ligeira doe lubrificante fornecido à volta do pino de introdução na parte inferior do grupo de distribuição 4 Aplique uma camada ligeira de lubrificante nas guias em ambos os lados consulte a figura 5 Reintroduza o grupo d...

Страница 52: ... a garrafa de solução descalcificante Gaggia no reservatório de água e em seguida encha o com água até alcançar o nível CALC CLEAN Em seguida reintroduza o na máquina 6 Posicione um recipiente grande 1 5 l debaixo do tubo de vapor e sistema de distribuição do café 7 Siga as instruções visualizadas no visor para iniciar o procedimento de descalcificação Este procedimento dura cerca de 25 minutos e ...

Страница 53: ...o capítulo Obs se o procedimento não tiver sido concluído assim que possível será necessário efetuar outro procedimento de descalcificação Programações variadas Ao pressionar a tecla CLEAN SET clean setting e selecionar PROGRAMAÇÕES no visor podem restabelecer se ou modificar alguns parâmetros da máquina como Idioma Filtro de água Tempo de stand by Unidade de medida Dureza da água Contador de bebi...

Страница 54: ...dade de medida em ml ou once SETTING WATER HARDNESS BEVERAGE COUNTER BUTTON SOUND UNITS Contador de bebida É possível visualizar para cada bebida o número de chávenas que foram distribuídas desde o primeiro funcionamento da máquina Estes dados não suscetíveis de reset Programações predefinidas É possível restaurar a máquina para os valores de fábrica a máquina solicitará uma dupla confirmação ante...

Страница 55: ...ujo ou não está bem lubrificado Desligue a máquina Remova o grupo de distribuição e limpe o bem Consulte o capítulo Limpeza do grupo de distribuição O grupo de distribuição não está posicionado corretamente Desligue a máquina Remova o grupo de distribuição e volte a introduzi lo Certifique se de que o grupo de distribuição está na posição correta antes de o inserir Consulte o capítulo Reintrodução...

Страница 56: ... Se a gaveta de recolha das borras de café for esvaziada com a máquina desligada o contador dos ciclos de café é reposto a zero Neste caso o visor apresenta o ícone mesmo que a gaveta não esteja cheia A gaveta de recolha das borras de café foi reposicionada de forma demasiado rápida Aguarde sempre cerca de 5 segundos quando se reposiciona a gaveta de recolha das borras de café Desta forma o contad...

Страница 57: ... café para uma moagem mais fina A máquina está a efetuar o procedimento de regulação automática Distribua algumas chávenas de café de modo a que a máquina se regule automaticamente A conduta de saída do café está bloqueada Limpe a conduta de saída do café com uma colher conforme descrito no capítulo Limpeza do grupo de distribuição debaixo de água corrente O café não está suficientemente quente A ...

Страница 58: ...tro INTENZA Verifique a embalagem e introduza a junta no filtro INTENZA Não é possível ativar o filtro INTENZA Já está um filtro ativo A máquina indica a percentagem utilizada do filtro Se de qualquer forma desejar ativar um novo filtro antes da expiração do filtro que está a ser utilizado este último deve ser desativado em primeiro lugar conforme descrito no parágrafo Substituição do filtro de ág...

Страница 59: ...tinhola de manutenção Material do corpo Termoplástico Dimensões 224 x 357 x 435 mm Peso 7 7 kg Comprimento do cabo 1200 mm Painel de comando Frontal Reservatório de água 1 8 litros Extraível Capacidade do recipiente de café em grãos 250 g Capacidade da gaveta de recolha das borras 15 Pressão da bomba 15 bar Caldeira Caldeira em inox Dispositivos de segurança Termofusível Gama de café disponível em...

Страница 60: ... Capitale Sociale Euro 104 000 i v REA MI1387376 R I Cod Fisc 02069680367 Part IVA IT 13054780153 www gaggia it www gaggia com GAGGIA S p A reserves the right to make all changes deemed necessary GAGGIA S p a reserva se o direito de efetuar as alterações consideradas necessárias 4219 465 05211 MAN GAG MAGENTA Milk 127V EN PT Rev 02 indd 60 05 05 2021 16 19 23 ...

Отзывы: