background image

• 13 •

ENGLISH

Important to know……

1.  The taste of your coffee depends on the characteristics 

of the beans from which it is made, the type of bean, 
where it was grown and processed. The coffee beans 
that are roasted for a longer period of time and at higher 
temperatures will be much darker in colour.Darker beans 
will produce a richer cup of coffee than the lightly-roasted 
beans.

2.  A variety of dark roasts are available from which you 

can choose to brew your espresso. Each of these roasts 
is a blend of coffee beans that are roasted at a specifi c 
temperature producing a specifi c type of fl avour.There are 
decaffeinated beans that have up to 98% of the caffeine 
content removed. The next time you purchase coffee for 
your espresso maker, experiment with one of the many 
kinds of coffee being sold. You may just fi nd that it tastes 
better than the blend you have been using.

3.  A fi ne “espresso grind” for pump-driven machines must be 

used. Be sure to ask for this when buying coffee or when 
having beans ground. Do not use a blade-type grinder 
because it makes too much coffee dust and produces an 
irregular grind.

4.  The mark of real espresso is its dark color, rich taste and 

the light brown, natural froth called “crema” in Italian.

5.  Cappuccino is simply a combination of espresso and hot, 

frothy milk.Cappuccino is usually topped with cinnamon, 
nutmeg or cocoa powder.

6.  Espresso Coffee should be served immediately after it is 

made.

7.  Espresso is served in 2 to 2 ½ oz. demitasse cups. A 4 or 

6 oz. cup or glass is used for cappuccino

8.  Ideally, coffee beans should be ground immediately before 

using. Remember, it must be an “espresso grind” for 
pump-driven espresso machines.

9.  It’s best to store ground coffee or beans in an airtight 

container in the freezer of your refrigerator. Ground coffee 
tends to absorb food odours.

Warning! 

Never brew coffee when the steam 

function is on, as the temperature is too high and 
there is a risk of burns.

How to make a good Espresso coffee:

1  Follow the procedure described in section 

“Prepara-

tion”

.

2  Insert the frothing jet device (13) into the fi lter holder (9). 
  Insert the “Perfect crema” fi lter for ground coffee (11) 

into the fi lter holder, both for brewing 1 or 2 coffee cups.

  Insert the fi lter holder (9) into the brew group (14) from 

the bottom and wait for it to heat up.

3  Place a container under the fi lter holder (9). Preheat the 

fi lter holder by placing the hot water/brew button (2) on 

“on”


(this operation is only necessary for the 

fi rst coffee)

.

  Water will start coming out.
4  Once 150 cc of water have been dispensed, bring the hot 

water/brew button (2) onto 

“off”

5  Wait for the machine to reach the correct temperature 

with the fi lter holder cup inserted (warm-up time is about 
6 minutes). 

  In the meantime, prepare cups, milk and coffee, etc.
6  After warm-up, remove the fi lter holder (9) and fi ll it with 

ground coffee using the measuring scoop provided. 

  Add one measuring scoop of coffee for each cup. 
  Do not add too much coffee. 
 

Tamp the coffee with the appropriate coffee presser (18).

  Do not tamp too much.
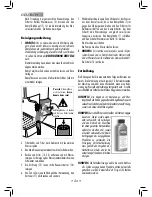
7  Clean any excess coffee from the rim of fi lter holder (9). 

Insert fi lter holder into brew head by holding handle ap-
proximately 45 degrees to the left as you face machine. 
When properly aligned,move handle fi rmly to the right to 
lock into position. 

  The handle should point to the front of the machine or 

slightly to the right.

8  Place one or two espresso cups on the drip plate to line up 

with the spouts of the fi lter holder. Press the hot water/
coffee switch (2).

9   When the cups are 3/4 full, press again the coffee 

switch(2). The more water you allow to fl ow, the weaker 
the coffee. When properly made, the espresso will have a 

Содержание 10001699

Страница 1: ...le droit d apporter toute modification qui se rend n cessaire GAGGIA S p a se reserva el derecho de hacer toda modificaci n que cree necesaria GAGGIA S p a behoudt zich het recht voor alle nodig geach...

Страница 2: ...ISTRUZIONI PER L USO OPERATING INSTRUCTIONS GEBRAUCHSANWEISUNG MODE D EMPLOI INSTRUCCIONES DE USO GEBRUIKSAANWIJZING INSTRUC OES E MODO DE EMPREGO...

Страница 3: ...talled by protruding the lower part of the external sleeve as shown in figure Gewindenutmutter auf Dampfrohr aufsetzen Gummiring 3 in D se 4 einsetzen Gumminiederhalter 2 auf Gummiring 3 aufsetzen Kom...

Страница 4: ...nza o di conoscenze pratiche a meno che siano state adeguatamente istruite all uso del dispositivo o che agiscano sotto la supervisione di una persona responsabile della loro incolumit I bambini devon...

Страница 5: ...essereinserita in una presa polarizzata solo in un verso Se la spina non entra correttamente nella presa provare a girarla Senonentraancoracorrettamentecontattare un elettricista qualificato Non modif...

Страница 6: ...liceoperazioneviassicuraun erogazioneottimale e deve essere eseguita al primo avvio o quando la macchina rimane inutilizzata per lungo tempo per pi di 2 settimane N B L acqua erogata deve essere vuota...

Страница 7: ...osa dovete sapere 1 Il sapore dell espresso dipende dalla quantit e dal tipo di caff utilizzato Il particolare sapore di un chicco di caff dipende da diversi fattori ma il suo gusto ed il suo aroma so...

Страница 8: ...posizione spento 6 Dopo il riscaldamento togliere il porta ltro 9 e inserire la cialda assicurarsi che la carta della cialda non fuoriesca dal porta ltro 7 Inserire il porta ltro nella macchina con u...

Страница 9: ...vapore 7 in senso antiorario per far fuoriuscire il vapore IMPORTANTE La pressione del vapore aumenter col ruotare della manopola N B Si consiglia un erogazione massima di 60 secondi 7 Ruotare il bric...

Страница 10: ...vapore Far uscire dal tromboncino una quantit d acqua pari a due tazze da cappuccino Chiudere la manopola vapore 7 e premere l interruttore acqua calda caff e l interruttore vapore Spegnere la macchi...

Страница 11: ...rbatoio dell acqua 9 Fig 02 Risciacquare il serbatoio e riempirlo con acqua fresca potabile 10 Fig 03 Sistemare un contenitore sotto al tubo vapore pannarello Aprire lentamente la manopola del rubinet...

Страница 12: ...rdita di acqua dal portafiltro Che il portafiltro sia stato inserito correttamente Che la guarnizione non sia sporca o consumata Che non vi siano residui di caff sul bordo del portafiltro L espresso h...

Страница 13: ...withreducedphysical sensoryormentalcapabili ties or lack of experience and knowledge unless they have been given supervision or instruction concerning use of the appliance by a person responsible for...

Страница 14: ...y feature this plug will t in a polarized outlet only one way If the plug does not t fully in the outlet reverse the plug If it still does not t contact a quali ed electri cian Do not attempt to defea...

Страница 15: ...st start up when the machine remains inactive for a long time more than 2 weeks NOTE Dispensed water must be emptied into an adequate drain It is not suitable for food use If the container lls up stop...

Страница 16: ...ns in an airtight container in the freezer of your refrigerator Ground coffee tends to absorb food odours Warning Never brew coffee when the steam function is on as the temperature is too high and the...

Страница 17: ...e hot water brew button 2 onto off 6 After the warm up remove the lter holder 9 and insert thepod Makesurethepaperofthepoddoesnotoverhang the lter holder 7 Insert the lter holder into the machine with...

Страница 18: ...is just under the surface of the milk See Fig 03 6 Slowly turn steam valve knob 7 counter clockwise to release steam IMPORTANT The more you turn the knob the greater the steam pressure for frothing N...

Страница 19: ...ionally as the water pressure changes during use Be certain to empty drip tray 12 as required Descaling Limescale normally builds up with the use of the appliance The machine needs descaling every 1 2...

Страница 20: ...water 10 Fig 03 Place a container under the steam wand Pannarello Open the knob 7 slowly by turning it counter clockwise and press the hot water brew button 2 11 Dispense the whole water tank from the...

Страница 21: ...ound too coarsely Water leaking excessively from lter holder Filter holder not properly inserted in brew head Gasket in brewing head dirty or worn Coffee grinds not cleaned off the rim of lter holder...

Страница 22: ...19 ENGLISH...

Страница 23: ...elektrischen Schl gen und Unf llen einzuschr nken 1 Alle in diesem oder jedem anderen in der Verpackung enthaltenen Heft angegebenen Anweisungen und Informa tionen aufmerksam durchlesen ehe die Espres...

Страница 24: ...svorrichtung so kann dieser SteckernurineinerRichtungindiegepolteSteckdose eingesteckt werden Passt der Stecker nicht korrekt in die Steckdose muss der Stecker umgedreht werden Passt der Stecker dann...

Страница 25: ...bei der ersten Inbetriebnahme nach einem l ngeren Zeitraum der Nichtbenutzung der Maschine l nger als 2 Wochen HINWEIS Das ausgegebene Wasser muss ber einen entsprechenden Ab uss entsorgt werden und d...

Страница 26: ...en Kaffee oder die Kaffee bohneninhermetischverschlossenenDosenimGefrierfach aufzubewahren Gemahlener Kaffee nimmt leicht Ger che an Zubereitung eines guten Espresso 1 DieimKapitel Zubereitung beschri...

Страница 27: ...ser Kaffeeschalter 2 wieder in die Position aus stellen 6 Nach dem Aufheizen den Filterhalter 9 abnehmen und den Pad einlegen Sicherstellen dass das Papier des Kaffeepads nicht ber den Filterhalter be...

Страница 28: ...ef llten Becher unter die Dampfd se stellen Siehe Fig 03 6 Den Knopf des Dampfabgabeventils 7 gegen den Uhrzeigersinndrehen umdenDampfaustretenzulassen WICHTIG beiDrehendesKnopfsnimmtderDampfdruck zu...

Страница 29: ...lter f r Hei wasser Kaffee und den Dampfschalter Aus dem Schacht eine Wassermenge von gleich zwei Tassen Cappuccino auslassen Den Dampfhahn 7 schlie en und Den Schalter Warmwasser Kaffe 2 dr cken Die...

Страница 30: ...tanks wiederholen 9 Fig 02 Den Tank aussp len und mit frischem Trink wasser f llen 10 Fig 03 EinenBeh lterunterdieDampfd se Pannarel lo stellen DenDrehknopfdesReglers 7 langsam ffnen indem er im Gegen...

Страница 31: ...ll dem Filterhalter Ob der Filterhalter richtig eingesetzt wurde Ob die Dichtung verschmutzt oder verschlissen ist Ob sich Kaffeereste am Rand des Filterhalters be nden Der Espresso weist nicht die ty...

Страница 32: ...29 DEUTSCH...

Страница 33: ...rendre les pr cautions suivantes a n d viter les d charges lectriques les courts circuits et les accidents corporels 1 Lire toutes les instructions et les indications donn es dans cette brochure ainsi...

Страница 34: ...Si la che n entre pas correctement dans la prise essayer de la tourner S il est encore impossible de l ins rer contacter un technicien quali Ne jamais essayer d alt rer cette mesure de s curit 4 Si l...

Страница 35: ...ntit une distribution optimale et est effectuer lors du premier d marrage lorsque la machine reste inactive pendant une longue p riode pendant plus de 2 semaines NOTE L eau distribu e doit tre vid e d...

Страница 36: ...p ciale espresso 9 Lecaf mouluouengraindoit treconserv dansunbocal tanche dans la partie cong lateur de votre r frig rateur Le caf moulu prend rapidement le go t des aliments Attention Ne pas distribu...

Страница 37: ...aude caf 2 sur teint 6 Apr s le chauffage enlever le porte ltre 9 et introduire la dosette s assurer que le papier de la dosette ne sort pas du porte ltre 7 Introduire le porte ltre dans la machine av...

Страница 38: ...ce que le voyant de temp rature correcte atteinte 5 s allume Placez alors le pichet lait rempli moiti sous le bec vapeur Voir g 03 6 Tournez lentement le bouton de la valve 7 d en sens inverse des ai...

Страница 39: ...e distributeur 17 et le nettoyer Cela d pendra de la fr quence d utilisation de la machine 7 Si la machine n est pas utilis e pour longtemps d chargez l eau de la chaudi re tournant en sens inverse de...

Страница 40: ...t sur l interrupteur ON OFF 1 et la garder ainsi pendant 3 minutes 8 R p ter les op rations d crites au point 7 jusqu vider compl tement le r servoir eau 9 Fig 02 Rincer le r servoir et le remplir d e...

Страница 41: ...Porte ltre mal verrouill dans l l ment percolateur Joint de l l ment percolateur sale ou us Poudre de caf sur le bord du porte ltre Il n y a presque pas de mousse la surface de l espresso Caf moulu t...

Страница 42: ...39 FRAN AIS...

Страница 43: ...iesgo de sacudidas el ctricas o incendios 1 Leer cuidadosamente todas las instrucciones e informacio nes anotadas en este manual y en cualquier otro folleto contenido en el embalaje antes de iniciar o...

Страница 44: ...piece 3 Sielcabledesuministroel ctricotieneunenchufepo larizado un borne es m s ancho que el otro como medida de seguridad este enchufe entrar en una toma de corriente polarizada s lo de una manera Si...

Страница 45: ...rimer uso o despu s de un per odo de inactividad Esta simple operaci n asegura un suministro ptimo y debe ser realizada en la primera puesta en marcha cuando la m quina permanece un largo per odo sin...

Страница 46: ...uina espresso de bomba 9 Se aconseja conservar el caf molido o en granos en tarros herm ticos en el congelador El caf molido absorbe f cilmente los olores Como preparar un buen Espresso 1 Seguir el pr...

Страница 47: ...spu sdesuministrar150ccdeagua colocarelinterrup tordeaguacaliente caf 2 enlaposici n apagado 6 Despu s de que se haya calentado extraer el porta ltro 9 e introducir la pastilla de caf asegurarse de qu...

Страница 48: ...eno hasta al mitad con leche fr a por debajo de la boquilla del vapor Ver Fig 03 6 Hacer girar lentamente la perilla de la v lvula de salida vapor 7 en sentido antihorario para hacer salir el vapor IM...

Страница 49: ...entes en el pa s donde se usa NOTA No beber la soluci n descalci cante y los productos suministrados hasta completar el ciclo No utilizar bajo ning n concepto vinagre como producto descalci cante 1 Fi...

Страница 50: ...p sito de agua quede completamente vac o 9 Fig 02 Enjuagar el dep sito y llenarlo con agua potable fresca 10 Fig 03 Colocarunrecipientedebajodeltubodevapor Pannarello Abrir lentamente el mando 7 gir n...

Страница 51: ...masiado grueso Excesiva p rdida de agua del porta ltro Si el porta ltro ha sido colocado correctamente Si el empaque est sucio o gastado Si existen residuos de caf en le borde del porta ltro El espres...

Страница 52: ...49 ESPA OL...

Страница 53: ...re brochure dan ook die zich in de verpakking mocht bevinden doorlezen alvorens het espresso apparaat te gebruiken 2 Geen hete oppervlakken aanraken 3 De kabel stekkers of het apparaat zelf niet onder...

Страница 54: ...bruikt worden in een gepola riseerdstopcontact Alsdestekkerniethelemaalpast in het stopcontact draai de stekker om Als het dan nog niet past neem contact op met een bevoegde elektricien Probeer de vei...

Страница 55: ...ekert van een optimale afgifte en dient uitgevoerd te worden bij de ingebruikname wanneer de machine gedurende een lange tijd niet wordt gebruikt voor meer dan 2 weken N B Het water dat verstrekt word...

Страница 56: ...pomp 9 Er wordt aangeraden de gemalen of ongemalen kof e in een hermetisch afgesloten verpakking in de diepvries te bewaren Gemalen kof e absorbeert makkelijk geuren Let op Geen kof e afgeven wanneer...

Страница 57: ...t de schakelaar voor heet water kof e 2 weer in stand uit worden gezet 6 Na de opwarming de lterhouder 9 verwijderen en de kof epad inbrengen Zorg ervoor dat het papier van de kof epad niet uit de lte...

Страница 58: ...e helft met koude melk gevulde kan onder de stoompijp plaatsen Zie Fig 03 6 Draai de knop van de stoomkraan 7 langzaam tegen de klok in om de stoom eruit te laten komen BELANGRIJK De druk van de stoom...

Страница 59: ...psysteem 14 schoon Deze schoonhouden 6 Draai de douchekop 17 regelmatig afhankelijk van het gebruik los en maak hem schoon 7 Als de machine langere tijd niet gebruikt wordt het water uitdeverhitterlat...

Страница 60: ...irca 150 ml per kopje uit het stoom heetwaterpijpje SchakelvervolgensdemachineuitmetdeschakelaarON OFF 1 en laat deze gedurende 3 minuten uit 8 Herhaal de handelingen beschreven bij punt 7 totdat het...

Страница 61: ...grof gemalen is Er lekt te veel water uit de lterdrager Of de lterdrager goed is aangebracht Of de afdichting niet vuil of versleten is Of er geen kof eresten op de rand van de lterdrager aanwezig zij...

Страница 62: ...59 NEDERLAND...

Страница 63: ...ncia e conhecimento a menos que n o tenham sido instru das ou sejam supervi sionadas por uma pessoa respons vel por sua seguran a Deve se supervisionar as crian as para que n o brinquem com o aparelh...

Страница 64: ...cha n o se adapta perfeitamente na tomada inverta a cha Se esta ainda n o se adaptar contacte um electricista quali cado N o tente for ar as medidas de seguran a 4 Se o cabo de alimenta o estiver dan...

Страница 65: ...istribui o e deve ser realizada na primeira utiliza o quando a m quina permanecer inutilizada por um longo per odo de tempo por mais de 2 semanas NOTA A gua distribu da deve ser esvaziada em uma aprop...

Страница 66: ...orbe facilmente os cheiros Aten o N o distribua caf quando a fun o vapor estiver seleccionada porque a temperatura muito elevada e h o risco de queimaduras Como prepar um bom Expresso 1 Sigaoprocedime...

Страница 67: ...Ap s o aquecimento remova o porta ltro 9 e insira a pastilha certi que se que o papel da pastilha n o que fora do porta ltro 7 Insira o porta ltro na m quina com um movimento de 45 para a esquerda 8 R...

Страница 68: ...horario para deixar sair o vapor IMPORTANTE A press o do vapor aumenta virando a manopula N B Aconselha se uma distribui o m xima de 60 segundos 7 Virar a carafe com movimento circular prestando aten...

Страница 69: ...igual a duas x caras de cappuccino Fecharamaniveladevapor 7 epressionaro interruptor de gua quente caf e o interruptor de vapor Desligar a m quina Nunca acionar a bomba sem gua 8 N B E normal que uma...

Страница 70: ...io e encha o com gua fresca pot vel 10 Fig 03 Coloque um recipiente abaixo do tubo de vapor Pannarello Abra lentamente o bot o da torneira 7 virando o no sentido contr rio ao dos ponteiros do rel gio...

Страница 71: ...perda de gua do porta ltro Que o porta ltro seja inserido corretamente Que a veda o n o seja suja ou consumida Que n o hajam residuos de caf na borda do porta ltro O espresso tem pouco creme Que o caf...

Страница 72: ...69 PORTUGAL...

Страница 73: ...sce il reimpiego e o riciclo dei materiali di cui composta l apparecchiatura Lo smaltimento abusivo del prodotto da parte dell utente comporta l applica zione delle sanzioni amministrative previste da...

Страница 74: ...ipula de forma adecuada Para abtener informa ci n m s detallada sobre el reciclaje de este produc to p ngase en contacto con la administraci n de su ciudad con su servicio de desechos del hogar o con...

Страница 75: ......

Страница 76: ......

Отзывы: