Gaggenau DI 461-131 Скачать руководство пользователя страница 15

15

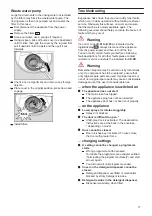
Switching off the appliance

Short time after the end of the programme:

Open the door.
Switch off ON/OFF switch 

1

.

Turn off the tap (not applicable if Aqua-Stop fitted).
Remove the utensils when they have cooled down.

Warning

At the end of the programme please open the door fully
and not partially when emptying the dishwasher. Any
escaping water vapour could damage sensitive
worktops.

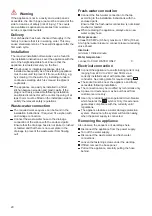
Interrupting the programme

Open the door.
Switch off ON/OFF switch 

1

.

The LEDs go out. The programme is saved. 
If the door was opened on an appliance which has a
warm water connection or is heated, first leave the
door ajar for several minutes and then close.
Otherwise, expansion (pressure) may cause the
appliance door to spring open or water to run out of
the appliance.
To continue the programme, switch on the ON/OFF
switch

1

 again.

Close the door.

Terminating the programme (Reset)

Open the door.

Press START button 

10

 for approx 3 sec. 

 is

indicated on the digital display 

3

.

Close the door.
The programme sequence lasts approx. 1 min.

 is indicated on the digital display 

3

 (buzzer

sounds).
Open the door.
Switch off ON/OFF switch 

1

.

Close the door.

Changing the programme

When the START button 

10

 has been pressed, the

programme cannot be changed.
The only way a programme can be changed is by
Cancel programme (reset).

Intensive drying

The final rinse uses a higher temperature which
improves the drying result. The running time may
increase slightly. (Caution if utensils are delicate!)

Open the door.
Switch on ON/OFF switch 

1

.

Hold down programme button 

A

 and press START

button

10

 until on the digital display 

 is

indicated.
Release both buttons.
The LED for button 

A

 flashes and the digital

display displays the factory setting 

.

Press programme button 

A

 until the factory set

value

 is indicated on the digital display 

3

.

To change the setting,

Press the button 

C

 to switch intensive drying on

 or off

.

Press START button 

10

.

The set value is saved.
Close the door.

Interior light

*

20

The interior light comes on when the door is opened
irrespective of whether the ON/OFF switch 

1

 is

switched on or off. When the door is closed or ajar, the
light is off.

Open the door.
Switch on ON/OFF switch 

1

.

Hold down programme button 

A

 and press START

button

10

 until 

 is indicated on the digital

display.
Release both buttons.
The LED for button 

A

 flashes and the digital

display displays the factory setting 

.

Press programme button 

A

 until the factory set

value

 is indicated on the digital display 

3

.

To change the setting,

Press the button 

C

 to switch the interior light off

 or on 

.

Press START button 

10

.

The set value is saved.
Close the door.

* depending on model

Содержание DI 461-131

Страница 1: ...Gaggenau Operating instructions Dishwasher DI 460 131 DI 461 131 W3128_A AU Ref 9000 407 108 8811 en...

Страница 2: ......

Страница 3: ...mation about comparability tests 12 Additional options 13 Turbo 13 Energy Save 13 Half load 13 Hygiene 13 IntensiveZone 13 Extra drying 13 Washing the dishes 13 Programme data 13 Aqua sensor 13 Zeolit...

Страница 4: ...roat and eyes or asphyxiation Keep children away from open dishwasher The water in the rinsing compartment is not drinking water and could contain detergent residue Ensure that children do not place f...

Страница 5: ...e aid 33 Detergent dispenser 34 Lock for detergent dispenser 35 Rating plate depending on model Selecting language The language in the display window 12 can be set from to Deutsch is the factory setti...

Страница 6: ...10 The chosen setting has now been stored Close the door Water hardness table Salt Using salt Always refill with salt immediately before switching on the appliance This ensures that overrun salt solu...

Страница 7: ...ange the amount of rinse aid unless streaks select lower setting or water stains select higher setting are left on the utensils Open the door Switch on ON OFF switch 1 Hold down programme button A and...

Страница 8: ...ass and cutlery out of the dishwasher as soon as possible after the programme ends Loading the dishwasher Remove large food remnants It is not necessary to prerinse utensils under running water Place...

Страница 9: ...the upper or lower basket Appliance height 81 5 cm Top basket Bottom basket Setting 1 max 16 cm 30 cm Setting 2 max 18 5 cm 27 5 cm Setting 3 max 21 cm 25 cm Appliance height 86 5 cm Top basket Botto...

Страница 10: ...such as glass protection or stainless steel cleaner If tablets contain rinse aid and salt it is usually not necessary to add additional rinse aid and salt up to a specific degree of hardness If the d...

Страница 11: ...he partially dissolved tablet Note You will obtain optimum rinsing and drying results by using solo detergents and applying salt and rinse aid separately f programmes are short tablets may not have fu...

Страница 12: ...utlery Normally soiled Prerinse Clean 50 Intermediate rinse Final rinse 65 Dry all Auto 35 45 Utensils and cutlery Lightly soiled Is optimised according to the soiling with the aid of sensors Turbo En...

Страница 13: ...ramme data consumption values can be found in the summary of instructions They refer to normal conditions and the water hardness set value Different influencing factors such as water temperature or li...

Страница 14: ...To change the setting By pressing the C button you can switch the onboard computer additional programme information off or on Press START button 10 The set value is saved Close the door Timer programm...

Страница 15: ...not be changed The only way a programme can be changed is by Cancel programme reset Intensive drying The final rinse uses a higher temperature which improves the drying result The running time may inc...

Страница 16: ...avoid using sponge cloths or wash them out thoroughly several times before using for the first time Warning Never use other chlorinated household detergents Health hazard Salt and rinse aid Check the...

Страница 17: ...f see following fault description for all other faults please contact customer service and state the indicated fault E XX Warning Remember Repairs may be carried out by technicians only If a component...

Страница 18: ...Remedial action is not possible on the utensils Food residue on the utensils Utensils placed too closely together utensils basket overfilled Too little detergent Rinse programme too weak Spray arm rot...

Страница 19: ...tions Install and connect the appliance according to the installation and assembly instructions Prior to installation disconnect the dishwasher from the power supply Ensure that the protective conduct...

Страница 20: ...e that the drainage hose is not kinked crushed or twisted and that there is no cover plate in the drainage to prevent the waste water from flowing out Fresh water connection Connect the fresh water co...

Страница 21: ...ere is a risk of frost e g holiday home empty the appliance completely see Transportation Turn off the tap disconnect supply hose and drain water Waste disposal Both the packaging of new appliances an...

Страница 22: ...22 en Subjekt to modification...

Страница 23: ...sheets or grilles and plates which have a diameter greater than 30 cm gourmet plates pasta plates dinner plates can be cleaned with the aid of the spray head To do this remove the top basket and inser...

Страница 24: ...cted to the power supply 2 This liability warranty is valid for the service life of the appliance 3 The warranty claim is subject to correct installation and connection of the appliance in accordance...

Отзывы: