GABRIEL KERAMIK AB
22 • RECTANGULAR
RECOMMENDATIONS FOR THE TILE SETTING
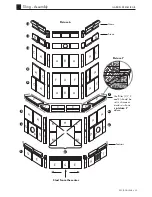
The tiles are marked with letters according to the tile plan
(
Do not unpack
all the tiles at the same time as they may be mixed up and placed in the
wrong position.) To get a nice end result, we recommend to unpack the tiles row by row as
you progress following the letter markings on the wrapping (
Picture 6
, page 23).
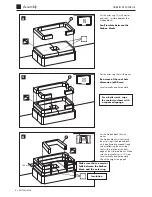
1
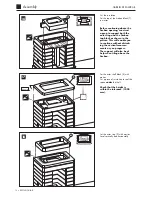
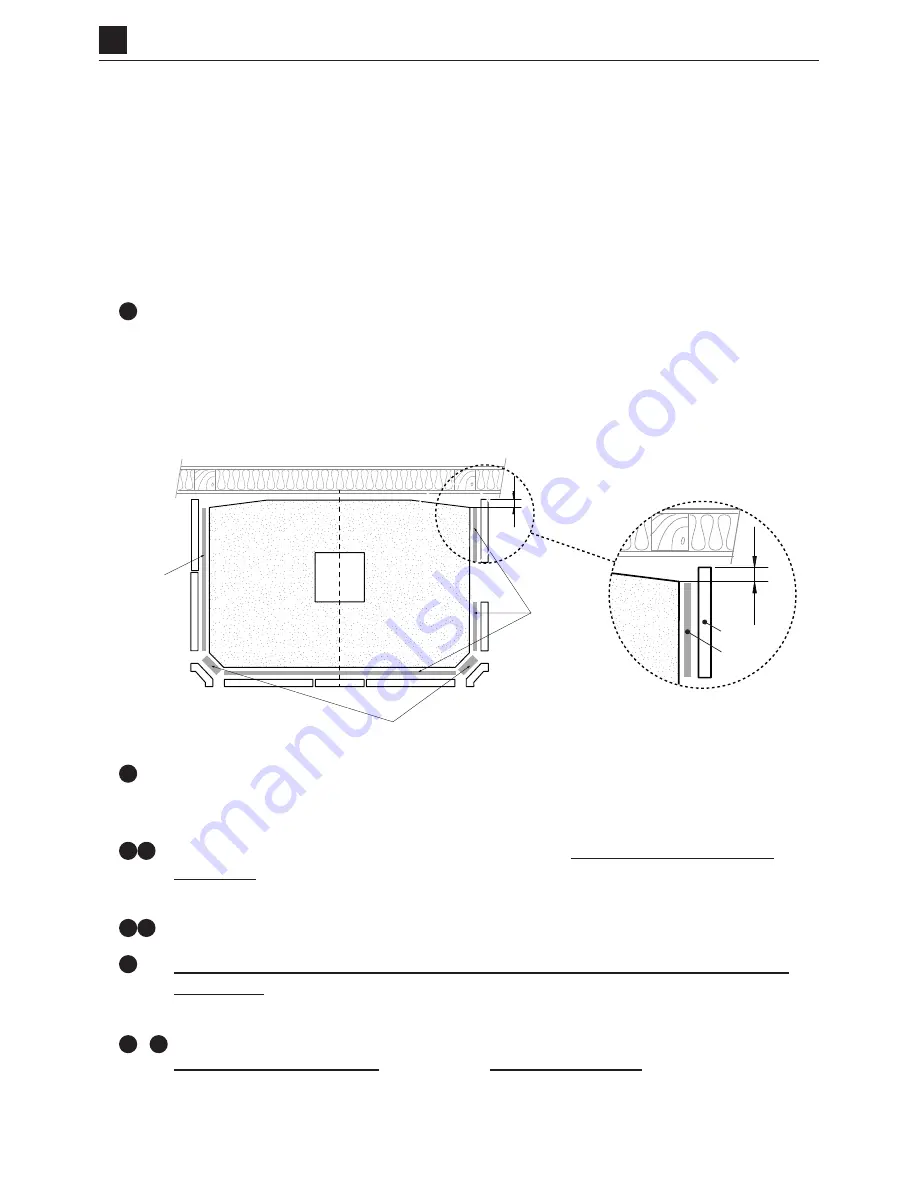
Start by positioning the tile “G” in the center, then continue to the sides and check
that the last tiles “J” and “O” are protruding about 5–10 mm from the edge of the
base block (
Picture
5
below) and at the same distance to the wall. Set the corner
tiles “T” in a 10–12 mm layer of adhesive.
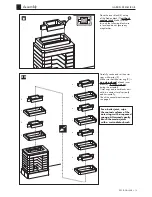
Continue with the foot-sims, always starting from the middle and work out to the
sides.
2
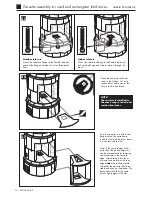
Tile around the fireplace. Measure and check the diagonals so that they are equal.
Make sure that the tiles are level and plumb by placing a level on both tiles (M and
K, and M and L).
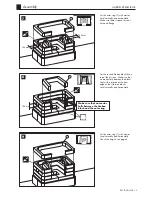
3 4
Continue with the corner tiles “
U
” and go to the wall.
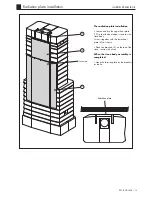
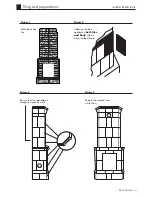
Keep a straight line at
the back.
Have in mind the “shadow line” of about 2 mm the corner tiles provide.
(
Picture 3
page 21).
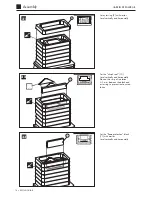
5 6
Repeat the procedure 3 and 4 above.
7
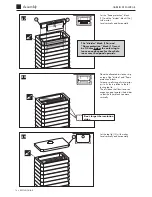
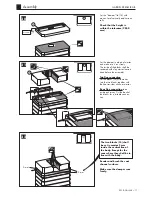
The shelf tiles (V, Y, X and Z) should be set with the provided silicone
or mortar.
(
Picture 7
page 23).
When using silicone make sure the shelves are
free from dust.
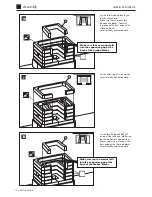
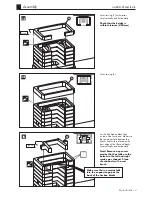
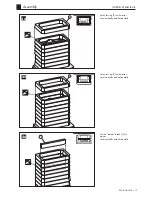
8
–
12
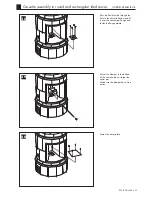
Start from the center and work yourself out towards the sides. Make sure to keep a
straight line at the rear
as well as the
highlighted lines.
(
Picture 3 and 4
page 21).
Recommendations for the tile setting
Picture 5
J
G
O
M
T
T
E
E
The tiles protrudes
about 5–10 mm
Fix 5 mm
Fix 10–12 mm
G
Fix 5 mm
Base block
Adhesive
Tile

