background image

GABRIEL KERAMIK AB

RECTANGULAR • 17

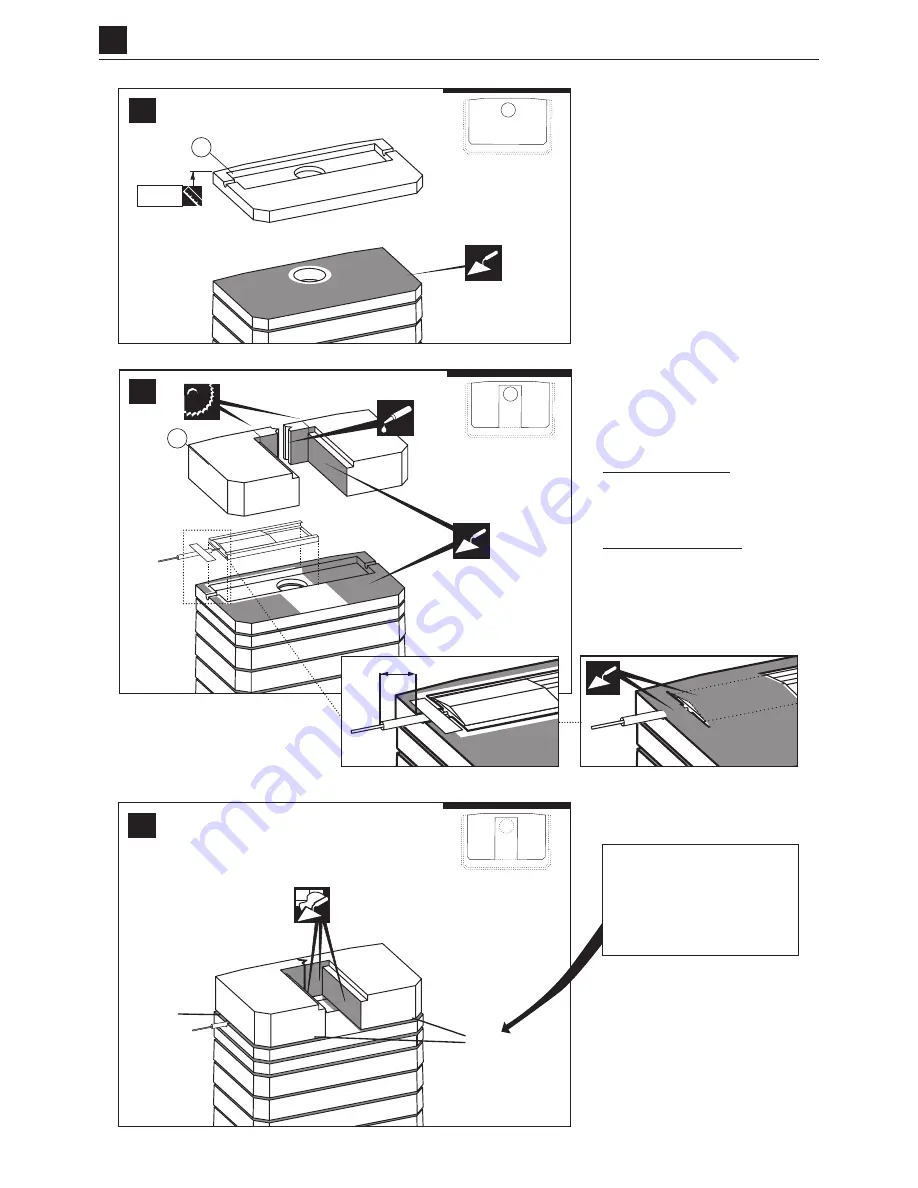
2125 mm

14

15

30 mm

5 mm

30

31

32

30 mm

5 mm

Assembly

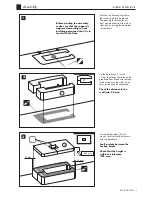
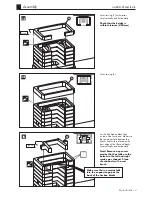
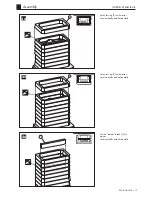
Set the “damper” lid (14) with 

mortar. Level vertically and horizon-

tally.

Check that the height is 

within the tolerance (2030 

mm)

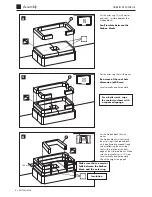
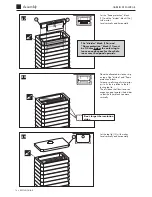
Set the damper in a bed of mortar 

and make sure it runs freely. 

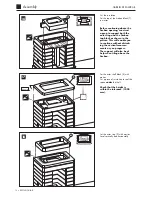
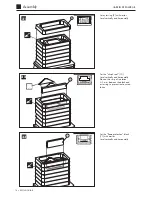
The inside of the blocks shall be 

rendered with clay mortar (easiest 

done before the assembly).

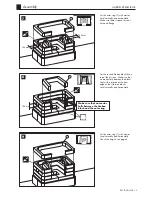
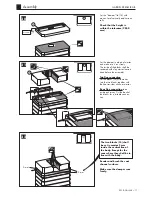
Top flue connection


Set the blocks (15) with mortar. 

Join the two blocks together with 

the heat-resistant silicon or mortar.

Rear flue connection 

to an 

existing chimney. Cut the back of 

the blocks for a suitable connec-

tion.

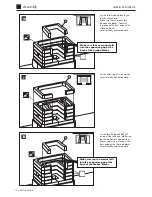
Render and brush the soot 

channel surfaces. 

Make sure the damper runs 

freely.

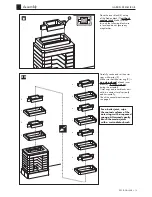
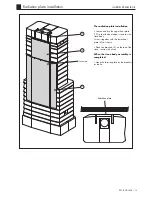
The two blocks (15) shall 

be set in mortar 5 mm 

inside the vertical line of 

the body. Except for the 

rear where they shall be in 

line with the body.

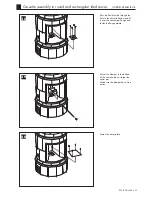
Содержание G830

Страница 1: ...installation sequence 6 Assembly 7 18 Radiation plate installation 19 Tiles and cassette Tiling preparations 20 Tiling recommendations 22 Tiling assembly 23 Cassette assembly 24 Fan installation 27 T...

Страница 2: ...830 Borgholm G840 Ekeby G855 Kung lv G860 Avanti G861 Avanti Intended use Space heating in residential buildings Fuel type Wood logs MANUFACTURER Name AB Gabriel Keramik Address Strandav gen 62 38052...

Страница 3: ...e marked with a pen Control measurement Shows important measurements during assembly Trowel Shows where the clay mortar is placed Rendered areas Shows the areas that shall be rendered with clay mortar...

Страница 4: ...mm Measurement for 125 mm combustion air inlet connection min 15 mm 560 mm 340 mm 125 mm Combustible wall Base block Preparations Measurement for 150 mm flue pipe connection Top connection 2190 mm Rea...

Страница 5: ...1 3 3a 3 3 3 3 4 9 9 9 9 9 9 9 9 9 13 14 15 5 2030 2190 No joints 560 mm 880 mm 35 mm 50 mm Distance to ceiling 50 mm min 50 mm Body Combustible ceiling Base block Combustible wall Radiation plate Dis...

Страница 6: ...GABRIEL KERAMIK AB 6 RECTANGULAR Start A 5 4 3 3 3 3 3a 3 2 1 17 16 15 14 13 9 9 9 9 9 9 9 9 9 8 7 6a 6 6 6 6 8 8 8 8 8 11 11 12a 12 10 Overall installation sequence...

Страница 7: ...mm thick layer of mortar on the prepared floor Make sure the regu lation distance to the wall is kept Level vertically and horizontally Check the distance to the wall min 50 mm Set the firebox block 2...

Страница 8: ...ly For a better joint wipe the contact surfaces with a squeezed sponge Set the firebox block 6 with mortar The firebox block must not touch the outer rings the firebox block must be allowed to expand...

Страница 9: ...Assembly Set the second firebox block 6 on top of the first one Make sure that no mortar falls between the blocks Seal with insulation at the front edge of the U formed blocks Level vertically and ho...

Страница 10: ...tally Set the outer ring 3 with mortar Level vertically and horizontally Make sure that no mortar falls into the expansion gap at the back of the firebox blocks Set the fourth firebox block 6 on top o...

Страница 11: ...h firebox block 6a on top of the fourth one Make sure that no mortar falls between the blocks Seal with insulation at the front edge of the U formed blocks Level vertically and horizontally Note Remov...

Страница 12: ...and the firebox top block as shown in the picture This will enable you to continue without disturb ing the vertical measure ments as you progress The support will also be of help when tiling above the...

Страница 13: ...ter rings and inner blocks must not be in contact Level vertically and horizontally Check the control measurements see page 5 For a better joint wipe the contact surfaces of the outer rings with a squ...

Страница 14: ...mortar Level vertically and horizontally Set the church roof 10 Level vertically and horizontally Place a thin strip of insulation 2 3 mm between the block and outer ring to prevent soot accumu latio...

Страница 15: ...15 1811 mm 9 12 9 24 25 26 Assembly Set outer ring 9 with mortar Level vertically and horizontally Set the divider block 12 in mortar Level vertically and horizontally Set outer ring 9 with mortar Lev...

Страница 16: ...to leave enough space for the whole inner core to expand upwards Place the allocated insulation strip on top of the divider and flame protection blocks Smear a small string of wet mortar just to fix...

Страница 17: ...l be rendered with clay mortar easiest done before the assembly Top flue connection Set the blocks 15 with mortar Join the two blocks together with the heat resistant silicon or mortar Rear flue conne...

Страница 18: ...CTANGULAR 16 33 35 34 17 Set the small lid 16 in mortar If needed cut to size for the either of the two flue pipe installations Assembly The supporting pieces 17 shall be adjusted according to the siz...

Страница 19: ...so that the bent edge is towards the stove body Screw it together with the lower heat plate 20 as shown Place the brackets 18 on the top of the stove secure with silicon When the stove body assembly...

Страница 20: ...mmended The tiles are handmade with tolerance and joints could vary accordingly The overall appearance is important We recommend wooden wedges Seal with adhesive between tiles and body around the fire...

Страница 21: ...1 Mark the centre line Applicera fix med tandspackel b de p stomme och kakel enligt bild Loda in centrum Att t nka p Loda in mitten Applicera fix b de p stomme och kakel med en tandspackel ca 8 mm st...

Страница 22: ...he middle and work out to the sides 2 Tile around the fireplace Measure and check the diagonals so that they are equal Make sure that the tiles are level and plumb by placing a level on both tiles M a...

Страница 23: ...U U U U A C A C B A F F S S R R A U C A B A U A C V Y X X Z V K M M L H E E O G J T T G E Q Q D P D A A U U D P D A A U U 2 1 3 4 5 6 7 8 9 10 11 12 Start from the center Shelf tiles V Y X and Z shou...

Страница 24: ...quare hole same size as the hole in the fire box block Fit in the cassette so that the steel flanges round the cassette are inside the tiles and the brass frame is in contact with the tiles Note If th...

Страница 25: ...r tiled stoves Pass the flexible tube through the hole in the cassette bottom and fit it over the connecting flange and fasten the flange plaate Mount the damper in the bottom of the cassette do not f...

Страница 26: ...ct position pull it out again approx 20 mm and apply a silicon string just inside the edge around the brass frame then push the cassette back in Even the seal with a wet finger to dip the finger in wa...

Страница 27: ...ling block is not pushed to far in as it will restrict the inlet convection air flow to the cassette Press the fan carefully into the pre cut hole in the sealing block Note The fan must be moun ted so...

Страница 28: ...esistant material for long lasting heat radiation Fan controlled direct heat through channels in the hot air cassette for efficient heat circulation Connection for combustion air from the outside The...

Отзывы: