9
Picture 1
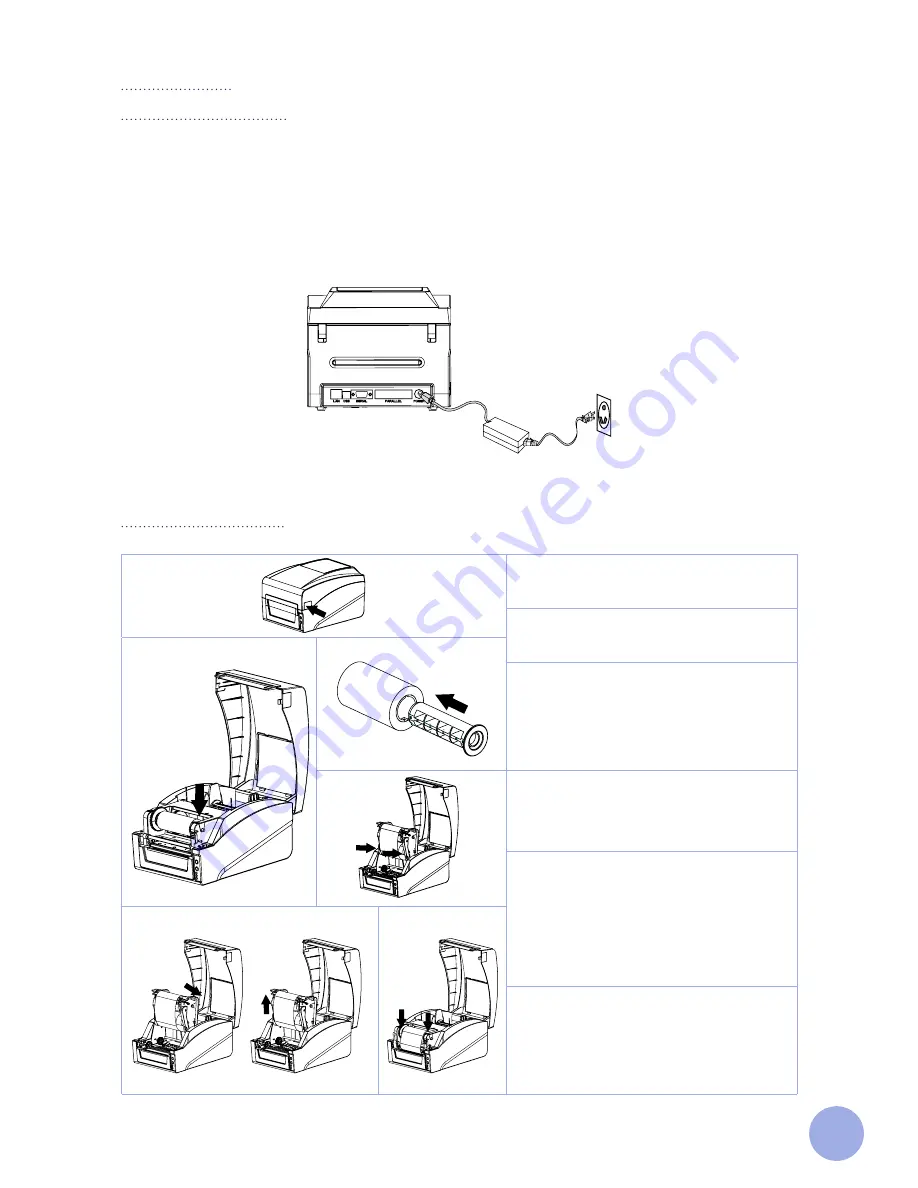
1. Press the two buttons on the left and right
side to open the printer top cover.
2. Press the print head release button
to open it.
Picture 2
Picture 3
3. Place an empty cardboard core onto the
ribbon take-up spool. Next, clamp the left
and right side of the ribbon take-up spool
into the printer.
Picture 4
4. Place the ribbon in the holder then clamp
the left and right side of the holder in the
printer.
5. Attach the ribbon to the empty cardboard
core.
Next, turn the blue wheel clockwise to make
sure the ribbon is taut.
Picture 5
Picture 6
6. Close the print head by pressing on
the left and right side of the print head as
indicated by the arrows until you hear a
snapping sound.
Installation
Installing the printer
1.
Place the printer on a stable surface.
2.
Make sure the power is turned off. Do not plug in the power cord when the printer is turned on.
3.
Connect a serial, USB, Parallel, or Ethernet cable to the printer and PC.
4.
Connect the power plug to the power supply socket.
Installing the ribbon
Picture 6


