G-RAID
3
Product Guide
Page 5
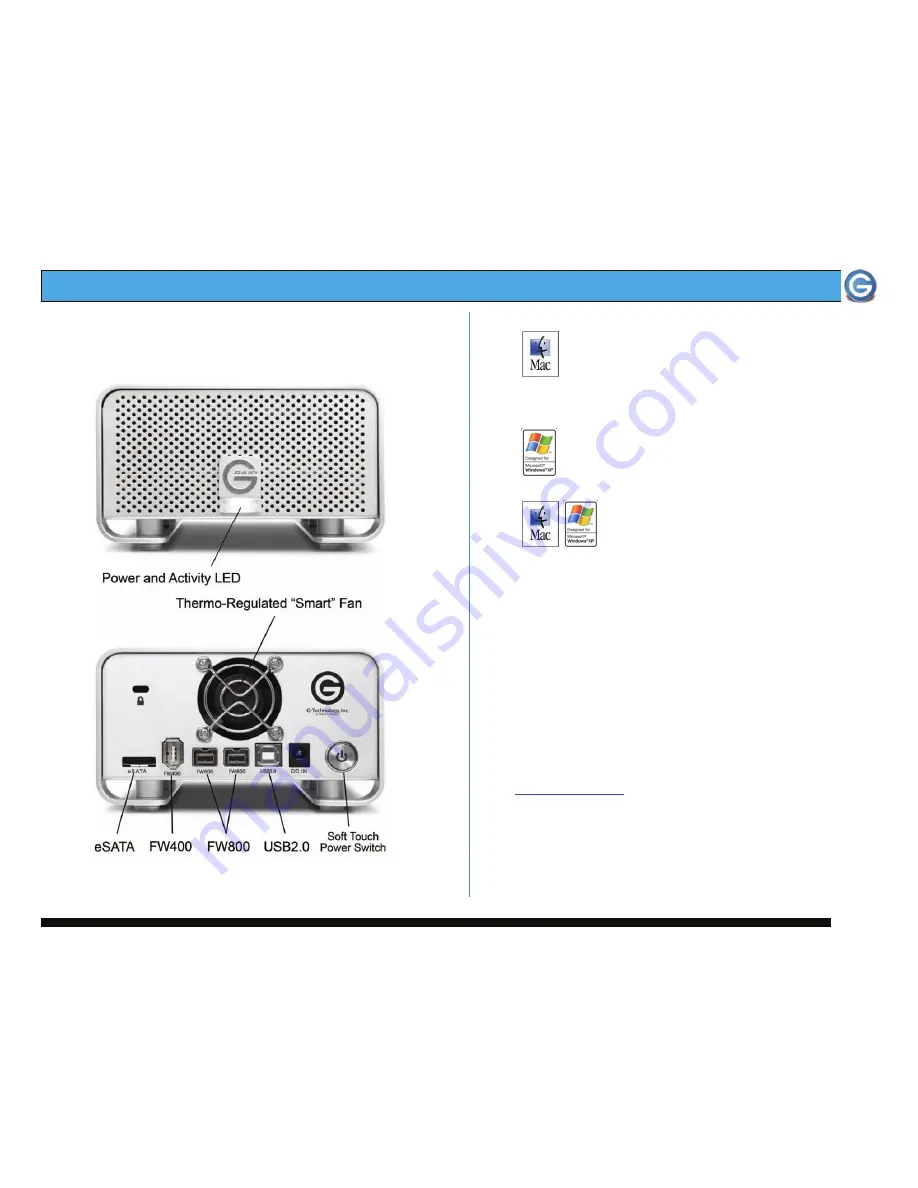
5. G-RAID3 OVERVIEW
Attention Mac OS X Users
G-RAID
3
is set up at the factory for use with
Mac OS X systems. If you are running Mac OS X,
G-RAID
3
will mount on the OS X desktop right out of
the box. If it becomes necessary to re-format G-RAID
3
for
Mac OS X, see section 7.1.
Attention Windows Users
G-RAID
3
must be formatted for the Windows
Operating System before use on a PC. Please see
section 7.2 for more information.
Attention Cross Platform Users
G-RAID
3
can be used on both MAC and PC
systems by formatting the drive “FAT32.”
There are some limitations when using FAT
32, see section 7.3 for details. Alternatively you can install
software on the Windows machine such as “MacDrive” which
will allow you to mount MAC formatted drives on your PC.
6. INSTALLING G-RAID
3
1. Connect the plug from the power supply “brick” to the
power connector on the rear of G-RAID
3
and plug the AC
cable in to a surge protector or wall outlet.
2. Connect G-RAID
3
to your system via the eSATA, FireWire
400, FireWire 800 or USB port. For maximum performance we
recommend connecting G-RAID
3
to your computer via the
eSATA port.
Note:
For maximum performance on Mac and PC computers that do not
support eSATA, it is recommended to install an eSATA PCIe adapter (for
desktops) or an eSATA CardBus adapter (for laptops). Visit G-Tech at
www.g-technology.com
to purchase these adapters.
3. Power on G-RAID
3
by pressing the power button located on
the back of the unit. G-RAID
3
will automatically mount on the
desktop if you are using a Mac computer.
Note
: To power off G-RAID
3
, press and hold the power button for
three seconds.
Содержание G-RAID3
Страница 2: ...G RAID3 Product Guide Page 2...
Страница 3: ...G RAID3 Product Guide Page 3...


