


Instruction Manual
67AX and 67AD CCP Ground Microphone System | 7
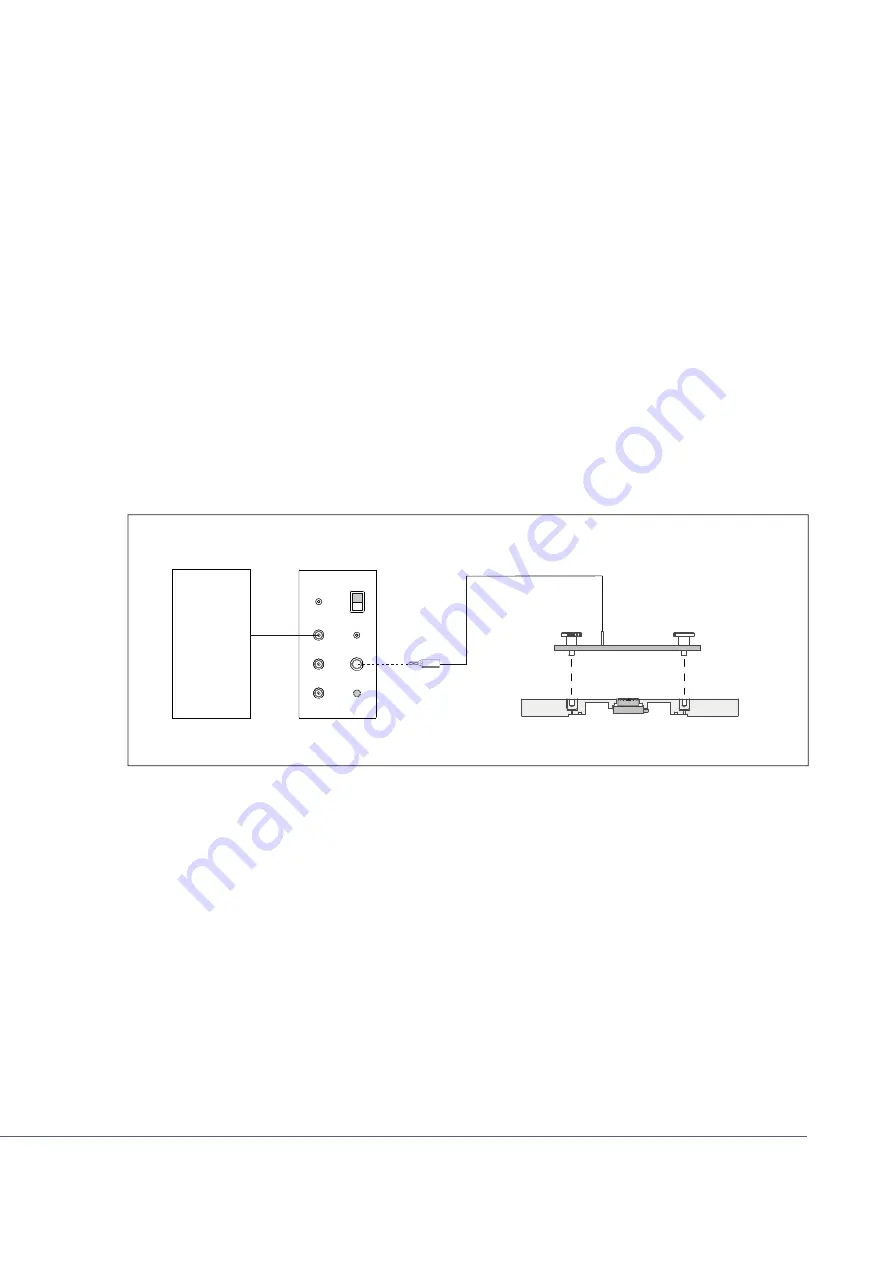
On-site Frequency Calibration
For on-site frequency calibration the RA0310 Actuator Connector is needed. It is an electrostatic
actuator built into a plate that screws onto the ground plate with two fi nger screws, ensuring cor-
rect placement and stability during calibration. Also, a signal generator and an acuator supply are
needed.
Items to use
• RA0310 Actuator Connector.
• GRAS 14AA Actuator Supply.
• A signal generator.
Procedure
1.
Mount the RA0310 Actuator Connector over the microphone by use of fi nger screws.
2. Connect the 14AA Actuator Supply and signal generator as shown below. The RA0310 must be
connected to the high-voltage output of the 14AA.
3. Perform the calibration .
14AA Actuator Supply
Power
G.R.A.S.
Actuator Supply
Type 14AA
AC Output
+200VDC
AC Output
Max. 1Vrms
+800VDC
AC Output
On
GND
AC Input
Overload
Signal generator
RA0310 Actuator Connector
Ground plate
Fig. 3.
Mounting and connecting the RA0310 Actuator Connector.
Separate Level Calibration after Dismantling
The microphone can be calibrated separately after dismounting from the ground plate. For com-
plete calibration information, see the pistonphone instruction manual.
Remove the microphone from the mounting plate.
1.
Set the pistonphone in an upright position, preferably using a calibration stand for stability.
2. Mount the pistonphone calibration adapter (RA0221) on the pistonphone.
3. Insert the microphone into the adapter on the pistonphone. Press gently to ensure that the
microphone is inserted as far as it can go.
4. Turn on the pistonphone and calibrate as described in the instruction manual for the piston-
phone.


