12
LI0063 – Revision 29 May 2015
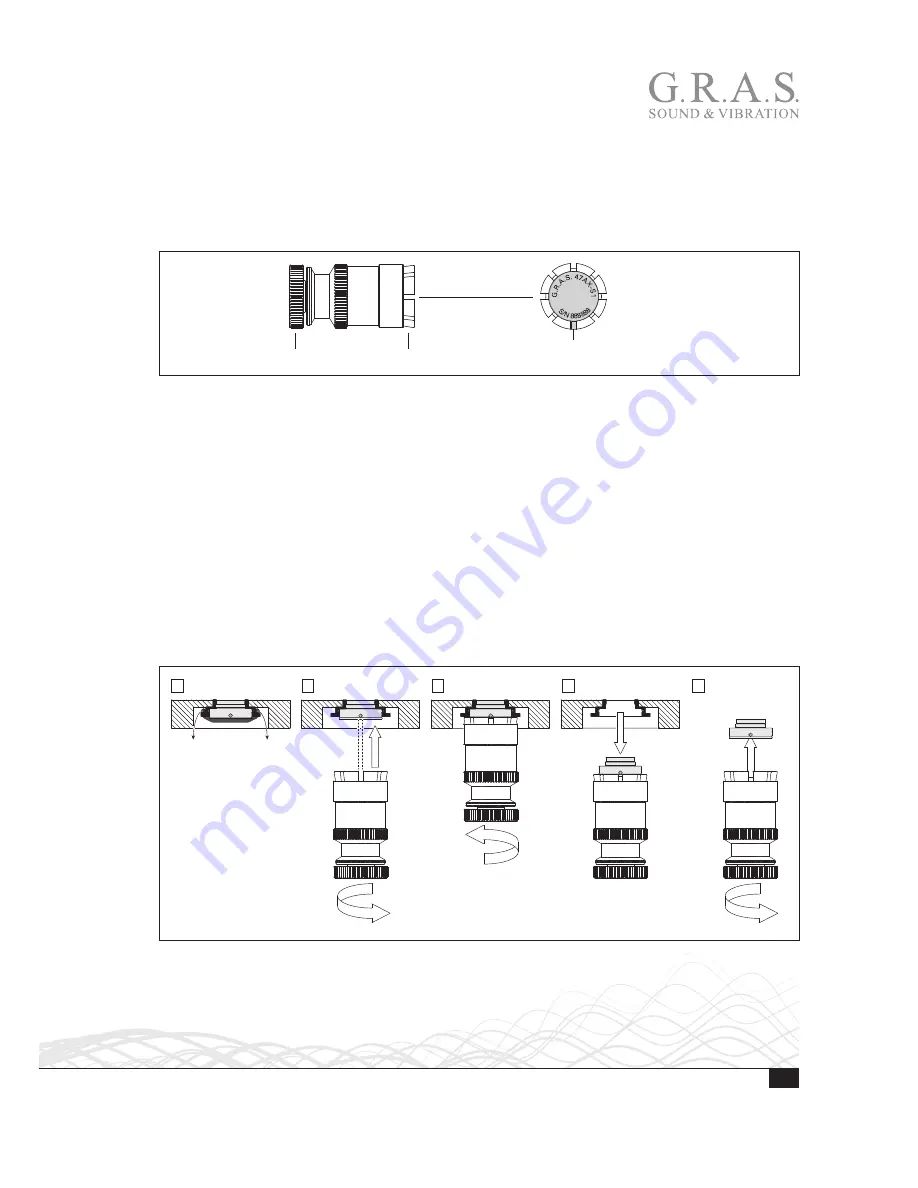
Removal of 1/2 inch and 1/4 inch Flush-mount Microphones
Once mounted, a flush-mount microphone can be difficult to remove. The G.R.A.S. RA0302
Removal Tool for 1/2 inch and 1/4 inch flush-mount microphones makes it possible to remove
the microphone without damage to structure, microphone housing or cable. The removal tool
holds the microphone housing with 8 claws, tightened and loosened by turning a knob, see Fig. 5.
Knob
Claws
Space for cable
Fig. 5.
The RA0302 Removal Tool for 1/2-inch and 1/4-inch flush-mount microphones.
1. If the surface microphone is secured with an O-ring, start by removing it.
2. Loosen the claws by turning the knob counterclockwise.
3. Slide the removal tool over the surface microphone and tighten its claws firmly by turning the
knob clockwise.
Caution:
To avoid damage to the cable, be sure to locate it in the space between the claws, as
shown in Fig. 5, and Fig. 6, steps 2 and 3.
4. Pull out the microphone.
5. Loosen the claws by turning the knob counterclockwise. Remove the microphone.
The removal tool should not be used for mounting.
1
2
3
4
5
Fig. 6.
Removal of a 1/2 inch flush-mount microphone. The procedure for a 1/4 inch microphone is the same.


