Outdoor Microphone System - Page 11
G.R.A.S. Sound & Vibration
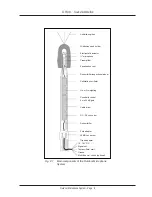
2.2.4 Dismantling the Microphone Assembly
Dismantling the microphone assembly is rarely necessary and should be done by a qualified
technician recognised by G.R.A.S. Sound & Vibration.
First disconnect the power from the Outdoor Microphone System before proceeding. The actua
-
tor voltage is 300 V.
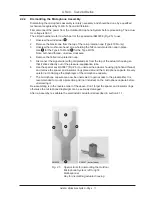
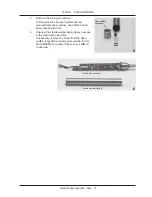
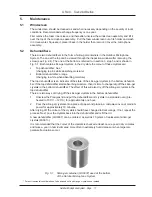
The circled numbers refer to which part of the special tool AM0038 (Fig. 2.5) to use
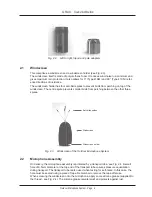
1. Unscrew the windscreen
1
.
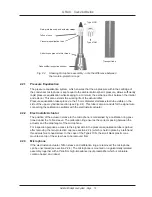
2. Remove the black cone from the top of the rain-protection cap (Type 41CN only).
3. Unscrew the mushroom-head screw holding the Teflon rain-protection cap in place.
Use
2
for the Type 41AM and
3
for the Type 41CN.
Note: Left-hand thread - unscrew clockwise.
4. Remove the Teflon rain-protection cap.
5. Disconnect the signal wire (with gold plated pin) from the top of the actuator housing so
that it sticks directly out of the pressure-equalisation tube.
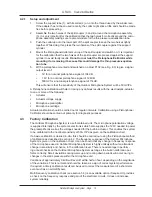
6. Use the special key RA0087 (Fig. 2.5) to unscrew the actuator housing (right-hand thread)
and remove the spacer and insulator rings placed around the microphone capsule. Be very
careful not to damage the diaphragm of the microphone capsule.
7. The microphone capsule can now be unscrewed to gain access to the preamplifier. It is
recommended to mount a protection grid (not included) on the microphone capsule before
unscrewing it.
Re-assembling is in the reverse order of the above. Don’t forget the spacer and insulator rings
otherwise the microphone diaphragm can be seriously damaged.
After re-assemby, re-calibrate the electrostatic actuator as described in section 4.1.1.
Fig. 2.5 Special tools for dismantling the Outdoor
Microphone System; left to right:
Multi-spanner
Key for dismantling actuator housing
AM0038
RA0087 (not included)
1
2
3
5
4


