-Make sure the fixture is operated by qualified personnel who knows the fixture before using.
-Keep the original packages if any second shipment is needed.
-Don’t try to change the fixtures without any instruction by the manufacturer or the appointed
repairing agencies.
-It is not in warranty range if there are any malfunctions from not following the user manual to
operate or any illegal operation, like shock short circuit, electronic shock, lamp broke, etc.
4.
Installation via clamp
Screw the clamps each via a M12 screw and nut onto the Omega holders.
Insert the quick-lock fasteners of the first Omega holder into the respective holes on the bottom
of the device. Tighten the quick-lock fasteners fully clockwise. Install the second Omega holder.
Pull the safety-rope through the holes on the bottom of the base and over the trussing system or
a safe fixation spot. Insert the end in the carabine and tighten the safety screw.
5.
DMX-512 control connections
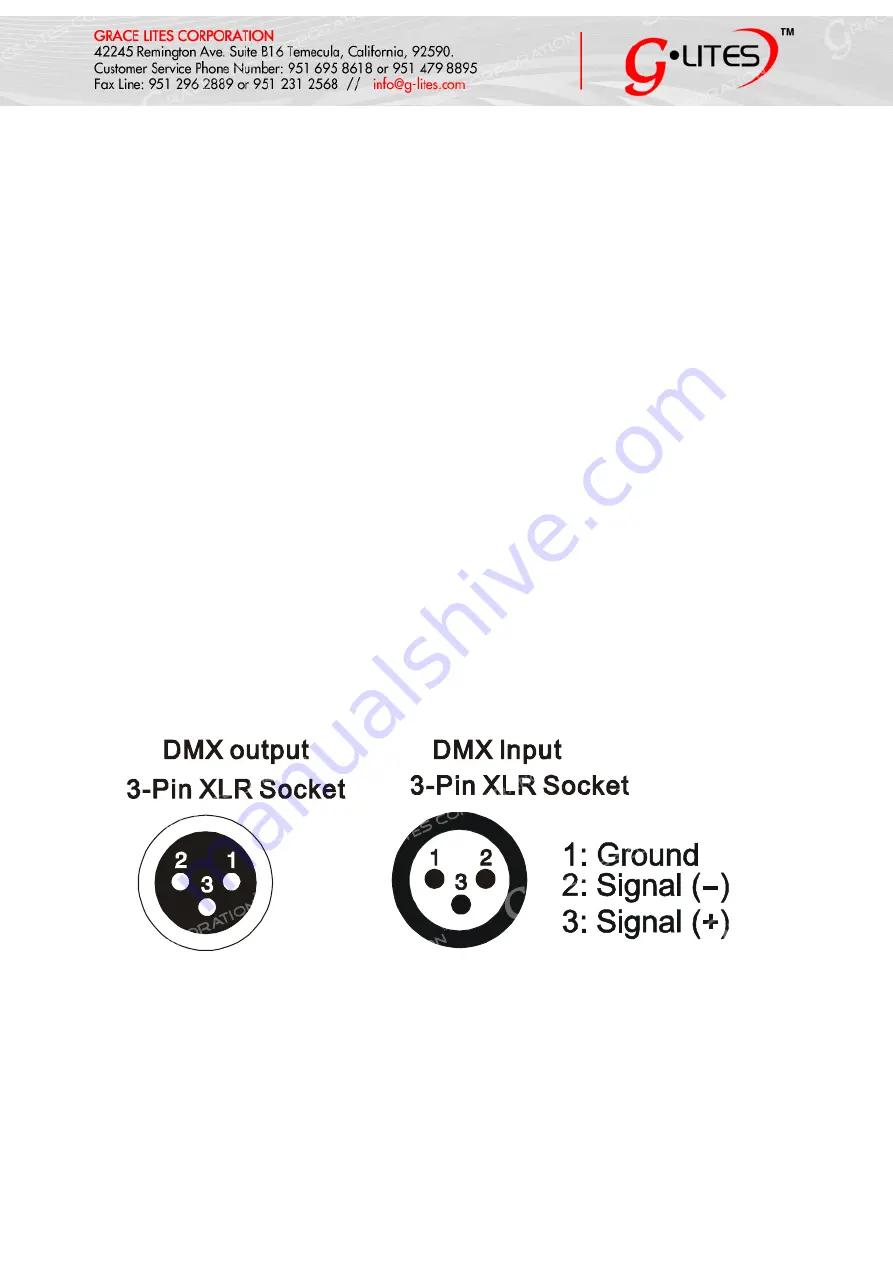
Connect the provided XLR cable to the female 3-pin XLR output of your controller and the other
side to the male 3-pin XLR input of the moving head. You can chain multiple
Moving head together through serial linking. The cable needed should be two core, screened
cable with XLR input and output connectors. Please refer to the diagram below.
DMX-512 connection with DMX terminator
For installations where the DMX cable has to run a long distance or is in an electrically noisy
environment, such as in a discotheque, it is recommended to use a DMX terminator. This helps
in preventing corruption of the digital control signal by electrical noise. The DMX terminator is
Содержание Beam 300
Страница 1: ......


