


Step 6
Connect sensor cables
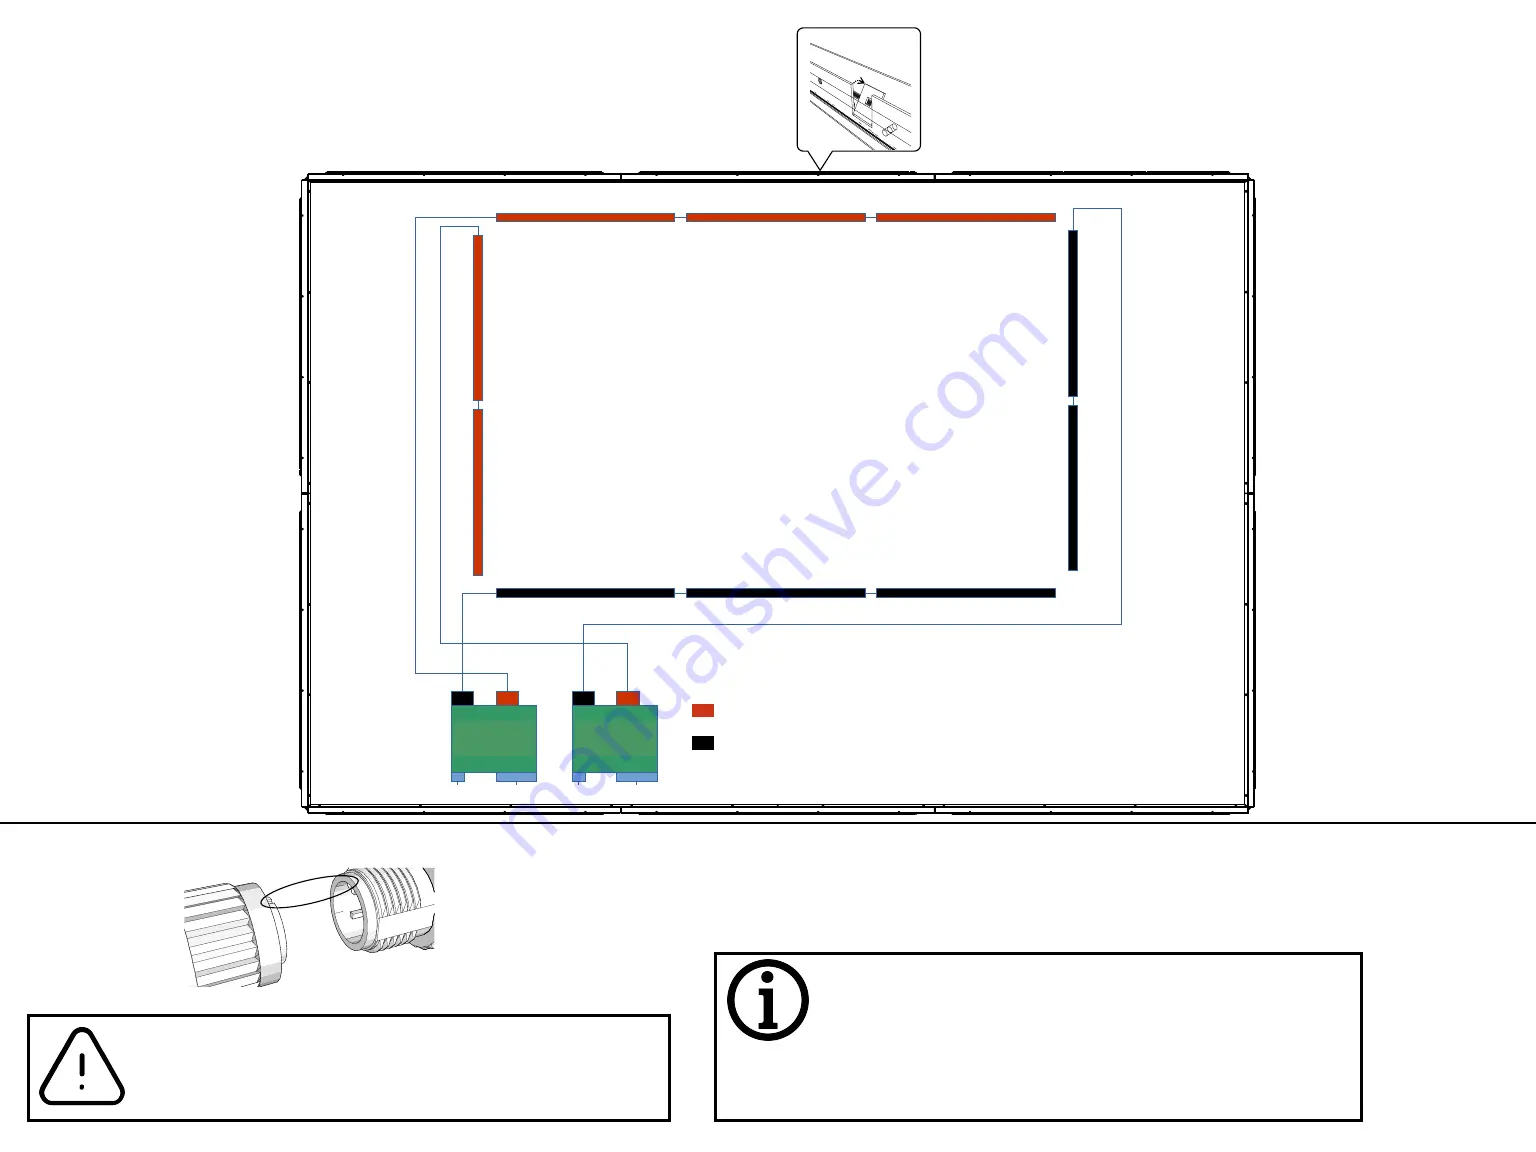
Connect the light bars with each other. The open and labeled
plugs have to be connected to the sensor cables.
Use connection diagram!
Put all the cables into the Base Profiles. Any spare cable can
be arranged in the top Base Profile. To prevent the cables
from falling back out, bend the square flaps with a screw
driver to hold the cables in place.
The plugs are equipped with a guide to ensure correct
connection. Make sure to gently find the guide before
pushing the plugs together and screwing them tight!
!
TXZS1
TXES1
TXZS2
TXZS3
TXES2
Lvx X
Lvx Y
TOP
Computer
Power
Power
CAN/RS232
COM 1
HDMI
Projector
LAN
HDMI
HDMI
Power
Power Line
RXZS3
RXES2
RXZS1
RXZS2
RXES1
Calibration of the light grid:
Before the first power on after mounting the light bars to their final position put switch 3
(the array of tiny switches) up on both of the LVX-devices. Then Power on the System and
check that the green LED below the orange LED is lit. When interrupting a beam the green
light should go off. Check for both Axis X and Y. Then put down the switch 3 (to off). Now
the light grid is ready to use
Multiball setup and connection plan
SEA
EMA
B.1-B.8 h
LS1
LS2
LS3
LS4
LS5
LR1
LR2
LR3
LR4
LR5
MB X
MB Y
SY
RY
SX
RX
RX
SX
RY
SY


