Firmware Download Utility Instructions
©
2004 – 2005 FutureLogic, Incorporated. All Rights Reserved.
PUBN Page 3 of 10 05/04/2005
PUBN-000027 REV.B
2.
Click the
Abort Load
or
Stop Download
toolbar button to verify that the download process is
NOT active.
Figure 1-4
Download Utility Toolbar
3.
Select the
GEN2 Printers Only!
check box.
4.
Connect the printer using one of the following methods:
•
RS232.
Connect the printer to the PC using the FutureLogic, Inc. Evaluation
Cable (Part Number 150-00044) or other approved cabling.
•
Netplex.
Connect using the Convert Box and Power Supply.
5.
Power up the printer.
6.
(Optional) Set up your preferences if using the Download Utility for the first time.
a.
Click the
Preferences
toolbar button.
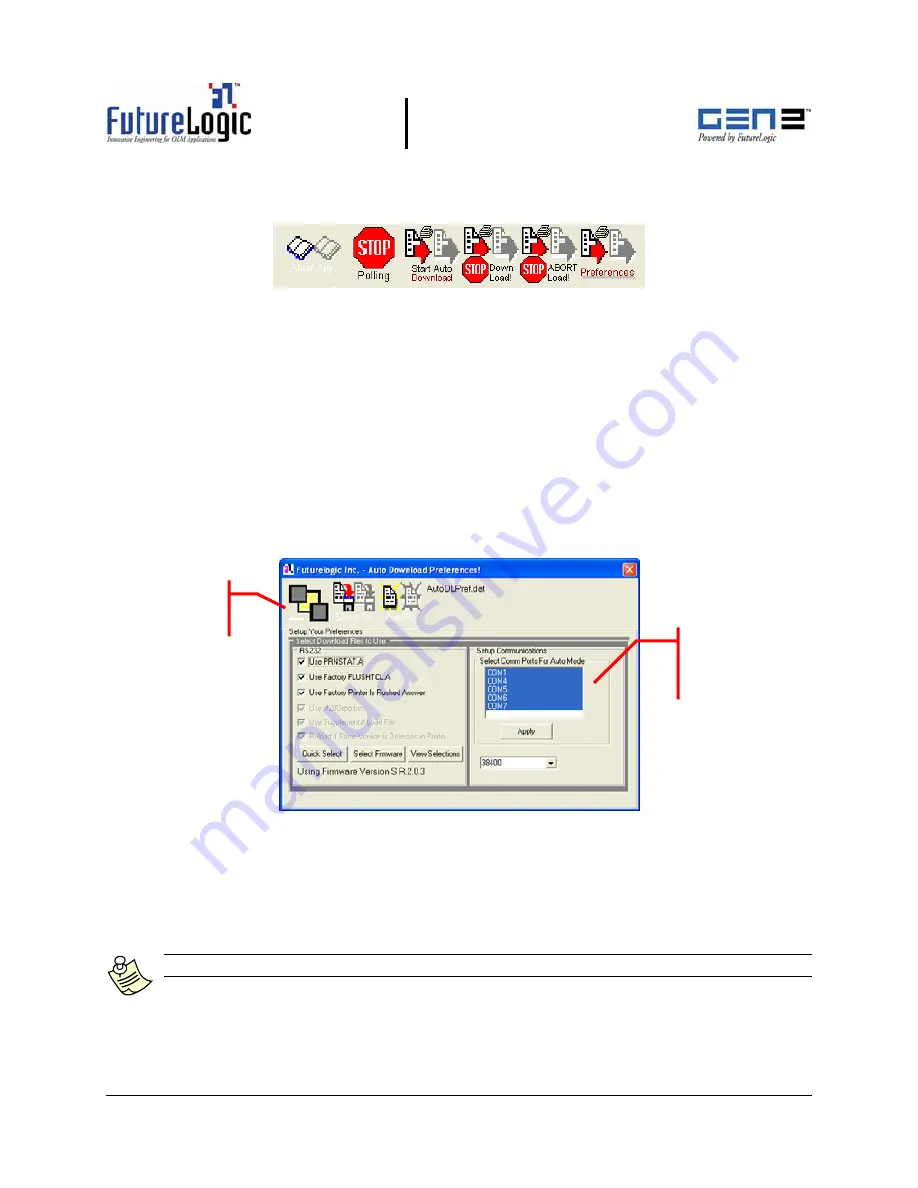
The Auto Download Preferences dialog displays.
Figure 1-5
Auto Download Preferences Dialog
b.
Select the communications port to which the printer is connected in the Select Comm
Ports for Auto Mode area.
c.
Click the
Apply
button.
d.
Click the
Select Firmware
button to set up the firmware.
Note:
The firmware file (.VFX) must be located in the same folder as the Download Utility.
e.
Select the firmware file and click the
Open
button.
The Auto Download Preferences dialog updates to display the version number of the
selected firmware file.
Select Comm
Ports For Auto
Mode Area
Toolbar
Buttons


