


In
st
all
at
io
n
:
S
ta
ge
2
Page 6 of 18 // email [email protected] tel: +44 (0) 1438 833577 fax: +44 (0) 1438 833565
CHS - Ceiling Hinge & Swivel
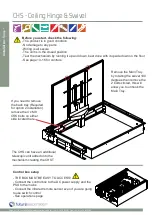
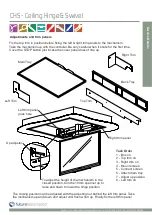
Decide which way to fix the mechanism
One option is to hang the
mechanism from 4 bolts
fixed to the top of the mount
plates. (See CHS Tech for
dimensions)
Holes for hanging
mechanism
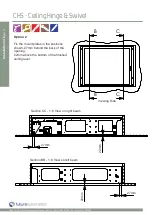
Mechanism installation Option 1
Mechanism installation Option 2
Remove side Mount Plates
and mount in the correct
place within the enclosure
as shown to the left.
See next page for location
details.
Mount plates
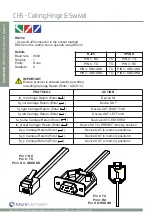
Box removal.
Open mechanism to roughly 20 degrees, undo
all the bolts within the box and then slide off.
(See CHS Tech for beam and opening details).
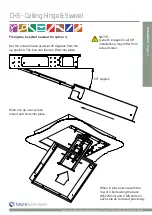
If option 1 is chosen to mount
the mechanism you can now
turn to installation stage 5 -
Running screen cables.
The second option is to remove the left
and right mount plates and secure them
within the enclosure.
Timber beams
Plaster board
ceiling
NOTE:
Generic images for all CH
installations, may differ from
actual model.


