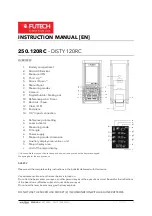


MANUAL
250.120RC – DISTY 120RC [EN]
V1.0 – 09.2022
10
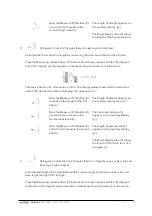
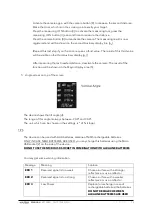
Press the Measure / ON button [3]
a third time to measure the third
leg (c).
The length of leg (c) appears on
the auxiliary display. [g
1
]
The Major display Area [h] shows
the area of the measured triangle.
Note:
“ERR 5”
will be displayed in the event that a measurement contradicts the characteristics of
a triangle (e.g. c is shorter than b). The measurement must be redone.
CALCULATION OPTIONS
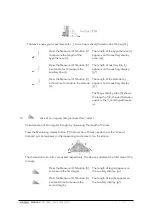
1.
Addition / Subtraction distances
Add
Subtract
Measure the distance as described above at
‘1. Distance measurement, single measurement’
.
To add a measurement to this result, press
the Plus / Up button [4]. The result moves to
the auxiliary display [g
2
], a + appears in front
of the major display area [h]
To subtract a measurement to this result,
press the Minus / Down button [5]. The result
moves to the auxiliary display [g
2
], a –
appears in front of the major display area [h]
Measure the second distance as described above.
The last measurement appears on auxiliary display [g3], the result of the calculation will be
visible on the major display area [h]
à
To add / subtract additional measurements, just continue with the next measurement.
Tip:
You can switch between Addition and Subtraction by pressing the Plus / Up button [4] (to add
a measurement) or the Minus / Down button [5] (to subtract a measurement) just before
measuring an additional measurement.
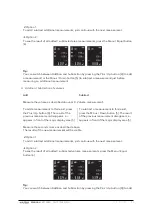
2.
Addition / Subtraction of areas
Add
Subtract
Measure the area as described above at
‘2. Area measurement’
.
To add a measurement to this result, press
the Plus / Up button [4]. The result of the
previous measurement disappears, a +
appears in front of the major display area [h]
To subtract a measurement to this result,
press the Minus / Down button [5]. The result
of the previous measurement disappears, a –
appears in front of the major display area [h]
Measure the second area as described above.
The results of the new measurement will be visible.


