6
6
7
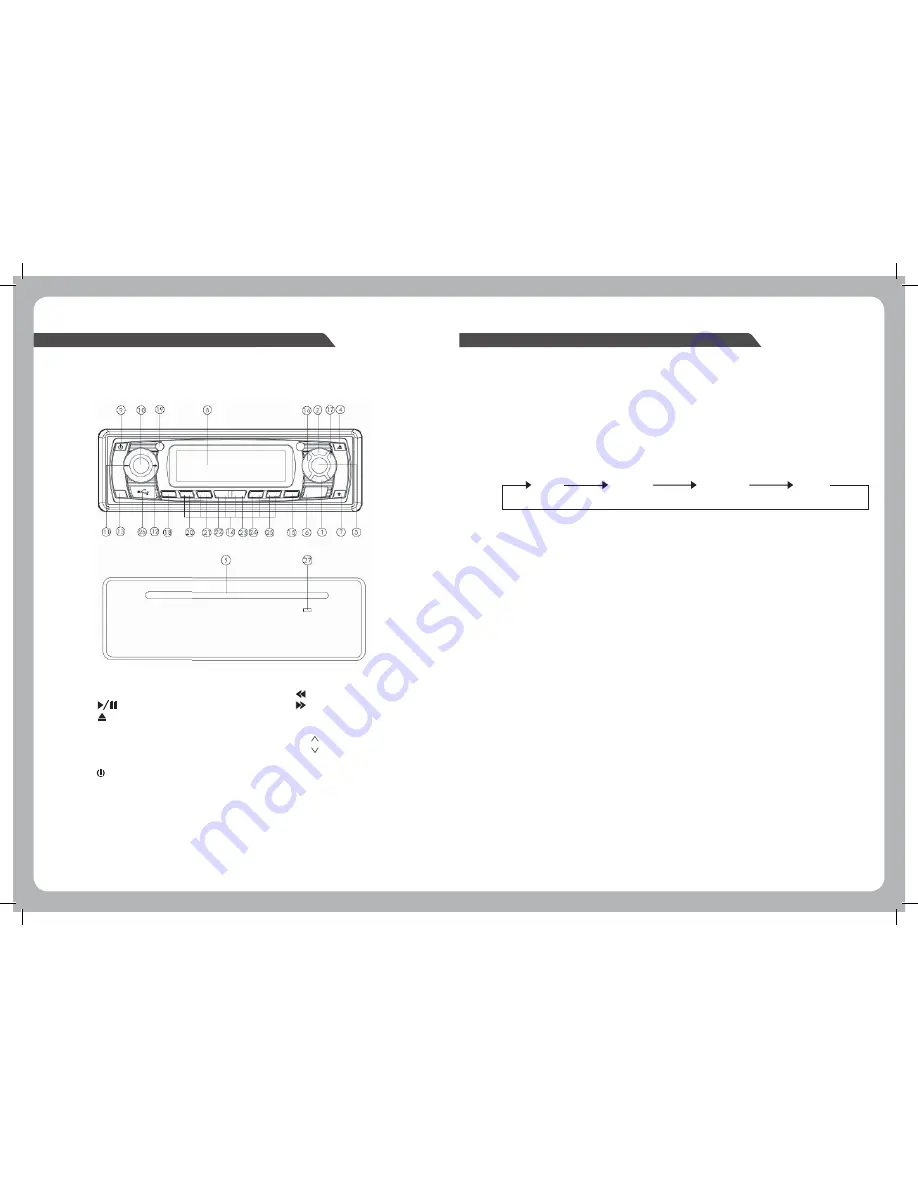
BUTTON DESCRIPTION
FRONT PANEL
GENERAL OPERATION
POWER ON/OFF
Press the power ON/OFF button (9)
FRONT PANEL RELEASE
Press OPEN button (7) to open the front panel
SOUND ADJUSTMENT
Press the SEL/MENU button (10) repeatedly to cycle the audio mode through bass, treble, balance and
fader modes. Press the VOLUME UP button (12) or VOLUME DOWN button (11) to adjust the selected
mode.
1. MON
-Mono/Stereo
2.
AS/PS -Auto store preset scan
3.
Mute
4.
(eject button)
5. Disc
Slot
6. MODE/SUB.W
7. OPEN
8.
Liquid Crystal Display
9.
/DIM
10. SEL/MENU
11. - (volume down button)
12. + (volume up button)
13. BND/LOU/ENT
14. Preset station buttons (1-6)
15. DISP
16. (forward)
17. (Rewind)
18. SCAN/IPOD-MENU/SCH
19. EQ (equaliser)
20. DIR (up)
21. DIR (down)
22. RPT (repeat)
23. SHF (shuffle)
24. SCN (scan)
25. Preset 6
26. USB Interface
27. Reset button
BASS TREBLE BALANCE FADER
SETTING THE CLOCK
Press and hold the DISPLAY Button (15) until the clock is displayed and flashes. Press the VOLUME UP
button (12) to change the minutes and the VOLUME DOWN button (11) to change the hours. Press the
DISPLAY button (15) to confirm and exit.
MUTE/PAUSE
In Radio/Aux mode, press PLAY/MUTE button (3) to mute the audio. Press again to resume.
LOUDNESS
Press and hold the BND/LOU/ENT button (13) to reinforce the bass output. Press again to cancel.
MODE SELECTION
Press the MODE button (6) to cycle through the source modes. Only active modes will be displayed. Eg. If
there is no CD loaded CD mode will not be selectable.
SUBWOOFER LINE OUT
Press and hold MODE/USB/W button (19) to activate the Subwoofer output. Repeat to deactivate
EQUALIZATION
Press the EQ button (19) repeatedly to cycle through and select the EQ option you desire.
ESP
Electronic shock protection provides a 10 second read ahead buffer.
ILLUMINATION
Press and hold the POWER/DIM button (9) to adjust the LCD backlight brightness.
RESET BUTTON
The RESET button is located in the housing of the unit button (27) and must be activated with a ballpoint
pen or something similar under the following conditions.
1. An error symbol is displayed
2. Function buttons do not operate correctly


