


CCD-0005559 Rev: 04-29-22
- 23 -
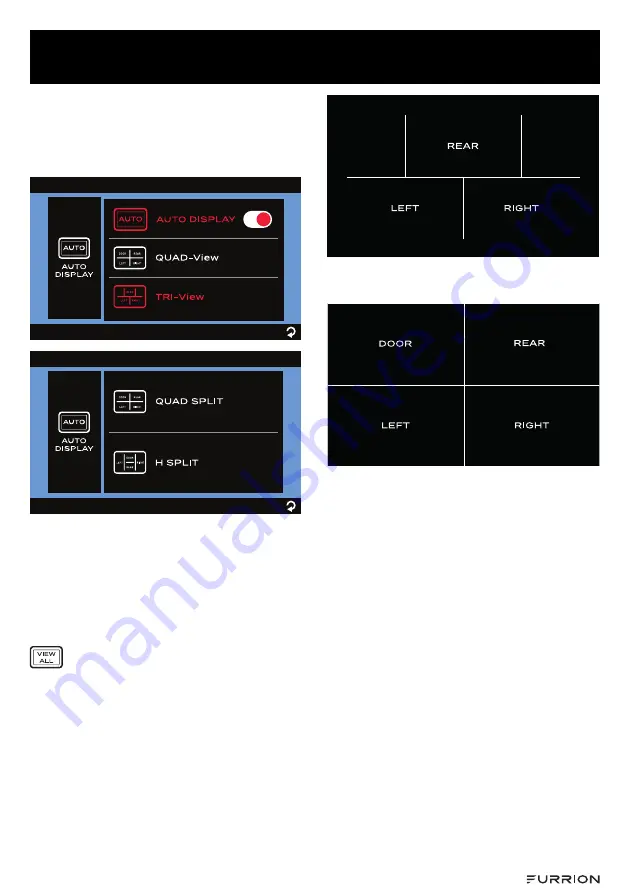
Install and Use Monitor
the sub-menu and select
QUAD SPLIT
or
H SPLIT
camera layout for 4-channel
display or tap
TRI-View
to select the
camera layout pattern for 3-channel
display.
By default, the monitor screen shows the
single-channel image of the last paired
camera.
To switch to 3-channel or 4-channel
display mode
:
Tap twice on the monitor screen to bring
up the camera selection interface, then tap
to enter channel display.
−
3-channel display when
TRI-View
is
selected:
−
4-channel display when
QUAD SPLIT
is
selected:
−
4-channel display when
H SPLIT
is
selected:


