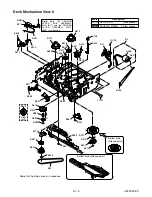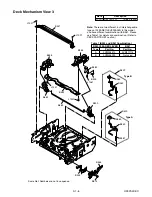
2-4-7
U25PALDA
[24]
(C-5)
(S-15)
[25]
[27]
[26]
[28]
(C-4)
(L-4)
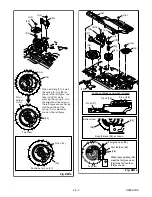
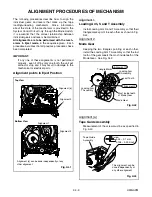
When reassembling [28],
meet the first groove on
[28] to the first tooth on
[48] as shown.
[28]
Top View
First tooth on [48]
First groove on [28]
Align [25] and [28] as shown.
Bottom View
[28]
[25]
Fig. DM14
[32]
[29]
[30]
[31]
(C-6)
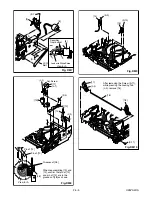
Pin of [37]
Pin of [34]
Position of Mode Lever when installed
Pin of [38]
[23]
(P-4)
(C-3)
(P-4)
[28]
[28]
[23]
When installing [23], install
the spring (P-4) to [28] as
shown in the left figure, and
then install [23] while
pressing the spring (P-4) to
the direction of the arrow in
the left figure and confirming
that the position of the
spring (P-4) is placed as
shown in the left figure.
Pin on
bottom
of [23]
Pin on [22]
Position of p
in on [22]
Top View
(C-2)
[22]
Fig. DM13
Содержание 25A-664
Страница 22: ...1 8 3 1 8 4 1 8 5 HC4S4SCM1 Main 1 5 Schematic Diagram ...
Страница 23: ...1 8 6 1 8 7 1 8 8 HC4S4SCM2 Main 2 5 Schematic Diagram ...
Страница 24: ...1 8 9 1 8 10 1 8 11 HC4S4SCM3 Main 3 5 Schematic Diagram ...
Страница 26: ...Main 5 5 Schematic Diagram 1 8 15 1 8 16 HC4S4SCM5 ...
Страница 27: ...VPS Schematic Diagram 1 8 17 1 8 18 HC4S4SCV ...
Страница 28: ...1 8 19 1 8 20 HC4S4SCF Function Schematic Diagram ...
Страница 29: ...AFV Schematic Diagram 1 8 21 1 8 22 HC4S4SCAFV ...
Страница 30: ...Jack Schematic Diagram 1 8 23 1 8 24 HC4S4SCJ ...
Страница 31: ...1 8 25 1 8 26 Function CBA Top View Function CBA Bottom View BHC400F01018 B ...
Страница 33: ...1 8 29 1 8 30 Jack CBA Top View Jack CBA Bottom View BHC400F01018 E ...
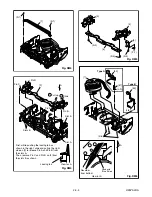
Страница 54: ...2 4 6 U25PALDA S 12 19 Cap Belt Fig DM11 Fig DM12 20 C 1 21 ...
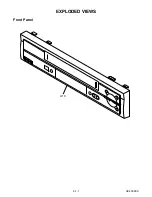
Страница 60: ...3 1 1 HC4C0FEX A1X EXPLODED VIEWS Front Panel ...
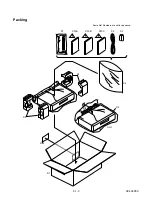
Страница 62: ...3 1 3 HC4S4PEX Some Ref Numbers are not in sequence X2 X20C X3 X20B X20A X1 X4 S1 Unit S3 S2 S2 A14 Packing ...
Страница 81: ...25A 664 HC4S4ED ...

