background image


   Terminal Setup 


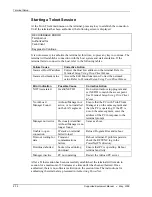
To change the default Destination Location, click on 

Browse


and select a location. Then 

click on 

Next

.  


The default folder is 

PowerNet

. This default may be changed either by selecting an 

existing program group or by typing in a new name at the prompt. Then click on 

Next

.


Supported Equipment Manual   

   May, 2006 


2-3

Содержание TeamPad 7100

Страница 1: ...Supported Equipment Manual for the TeamPad 7100 and 7120 Hand Held Computers from Fujitsu ...

Страница 2: ...nd to make changes to it from time to time without obligation to notify any person or organization of such revision or changes Trademarks PowerNet OpenAir OpenAir Linux OpenAir Windows OpenAir 400 PowerNet Twin Client and PowerNet AirLinc are trademarks of Connect Inc Other product names mentioned in this manual may be trademarks or registered trademarks of their respective companies and are hereb...

Страница 3: ...g the Manager 2 5 Downloading Files To Terminal 2 10 Booting the Terminal 2 11 Starting a Telnet Session 2 12 Standard Setup 2 13 Setup Using Twin Client Manager 2 13 Terminal Setup Using Twin Client Menus 2 19 Authorizing PowerNet 2 21 Software Management 2 25 Auto Configuration 2 25 Manual Download of Configuration Files 2 31 Chapter 3 Keypad Configuration 3 1 Diagram 3 1 Table 3 2 Chapter 4 Err...

Страница 4: ...This page is intentionally blank iv Supported Equipment Manual May 2006 ...

Страница 5: ... a touch or pen resistive screen that does not require a special stylus and signature capture readiness with standard development tools like PenRight The 7100 terminal with its 9 ounce 250g design has a battery life of up to 8 hours including 4000 barcode scans of battery life with Lithium Ion technology application dependent The 7120 terminal with its 10 ounce 300g design has a Lithium battery wi...

Страница 6: ...mum the following A Pentium class processor 32 MB of RAM 10 MB of free hard disk space available Microsoft Windows 95 98 ME XP or NT 2000 operating system Bios The version of BIOS will appear on a terminal screen when the terminal is rebooted For rebooting instructions see Booting the Terminal in the Quick Start section Supported Equipment Manual May 2006 1 2 ...

Страница 7: ...k on Software Downloads Select the file named PowerNet Twin Client for Fujitsu Running Setup from a Download File The downloaded file is a compressed archive After extraction using a utility such as WinZip or PKWARE folders are created on the hard disk as shown in the following figure Click on the Disk1 folder to view the files as shown in the following figure Supported Equipment Manual May 2006 2...

Страница 8: ...and proceed to the following section entitled Installation for further instructions Installation The InstallShield wizard runs and presents the following screen Click on Next to begin the installation process Supported Equipment Manual May 2006 2 2 ...

Страница 9: ...lick on Browse and select a location Then click on Next The default folder is PowerNet This default may be changed either by selecting an existing program group or by typing in a new name at the prompt Then click on Next Supported Equipment Manual May 2006 2 3 ...

Страница 10: ...in Client Manager is the utility that manages the terminal software and configurations Select Start Programs PowerNet and Twin Client Manager The PowerNet Twin Client Manager screen appears as shown in the following figure This is the administrator s main screen and all functions are accessed from its menu bar tool bar and tabs Menu Bar The menu bar provides access to the functions used to configu...

Страница 11: ... use Quick Start provides detailed instructions for quickly configuring the terminal and starting a Telnet session Quick Start Quick Start describes how to prepare the Twin Client Manager and the Fujitsu terminal for a Telnet session with the host Following an initial setup procedure the terminal software and configuration is managed automatically over the wireless network Configuring the Manager ...

Страница 12: ...vers are the Telnet host systems the terminals will access To set these addresses from the Settings menu click on Servers and then click on Add Enter the name of each server its IP Address and IP port normally 23 for Telnet servers and emulation type Then click on OK Supported Equipment Manual May 2006 2 6 ...

Страница 13: ... the line that is in error and then click on the Edit button to make the corrections Setting Terminal Model Under Settings choose the Options menu as shown Select terminal model desired radio type and COM port Saving the Configuration Click on File and Save As Enter a name for this configuration For the purposes of this example the name is vt100 Supported Equipment Manual May 2006 2 7 ...

Страница 14: ...options Click on the Auto Configuration option in the Settings menu Note If the Auto Configuration window does not display the options click on the Advanced button If multiple network adapters are installed on the PC ensure that the desired network adapter is selected The adapter selection can be changed by clicking on the Change button Supported Equipment Manual May 2006 2 8 ...

Страница 15: ...all of the check boxes are checked as shown above To assign terminal IP addresses automatically over the wireless network check all of the boxes as shown above Then click on the Addresses button and enter the desired range in the From and To boxes as shown in the following figure After setting the address range click on OK to return to the Auto Configuration screen and then click on the box next t...

Страница 16: ...to return to the main menu Note The software does not need to be authorized now It can be authorized later after a Telnet session has been established The procedure is described in Authorizing PowerNet under Standard Setup Downloading Files To Terminal Twin Client program and configuration files are installed on the terminal with the following procedure Boot the terminal according to the direction...

Страница 17: ...will then automatically manage the terminal software and configuration Booting the Terminal At any time it is necessary to update the terminal software and or configuration the terminal must be booted To boot the terminal press the sft clr 1 keys A successful wireless connection is indicated by the display of the Twin Client main menu shown below Twin Client 1991 2006 Connect Inc Keypress to Conti...

Страница 18: ...minal Setup Using Twin Client Menus No AirLoad Manager Found AirLoad Manager not active or not installed on the LAN segment Ensure that the PC with Twin Client Manager is on the same segment and that the PC is operating If the PC is not on the same segment enter the address of the PC in response to the terminal prompt Manager not Active Previously identified AirLoad Manager is no longer found Same...

Страница 19: ...al Also described are the methods for authorizing the terminal software Setup Using Twin Client Manager The Twin Client Manager provides a Standard Settings tab for automatic setup of the terminals The options within this tab vary according to the emulation selected each of which is described below VT Settings Select the VT emulation setup by clicking on the Settings menu and then the Emulation me...

Страница 20: ...nt processing However input fields that cross quadrant boundaries result in a shift to the left in order to locate as much of the current input field on the terminal display Soft always positions on a quadrant boundary regardless of input field boundaries Viewing keys are enabled Hard is the same as Soft except the viewing keys are disabled Lock locks the terminal display origin upper left corner ...

Страница 21: ...lue is none indicating no printer is attached 5250 Settings Select the 5250 emulation setup by clicking on the Settings menu and then the Emulation menu as shown below Then click on the 5250 selection as shown below Click on OK after the selection is made and return to the main Twin Client Manager menu The standard settings tab will now reflect the settings for 5250 emulation Supported Equipment M...

Страница 22: ...nt processing However input fields that cross quadrant boundaries result in a shift to the left in order to locate as much of the current input field on the terminal display Soft always positions on a quadrant boundary regardless of input field boundaries Viewing keys are enabled Hard is the same as Soft except the viewing keys are disabled Lock locks the terminal display origin upper left corner ...

Страница 23: ...lue is none indicating no printer is attached 3270 Settings Select the 3270 emulation setup by clicking on the Settings menu and then the Emulation menu as shown below Then click on the 3270 selection as shown below Click on OK after the selection is made and return to the main Twin Client Manager menu The standard settings tab will now reflect the settings for 3270 emulation Supported Equipment M...

Страница 24: ...nt processing However input fields that cross quadrant boundaries result in a shift to the left in order to locate as much of the current input field on the terminal display Soft always positions on a quadrant boundary regardless of input field boundaries Viewing keys are enabled Hard is the same as Soft except the viewing keys are disabled Lock locks the terminal display origin upper left corner ...

Страница 25: ...it Mobile Unit IP Edit Server Host IPs Edit Radio Option Edit License Key Run Site Survey Switch Client Modes Run Client Emulator Exit to OS Use the Up Arrow and Down Arrow keys to navigate the menu and press Enter to select the highlighted option Each menu option is described below Edit Mobile Unit IP The IP list contains the terminal IP address the Subnet Mask and the Router IP address Enter the...

Страница 26: ...isplayed at the top of the terminal screen is the Identification Code for the terminal 00A0F826E614 Authorization ______________ not authorized F3 Save F7 Quit Type the Authorization code into the field as it appears on the web site Uppercase letters are significant and punctuation characters such as the hyphen are required Press F3 to save the Authorization code Run Site Survey This option a feat...

Страница 27: ...connectrf com on the Partner Services page Click on the Generate Authorization icon at the top of the page Automatic Authorization The Twin Client Manager can automatically authorize the terminal over the wireless network if the following requirements are met A PC running Twin Client Manager is connected to the wire LAN segment with at least one access point within range of the terminal The System...

Страница 28: ...the System ID before the code is generated Manual Authorization The procedure for manually setting the Authorization code on the terminal is described in the section entitled Edit License Key in Terminal Setup Using Twin Client Menus above Adding Licenses The Add Licenses feature is used when adding additional licenses to an already site licensed Twin Client Manager i e Twin Client Manager is lice...

Страница 29: ...nses Authorization code Use the Machine ID in the pop up box instead of the original Machine ID to get your Authorization code If adding users click on the Add Licenses button before generating the Authorization code to get the most current Machine ID Supported Equipment Manual May 2006 2 23 ...

Страница 30: ...chine ID for it From Twin Client Manager select Authorization from under the Settings menu Click on the Transfer Authorization button on the old PC You will be asked for the new System ID Enter this new System ID It will generate an Authorization code for the new PC s Twin Client Manager Note This feature only works if there are licenses remaining on the old PC Supported Equipment Manual May 2006 ...

Страница 31: ...ions involving serial download options are described at the end of it Auto Configuration The Auto Configuration form is accessed from the Twin Client Manager Settings menu Note If no options are displayed click the Advanced button Enabling Automatic Downloads Click to put a check in the box that allows terminals to be automatically configured via RF to enable automatic downloading In the event ano...

Страница 32: ... Files box to enable automatic synchronization of program files on the terminal When the terminal is booted its program files will be compared with the most recent on the PC The terminal is updated automatically if it does not have the latest revision Automatic IP Address Assignment New terminals will be assigned IP addresses automatically if the following box is checked Note Do not check this opt...

Страница 33: ...ting New Groups New groups with different configurations can be created by clicking on Terminal Group Manager and then clicking the right mouse button as shown After the new group has been created the group settings option becomes available for change as shown below Supported Equipment Manual May 2006 2 27 ...

Страница 34: ...Terminal Setup After the Configuration File and all of the other parameters have been set the group is made active by clicking on the Active check box Supported Equipment Manual May 2006 2 28 ...

Страница 35: ... be automatically updated The following warning message appears Click on the Yes button to force the reload Setting the Default Terminal Group New terminals that have not yet been assigned to any group are initially assigned to the default group in effect when they are booted Any group can be made the default group by clicking on the group and then clicking on the right mouse button Then click on ...

Страница 36: ...rag the terminal icon to the desired group as shown next Release the mouse button which reassigns the terminal The next time the terminal is rebooted it will be reconfigured as defined in the group specification Supported Equipment Manual May 2006 2 30 ...

Страница 37: ...pt but do not Enter at this time Note This procedure assumes that the PowerNet Twin Client was previously installed The following screen appears Choose Enter on the terminal while choosing OK at the prompt above Boot the terminal The terminal is now ready to begin a Telnet session with the new configuration files Under Terminal you may select Receive File from Terminal Enter the path and file name...

Страница 38: ...Terminal Setup This page is intentionally blank Supported Equipment Manual May 2006 2 32 ...

Страница 39: ...Chapter 3 Keypad Configuration Diagram c d e y bklite i sft space a r f online utilities menu n pwr 0 sft ent 1 2 3 bks 4 5 6 clr 7 8 9 pwr shift keytop Supported Equipment Manual May 2006 3 1 ...

Страница 40: ... 0 i sft sft sft sft sft sft sft sft sft sft space sft ent sft ent sft ent y sft clr sft clr sft clr sft bks sft bks sft bks pwr sft pwr sft pwr sft pwr a sft 1 sft 1 sft 1 r sft 2 sft 2 sft 2 f sft 3 sft 3 sft 3 c sft 4 sft 4 sft 4 d sft 5 sft 5 sft 5 e sft 6 sft 6 sft 6 online utilities menu sft 7 sft 7 sft 7 n sft 8 sft 8 sft 8 sft 9 sft 9 sft 9 backlight sft 0 sft 0 sft 0 Supported Equipment M...

Страница 41: ...ey a Minus sign Ensure that you are entering input into the correct field DECIMAL NOT VALID Trying to key a Decimal period Ensure that you are entering input into the correct field ALPHANUMERIC ONLY Trying to key characters other than Alphabetic and numeric Ensure that you are entering input into the correct field NUMERIC ONLY Trying to key characters other than numeric Ensure that you are enterin...

Страница 42: ...before it is filled Ensure that you are entering input into the correct field RECOVERABLE ERROR Encountered an error from which you can continue Verify that your configuration settings for the hardware being used usually a printer and cable issue UNRECOVERABLE ERROR Encountered an error from which you can NOT continue Verify that your Network settings are correct and you are in the correct mode us...

Страница 43: ...nt radio host or network issue Troubleshoot the customer s environment T1113 T1114 T1161 T1171 T1187 and T1194 RF Check ERROR nREBOOT MOBILE UNIT Could not run the RF Survey Most likely a range access point radio host or network issue Troubleshoot the customer s environment T1113 T1114 T1161 T1171 T1187 and T1194 RF Timeout ERROR nREBOOT MOBILE UNIT Have been trying to contact the host for the rad...

Страница 44: ...ure or network failure T1113 T1114 T1161 T1171 T1187 and T1194 WAITING TO SEND Mobile Unit out of the coverage area Most likely a range access point radio host or network issue Troubleshoot the customer s environment T1113 T1114 T1161 T1171 T1187 and T1194 TCP Error Reading nMAC Address nREBOOT MOBILE UNIT Could not obtain the Mac Address from the Mobile Unit Possible hardware driver or stack prob...

Страница 45: ... the host application Select Host or App Need to choose your Host application destination User selection required Connecting Attempting to connect to the Host application Advisory message TCP Error nReading IP Address nREBOOT MOBILE UNIT Mobile Unit missing Network IP information Configure the Mobile Unit with the correct network IP information Printer start error Could not initialize the printer ...

Страница 46: ... customer s environment T1113 T1114 T1161 T1171 T1187 and T1194 Missing Subnet IP nSession Ended Mobile Unit IP Netmask Error Most likely a Mobile Unit network setting issue Troubleshoot the customer s environment T1113 T1114 T1161 T1171 T1187 and T1194 Error Opening File File is missing Verify that the configuration files are on the Mobile Unit Or perhaps there is a hardware failure Telnet API nn...

Страница 47: ...elnet Setup files nnot found Reload nfiles then switch Customer specific configuration files are missing Load the configuration files into the Mobile Unit from Twin Client Manager Switched Client to nTelnet Direct Mode Mobile Unit running in Telnet mode direct to the target Host Advisory message Switched Client to nServer Based Mode Mobile Unit running through a Connect server in Server mode usual...

Страница 48: ...rompt Advisory message TwinClient TN5250 Prompt Advisory message TwinClient TNVT Prompt Advisory message c 1991 2006 Connect Prompt Advisory message Edit Menu Options Menu Title Advisory message Edit Mobile Unit IP Menu Option Advisory message Edit Server Host IPs Menu Option Advisory message Edit Radio Option Menu Option Advisory message Supported Equipment Manual May 2006 4 8 ...

Страница 49: ...gs and paper in the printer OUT OF RANGE OF BASE Mobile Unit out of the coverage area Most likely a range access point radio host or network issue Troubleshoot the customer s environment T1113 T1114 T1161 T1171 T1187 and T1194 CONNECT SERIAL CABLE Serial cable not connected to the Mobile Unit Check cable battery and communication settings for the Mobile Unit REMOVE SERIAL CABLE Remove serial cable...

Страница 50: ...n in the appropriate time so the host disconnected you Modify the Host parameters for login Connection Failed nHost Not Responding Could not connect to the Host Most likely a range access point radio host or network issue Troubleshoot the customer s environment T1113 T1114 T1161 T1171 T1187 and T1194 Connection Failed nHost Unreachable Could not connect to the Host Most likely a range access point...

Страница 51: ...e WARNING Prompt Advisory message Turning power off nduring a session nwill cause the nprogram to restart This Mobile Unit will disconnect the session if powered off Mobile Unit manufacturer limitation Advisory message Are you sure y n Yes or No prompt for a confirmation Advisory message You Sure YyNn Yes or No prompt for a confirmation Advisory message Domain Name Server nNot Set DOMAIN NAME SERV...

Страница 52: ...194 Error loading nparameter file Could not load the parameter file Reload the correct configuration files Could not open ntelnet interface Could not Telnet Reload the program files Could not set mtelnet options Could not use the Telnet configuration Reload the correct configuration files Setup file nsetting mismatch nReload Setup Emulation program selected is not compatible with the configuration...

Страница 53: ... scanning test Advisory message Enter Setup nPassword Prompt Advisory message Enter Profile nPassword Prompt Advisory message Host IP Host IP address prompt Enter target host IP address Host Name Host name prompt Enter target host Name Port Host IP port required Enter 23 for Telnet or 1800 for a Connect Server Could also be a different number depending on the customer s environment T1113 T1114 T11...

Страница 54: ...100 220 Setup Prompt Advisory message Mobile Unit Info Prompt Advisory message Emulation Setup Prompt Advisory message ANSI Setup Prompt Advisory message Miscellaneous Setup Prompt Advisory message Mobile Unit Type Prompt Advisory message Control Codes Prompt Advisory message Local Echo Prompt Advisory message Supported Equipment Manual May 2006 4 14 ...

Страница 55: ... message Insert Mode Prompt Advisory message Autowrap Mode Prompt Advisory message Cursor Prompt Advisory message EMULATION SETUP Prompt Advisory message Mobile Unit Type Prompt Advisory message Local Echo Prompt Advisory message Map Underline Prompt Advisory message Break Key Prompt Advisory message Supported Equipment Manual May 2006 4 15 ...

Страница 56: ... Backspace Key Prompt Advisory message MISCELLANEOUS SETUP Prompt Advisory message Test Options Prompt Advisory message Login Options Prompt Advisory message TEST OPTIONS Prompt Advisory message Printer Test Prompt Advisory message Scan Code Test Prompt Advisory message LOGIN OPTIONS Prompt Advisory message Supported Equipment Manual May 2006 4 16 ...

Страница 57: ...ord Prompt Advisory message ON Prompt Advisory message OFF Prompt Advisory message Map Prompt Advisory message Don t Map Prompt Advisory message Enable Break Prompt Advisory message Disable Break Prompt Advisory message 7 bit Prompt Advisory message 8 bit Prompt Advisory message Supported Equipment Manual May 2006 4 17 ...

Страница 58: ...ile Unit Setup Prompt Advisory message Scanner Options Prompt Advisory message Program Options Prompt Advisory message Special Options Prompt Advisory message Beeper Options Prompt Advisory message Exit to DOS Prompt Advisory message Backlight Time Prompt Advisory message Enter Key Action Prompt Advisory message Supported Equipment Manual May 2006 4 18 ...

Страница 59: ...Portable Printer Prompt Advisory message Reprint Option Prompt Advisory message Data IDs Prompt Advisory message Internal External Prompt Advisory message Modify Beeps Prompt Advisory message Message Beeps Prompt Advisory message Scan Identifier Prompt Advisory message AID Scan Setup Prompt Advisory message Supported Equipment Manual May 2006 4 19 ...

Страница 60: ...dvisory message Yes Prompt Advisory message No Prompt Advisory message Normal Prompt Advisory message Double Wide Prompt Advisory message Double High Prompt Advisory message Double High and Wide Prompt Advisory message Errors Only Prompt Advisory message Automatic Prompt Advisory message Supported Equipment Manual May 2006 4 20 ...

Страница 61: ...Advisory message Truncate Prompt Advisory message Split Prompt Advisory message Do Not Send Prompt Advisory message Always Send Prompt Advisory message Last Field Only Prompt Advisory message Internal Prompt Advisory message External Prompt Advisory message none Prompt Advisory message Supported Equipment Manual May 2006 4 21 ...

Страница 62: ...visory message comtec Prompt Advisory message rascal Prompt Advisory message codewriter Prompt Advisory message comtec S Prompt Advisory message User Name Prompt Advisory message Password Prompt Advisory message Frequency Hz Prompt Advisory message Duration ms Prompt Advisory message Supported Equipment Manual May 2006 4 22 ...

Страница 63: ...message Setup Scanner Prompt Advisory message Scan Test Prompt Advisory message Scan Operation Prompt Advisory message Laser Prompt Advisory message Contact Pulse Prompt Advisory message Contact No Pulse Prompt Advisory message Auto Pulse Prompt Advisory message Auto No Pulse Prompt Advisory message Supported Equipment Manual May 2006 4 23 ...

Страница 64: ...and Simulation Prompt Advisory message VT100 Prompt Advisory message VT220 Prompt Advisory message SETUP Prompt Advisory message Mobile Unit IP Radio Prompt Advisory message Host List Prompt Advisory message NULL Prompt Advisory message Supported Equipment Manual May 2006 4 24 ...

Отзывы: