86
CHAPTER2 Dependence Functions
2.2.6.3
Setting Trace
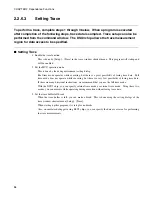
To perform a trace, complete steps 1 through 3 below. When a program is executed
after completion of the following steps, trace data is sampled. Trace setup can also be
performed from the command window. The DSU3 chip allows the trace measurement
region for data access to be specified.
■
Setting Trace
1. Enable the trace function
- This is done by [Setup] - [Trace] in the trace window shortcut menu. This program will startup and
will be enabled.
2. Set the MCU operation mode
- This is done by the debug environment setting dialog.
- Real time mode operates while executing, but there is a great possibility of losing trace data. Full
trace mode does not operate while executing, but there is a very low possibility of losing trace data.
If there are many divisional instructions, we recommend that you use the full trace mode.
- With the DSU3 chip, you can specify internal trace mode or external trace mode. Using these two
modes, you can measure while operating during execution without losing trace data.
3. Set the trace buffer full break
- When the trace buffer is full, you can make a break. This is done using the setting dialogs of the
trace window shortcut menu [Setup] - [Trace].
- When starting up this program, it is setup for no breaks.
- Also, on emulator debuggers using DSU3 chips, you can specify the data access area for performing
the trace measurements.
Содержание SOFTUNE
Страница 2: ......
Страница 3: ...FUJITSU SEMICONDUCTOR LIMITED FR FAMILY SOFTUNE TM WORKBENCH USER S MANUAL for V6 ...
Страница 4: ......
Страница 42: ...32 CHAPTER1 Basic Functions ...
Страница 225: ...215 INDEX INDEX The index follows on the next page This is listed in alphabetic order ...
Страница 232: ...222 INDEX ...
Страница 234: ......

