background image

E-22

HOW TO USE MENUS

1

2

3

SELECTING OPTIONS IN A MENU

Use the [MODE] button on the display or 

 and 

 on the remote control to select a desired input mode.

Press 

M E N U

.

The main menu screen will appear.

Press 

 or 

 to switch between subordinate menus.

Each time you press   or  , one of the available menus appears.

Press 

E N T E R

 or 

.

The corresponding menu screen will appear.

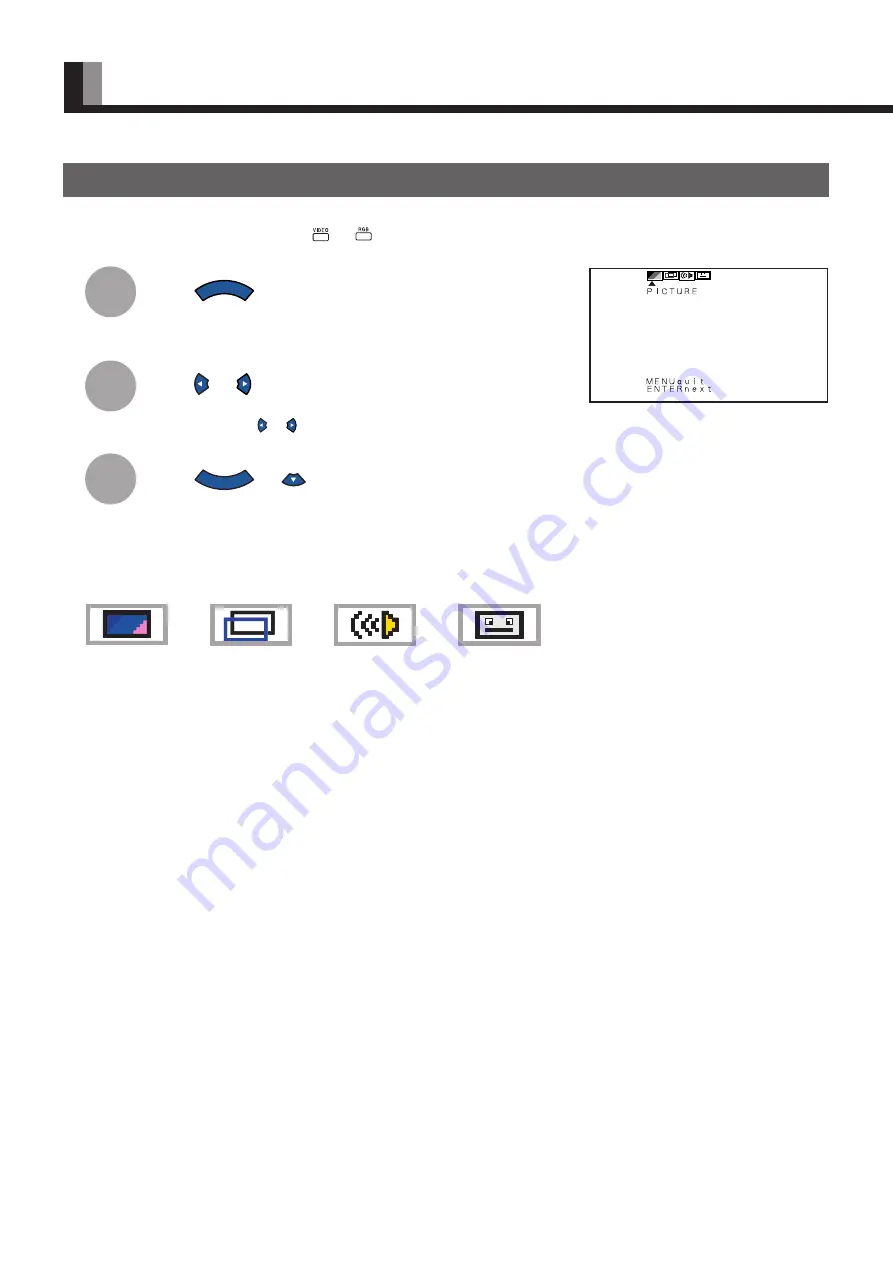
A total of four different menus (PICTURE, POSITION/SIZE, SOUND, OTHERS) are available.

You can easily distinguish between these menus as shown below.

Ex.: “PICTURE” selected in the main menu
screen

PICTURE

POSITION/SIZE

SOUND

OTHERS

* Do not change input signals when any of the menus is displayed.

Содержание Plasmavision PDS4221

Страница 1: ...fety Precautions E 2 E 3 Features E 4 Handy Tips E 5 Cleaning and Maintenance E 6 Installation E 7 Safety Measures E 8 Accessories E 9 Usage Part Names and Functions E 10 E 14 Using the Remote Control E 15 Connecting the Display to External Equipment E 16 E 17 Basic Operations E 18 Selecting Input Mode E 19 Watching Images on the Wide Screen E 20 E 21 How to Use Menus E 22 E 27 Adjustments Adjusti...

Страница 2: ...0 4 2 1995 EN 61000 4 3 1996 EN61000 4 4 1995 EN 61000 4 5 1995 EN61000 4 6 1996 EN61000 4 8 1993 EN 61000 4 11 1994 Safety e EN60950 1992 A1 1993 A2 1993 A3 1995 A4 1997 By conformance with the standard referenced the product follows the provisions of the directives listed below a EC Council Directive 89 336 EEC of 3rd May 1989 b EC Council Directive 92 31 EEC of 28th April 1992 c EC Council Dire...

Страница 3: ...0 4 2 1995 EN 61000 4 3 1996 EN61000 4 4 1995 EN 61000 4 5 1995 EN61000 4 6 1996 EN61000 4 8 1993 EN 61000 4 11 1994 Safety e EN60950 1992 A1 1993 A2 1993 A3 1995 A4 1997 By conformance with the standard referenced the product follows the provisions of the directives listed below a EC Council Directive 89 336 EEC of 3rd May 1989 b EC Council Directive 92 31 EEC of 28th April 1992 c EC Council Dire...

Страница 4: ...pment into an outlet on a circuit different from that to which the receiver is connected Consult the dealer or an experienced radio TV technician for help IMPORTANT INFORMATION WARNING This is Class A and Class B product In a domestic environment this product may cause radio interference in which case the user may be required to take adequate measures WARNING TO REDUCE THE RISK OF FIRE AND ELECTRI...

Страница 5: ... they may touch dangerous voltage points or short out parts that could result in a fire or electric shock Never spill liquid of any kind on the product Do not attempt to service this product yourself as opening or removing covers may expose you to dangerous voltages or other hazards Refer all service to qualified service personnel Unplug this product from the wall outlet and refer service to quali...

Страница 6: ...es video input mode and 3 screen sizes RGB input mode This display offers a total of five different screen sizes in video input mode Wide1 Wide2 Zoom1 and Zoom2 A Normal mode is also available for display of normal size 4 3 aspect ratio images Three different screen sizes in RGB input mode Normal Wide and Zoom are also available Install the display lengthwise The display can be installed lengthwis...

Страница 7: ...e power indicator blinks red indicating that the display is somehow faulty If you continue using the display as is fire or electric shock may result Be sure to first remove the power plug from the receptacle and to contact your dealer immediately If the message Error message Condition 1 appears the fan is faulty Turn the main power switch to OFF remove the power plug from the receptacle and contac...

Страница 8: ...ave selected No audio for the Audio input setting See Extended Features on P E 37 E 41 Check whether you have selected Input priority See Extended Features on P E 37 E 41 Input proper signals Make sure that the vertical frequency of the input signal is 60 Hz both for SVGA and XGA This sound is produced when the cabinet expands or contracts due to variations in temperature This sound does not indic...

Страница 9: ... or backward To prevent the power and other cables from being accidentally pulled make sure that they run along the wall or through corners The display can be installed with either of its sides facing down Note Grounding work is necessary if the receptacle is intended for exclusive use in the two wire circuit Reference See P E 44 for more information on options Front Side Front Side Front Side Whe...

Страница 10: ...he wall To do this use screws B 20 mm long to attach safety brackets B supplied with the display to the wall To make sure that the display is stable attach wall brackets at the same height as or slightly lower than the display brackets 3 Tie brackets A and B together To do this use strong cords to fix the display securely to the wall Use two screws supplied with the stand to fix the display using ...

Страница 11: ...le clampers One remote control One strap for remote control Two AA batteries for remote control One user s manual Four screws screw A x 2 screw B x 2 for brackets that prevent the unit from falling over Three power cables CHECKING ACCESSORIES Manual Connector cover When you finish binding the cables using the cable clampers you need to attach the connector cover to the display To do this use nippe...

Страница 12: ...you continue using the display as is fire or electric shock may result Be sure to first remove the power plug from the receptacle and to contact your dealer immediately 2 3 4 5 6 7 8 9 0 1 The control panel opens when you press the lower center of the display If you press the display again the control panel closes 4 Power button POWER Turns the power ON or OFF when the main power switch provided a...

Страница 13: ... When using an RS 232C cable be sure to use a straight cable 6 RGB1 synchronization switch SYNC SW1 TTL ANALOG 75 Ω This switch is used to terminate pins 13 and 14 of the RGB1 terminal with 75 Ω respectively for receiving horizontal H and vertical V synchronization signals TTL Used when sending RGB signals from the PC to the RGB1 terminal ANALOG 75 Ω Used when sending analog synchronization signal...

Страница 14: ...ed through the sound input terminal Description of Input Terminals RGB1 input terminal RGB1 INPUT mD sub Pin No Input signal Pin No Input signal 1 Red 9 2 Green 10 Ground 3 Blue 11 4 12 5 Ground 13 Horizontal H synchronization 6 Ground 14 Vertical V synchronization 7 Ground 15 8 Ground Frame Ground Use the RGB1 synchronization switch to switch between TTL and ANALOG depending on the types of horiz...

Страница 15: ...ard is used 640 x 480 31 47 59 94 VGA 640 x 400 37 88 60 32 SVGA 60 Hz 1024 x 768 48 36 60 00 XGA 60 Hz 848 x 480 31 02 60 00 640 x 480 15 73 59 94 60 fields 640 x 480 15 63 50 00 50 fields User setting 15 63 to 80 00 50 00 to 120 00 eight varieties each for the RGB1 and RGB2 modes Signal Display dots x lines Horizontal frequency kHz Vertical frequency Hz 15 73 59 94 SDTV 525i 15 63 50 00 SDTV 625...

Страница 16: ...e and sound 7 Volume adjustment buttons VOL See P E 18 Adjust the volume Press the button to increase the volume Press the button to reduce the volume 8 Adjustment buttons See P E 22 E 41 Use these buttons to scroll through options in a menu and change values 9 Enter button ENTER See P E 22 E 41 Press this button to finalize the selection of a desired menu or option within a menu 0 Display selecto...

Страница 17: ...as benzene or thinner EFFECTIVE RANGE FOR THE REMOTE CONTROL Point the remote control at the display s signal receiver when using it Make sure that there are no obstacles between the remote control and the display s signal receiver USING THE REMOTE CONTROL Information The remote control may not function properly if you use a high frequency fluorescent lamp If you experience problems move the lamp ...

Страница 18: ... EQUIPMENT Carefully check the terminals for position and type before making any connections Loose connectors can result in image or color problems Make sure that all connectors are securely inserted into their terminals When you complete connection route the cable and secure it with the cable clamper Then reinstall the connector cover CONNECTING THE DISPLAY TO EXTERNAL EQUIPMENT Terminal Connecto...

Страница 19: ...t AUDIO1 INPUT RGB1 INPUT RS 232C RGB2 INPUT To receptacle To sound output terminal To video output terminal To S video output terminal To color difference output terminal To display analog RGB output terminal To display analog RGB output terminal To RS 232C output terminal Connection to AV equipment To sound output terminal ...

Страница 20: ...panel to accomplish these steps TURNING ON THE POWER Press when the power is ON The power indicator lamp turns red TURNING OFF THE POWER Press to increase the volume Press to reduce the volume Any value between 0 and 40 can be selected Speaker off appears if you press or after you have selected No audio for Audio input See P E 37 E 41 Note that the volume level remains stored even when you turn OF...

Страница 21: ... the switches on the display s control panel to accomplish these steps VIDEO INPUT MODE RGB INPUT MODE S video mode Comp video mode Press to select a desired input mode Each time you press a different input mode appears as follows RGB1 RGB2 RGB1 Displays images from equipment connected to the RGB1 mD sub terminal RGB2 Displays images from equipment connected to the RGB2 BNC x 5 terminal You can sw...

Страница 22: ...ith an aspect ratio ratio of frame width to frame height different from that of the TV program or video media the images will appear differently than if you had selected a mode having the same aspect ratio Showing a movie or similar premium event at a different aspect ratio from its original one at any event site restaurant or bar for profit making purposes or for a public audience may constitute ...

Страница 23: ...1 Wide2 Horizontally extended image Zoom1 Horizontally extended image with caption Zoom2 16 9 aspect ratio HDTV broadcasting EDTV II enhanced definition television II 4 3 aspect ratio VHF UHF broadcasting BS broadcasting 1 85 1 aspect ratio Vista Vision size 2 35 1 aspect ratio Cinema Vision size Wide2 Video Input Mode Wide RGB Input Mode Reduces the aspect ratio of images from 16 9 to 4 3 Ideal f...

Страница 24: ...en subordinate menus Each time you press or one of the available menus appears Press E N T E R or The corresponding menu screen will appear A total of four different menus PICTURE POSITION SIZE SOUND OTHERS are available You can easily distinguish between these menus as shown below Ex PICTURE selected in the main menu screen PICTURE POSITION SIZE SOUND OTHERS Do not change input signals when any o...

Страница 25: ...emp 7 Dot clock for RGB1 RGB2 8 Clock phase for RGB1 RGB2 Function Adjusts image contrast Adjusts screen brightness Adjusts color darkness Adjusts tint Adjusts image sharpness Adjusts color temperature Adjusts the dot clock Adjusts clock phase Operation Higher contrast Lower contrast Brighter screen Darker screen Darker colors Lighter colors More green tinged colors More purple tinged colors Sharp...

Страница 26: ...n Function Adjusts screen position Operation Range Video S video Horizontal 30 to 30 Vertical Zoom 15 to 15 Others 7 to 7 Comp video 16 to 16 RGB1 RGB2 150 to 150 POSITION SIZE Menu screen Position adjustment screen Video S video 7 to 7 Comp video 4 to 4 RGB1 RGB2 25 to 50 2 Size Width Height Adjusts screen size Adjusts width Adjusts height Increases width Reduces width Increases height Reduces he...

Страница 27: ...ted mode Option 1 Treble 2 Bass 3 Balance 4 Speaker Function Adjusts treble Adjusts bass Adjusts volume balance Selects built in or external speakers Operation Stronger treble Weaker treble Stronger bass Weaker bass Higher volume from right hand speaker Higher volume from left hand speaker Use or for switching Range 6 to 6 6 to 6 10 to 10 Internal built in speakers External external speakers SOUND...

Страница 28: ...switching Use or for switching Displays the Status information screen Press E N T E R to update the status Range On displayed Off not displayed English Deutsch German Español Spanish Français French Italiano Italian Português Portuguese 0 no setup 1 2 3 4 Auto NTSC PAL SECAM N PAL M PAL 4 43NTSC 2 to 1 0 to 8 On enabled Off disabled Display only Displays a message screen Enter Displays Extended me...

Страница 29: ...screen and use or to select an option Use or to switch between available choices for the selected option Use or for switching Display the Audio input selection screen and use or to select an option Use or to switch between available choices for the selected option Use or for switching Use or for switching Display the White peak level calibration adjustment screen and use or to select an option Sha...

Страница 30: ...ress M E N U several times when you finish Repeat steps 4 5 and 6 when you wish to make changes to other options 1 2 You can also use the switches on the display s control panel to accomplish these steps BASIC OPERATIONS EX ADJUSTING TINT Tint PICTURE selected in the main menu screen Tint selected in the PICTURE Menu screen Video Input Mode POWER ON RGB VIDEO WIDE POWER OFF VOL 1 2 3 4 SHIFT MENU ...

Страница 31: ...for V S and 3 and 3 for C can be selected Sharper images Less sharp images Adjusting Color Temperature Color temp Use or to specify a desired color temperature Each time you press or one of the available choices appears in the following sequence Warm Standard Cool Warm More red tinged colors Standard Standard color temperature Cool More blue tinged colors You can adjust color temperature once you ...

Страница 32: ... right Moves screen to the left Press M E N U several times when you finish Repeat steps 4 5 and 6 when you wish to make changes to other options 1 2 You can also use the switches on the display s control panel to accomplish these steps BASIC OPERATION EX ADJUSTING SCREEN POSITION POSITION SIZE selected from the main menu screen Position selected in the POSITION SIZE Menu screen POWER ON RGB VIDEO...

Страница 33: ...l position Horizontal Moves screen to the right Moves screen to the left Vertical position Vertical Moves screen up Moves screen down Adjusting Screen Size Size Screen width Width Increases width Reduces width Screen height Height Increases height Reduces height Setting Range Position adjustment screen Size adjustment screen V R1 R2 C S V R1 R2 C S Position Size Video S video mode Horizontal 30 to...

Страница 34: ... U several times when you finish Repeat steps 4 and 5 when you wish to make changes to other options 1 2 You can also use the switches on the display s control panel to accomplish these steps BASIC OPERATION EX ADJUSTING VOLUME BALANCE Balance SOUND selected in the main menu screen Balance selected in the SOUND Menu screen POWER ON RGB VIDEO WIDE POWER OFF VOL 1 2 3 4 SHIFT MENU ENTER You can make...

Страница 35: ... Weaker treble Adjusting Bass Bass Any value between 6 and 6 can be selected Stronger bass Weaker bass Adjusting Volume Balance Balance Any value between 10 and 10 can be selected Higher volume from the right hand speaker Higher volume from the left hand speaker Selecting Speakers Speaker Use or to select speakers Each time you press or one of the available choices appears in the following sequenc...

Страница 36: ...ed in the selected language Press E N T E R several times when you finish Repeat steps 4 and 5 when you wish to make changes to other options 1 2 You can also use the switches on the display s control panel to accomplish these steps BASIC OPERATION EX SELECTING LANGUAGE Language OTHERS selected in the main menu screen Language selected in the OTHERS Menu screen Video Input Mode POWER ON RGB VIDEO ...

Страница 37: ...ndividual displays by assigning a unique number to each of the displays Each time you press or one of the available numbers appears in the following sequence 0 1 2 3 4 0 You can normally control displays You cannot control displays if you press any of SHIFT 1 through SHIFT 4 1 4 Allows you to control a desired display by pressing the corresponding button one of SHIFT 1 through SHIFT 4 When you do ...

Страница 38: ...tion Displaying System Status Status V S C R1 R2 Displays system operation status 1 Select Status and press E N T E R or The Status information screen will appear 2 Check the status Press E N T E R when you wish to update the status 3 Press M E N U to return to the OTHERS Menu screen Mode Input mode appears at the upper right corner of the screen Monitor No Monitor number Frequency Frequency and p...

Страница 39: ...er options 1 2 You can also use the switches on the display s control panel to accomplish these steps BASIC OPERATION EX SETTING UP POWER SAVING FUNCTION DPMS Extended menu selected in the OTHERS Menu screen Video Input Mode Message screen POWER ON RGB VIDEO WIDE POWER OFF VOL 1 2 3 4 SHIFT MENU ENTER You can use this menu to make adjustments for all extended features You can use the Extended menu...

Страница 40: ...rom PC Adjusting image sharpness Sharpness R1 R2 Any value between 3 and 3 can be selected Sharper images Less sharp images Making gamma correction Gamma R1 R2 You can use this option to make a dynamic gamma correction suitable for still or motion pictures Each time you press or one of the available choices appears in the following sequence Motion Still Motion Suitable for watching a motion pictur...

Страница 41: ...tive the power indicator lamp turns orange Each time you press or one of the available choices appears in the following sequence Off 1 min 3 min 5 min 10 min 30 min Off Disables DPMS Number Time before DPMS starts Unit minutes The power indicator lamp turns orange while the DPMS is ON The power turns ON automatically when the display receives a signal Displaying white over entire screen White scre...

Страница 42: ...ces appears in the following sequence On Off On Adjusts color temperature so that it is appropriate for reshooting Off Specifies the normal color temperature When you select On for this option the choice made for Color temp color temperature in the PICTURE Menu will be ignored See P E 28 E 29 for information on how to specify color temperature Screen saver setting screen Minimizing phosphor burn i...

Страница 43: ... when you have selected a mode with this option When changing sound input Selecting input terminals Audio input All modes You can use this option to select one of the two available terminals to receive sound from input equipment 1 Select Audio input and press E N T E R or The Audio input selection screen will appear 2 Press or to select input equipment 3 Select a desired input terminal Each time y...

Страница 44: ...AL SECAM N PAL M PAL 4 43NTSC PC input terminal RGB1 input terminal mD sub 3 rows 15 pin Image signal 0 7 Vp p 75 Ω Synchronization signal TTL level or 0 3 Vp p 75 Ω RGB2 input terminal BNC terminal x 5 R 0 7 Vp p 75 Ω G 0 7 Vp p 75 Ω B 0 7 Vp p 75 Ω H TTL level or 0 3 Vp p 75 Ω V TTL level or 0 3 Vp p 75 Ω Sound terminals 2 sound input pin jacks L R 2 lines 500 mVrms at least 22 kΩ Control termin...

Страница 45: ...95 EN61000 4 6 1996 EN61000 4 8 1993 EN61000 4 11 1994 AS Safety IEC60950 A1 A2 A3 A4 EMC AS NZS 3548 Regulation PDS4222W H PDS4222W S UL CSA Safety UL1950 CSA C22 2 No 950 EMC FCC Part 15 Class B ICES 003 Class B CE Safety EN60950 1992 A1 1993 A2 1993 A3 1995 A4 1997 EMC EN55022 1994 A1 1995 A2 1997 Class B EN61000 3 2 1995 A1 1997 A2 1998 EN61000 3 3 1995 EN55024 1998 EN61000 4 2 1995 EN61000 4 ...

Страница 46: ...11 1 set of 2 speakers stands When installing an option make sure that all installation requirements for that option as given in the relevant instruction manual are met The colors of options do not match the display colors perfectly Warning To prevent injury fire and electric shock arrange for options to be initially installed or installed at a different location by your dealer The pipe is not sup...

Отзывы: