24
ADJUSTING PICTURES (PICTURE MENU)
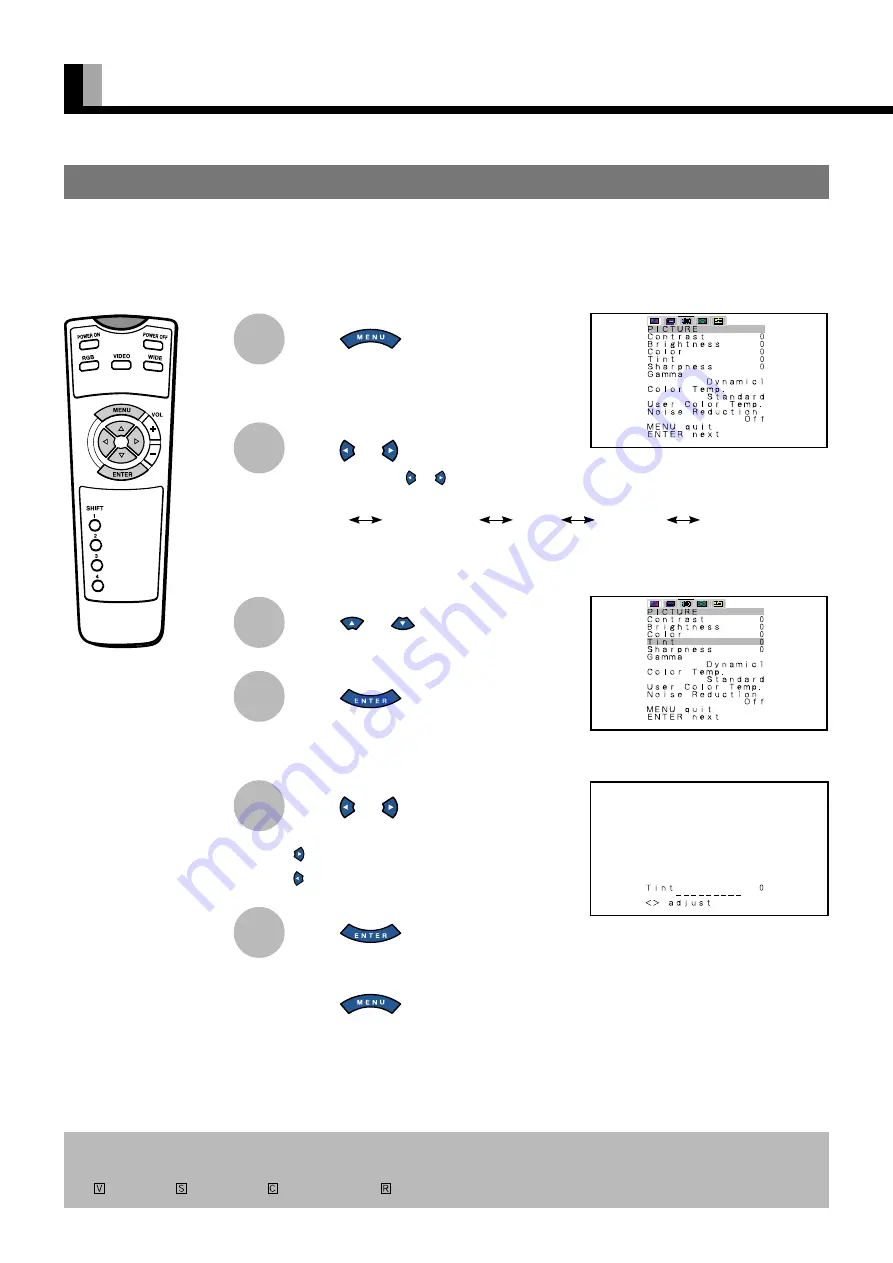
Press
.
The main menu screen will appear.
Press
or
to select “PICTURE”.
Each time you press or , one of the available
menus appears in the following sequence:
The PICTURE Menu screen will appear.
Press
or
to select “Tint”.
Press
.
The “Tint” adjustment screen will appear.
Press
or
to change tint
values.
: More greenish colors
: More purplish colors
Press
to store.
Press
when you finish.
* Repeat steps 3, 4, 5, and 6 when you wish to
make changes to other options.
1
2
* You can also use the
switches on the display’s
control panel to accomplish
these steps.
BASIC OPERATIONS [EX.: ADJUSTING TINT (Tint)]
“PICTURE” selected in the main menu
screen
“Tint” selected in the PICTURE Menu
screen (Video Input Mode)
You can make changes to all picture adjustment options in the PICTURE Menu.
The changes you make will be stored for a selected input mode. Therefore, you need to select a desired input mode before making any
changes.
3
4
5
6
“Tint” adjustment screen
PICTURE
POSITION/SIZE
AUDIO
FEATURES
FACTORY DEFAULT
* On-screen information disappears if you do not take any action for about 60 seconds.
* The following abbreviations used in this document represent input modes in which you can make adjustments:
: Video mode,
: S-video mode,
: Comp.video mode,
: RGB mode


