18
SELECTING OPTIONS IN A MENU
Use the [MODE] button on the display or
and
on the remote control to select a desired input mode.
Press
.
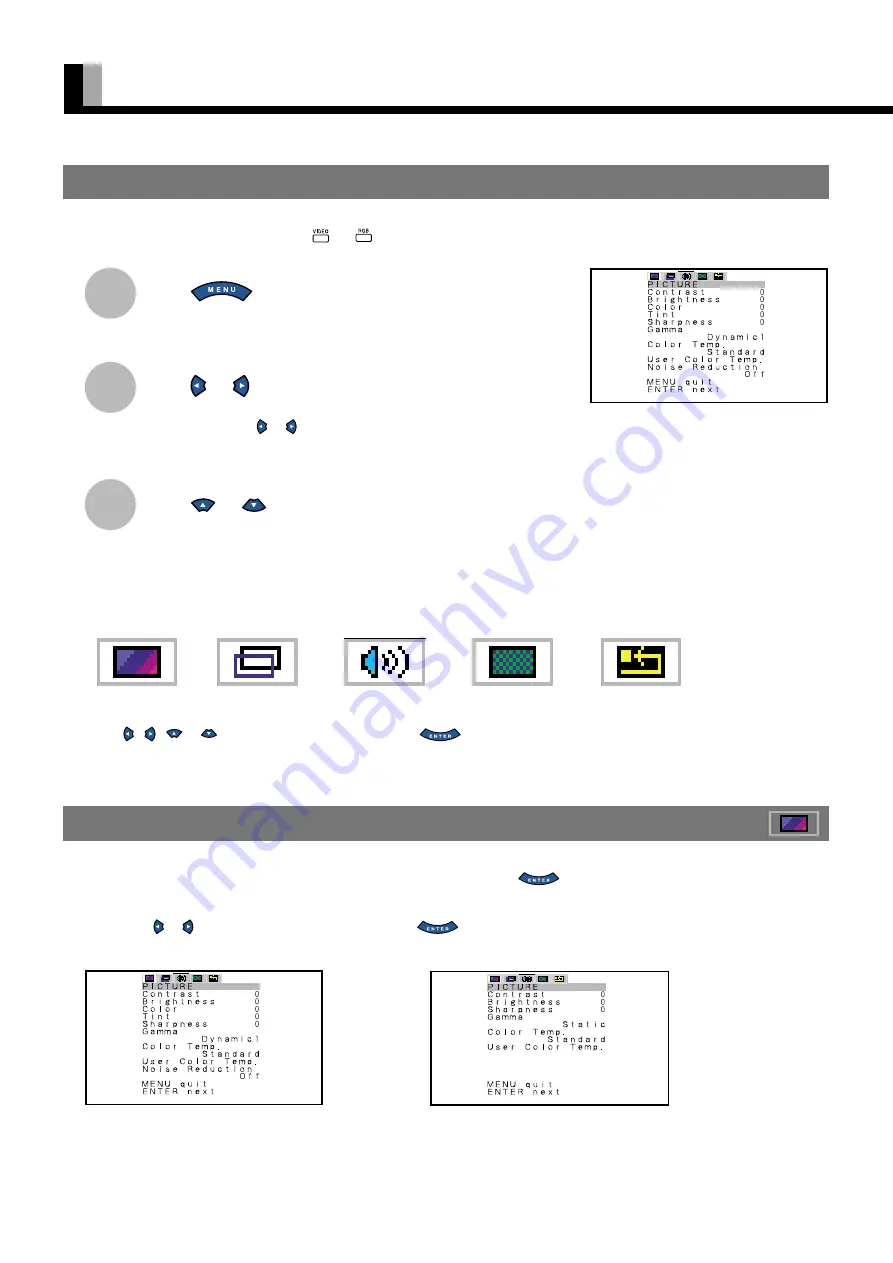
The main menu screen will appear.
Press
or
to switch between sub-menus.
Each time you press or , one of the available menus appears.
The corresponding menu screen will appear.
Press
or
to select an option for adjustment/setup.
A total of five different menus (PICTURE, POSITION/SIZE, AUDIO, FEATURES, FACTORY DEFAULT) are available.
You can easily distinguish between these menus as shown below.
*Press , ,
or
to make adjustment/setup, and press
to store.
* Do not change input signals when any of the menus are displayed.
* Audio Input menu will not be displayed when "No Audio" is selected. (See P. 35.)
USING THE PICTURE MENU
When you finish selecting a desired option in the PICTURE menu screen, press
.
At this time, the adjustment/setup screen for that option will appear.
You can use or to change the value for the option. Press
to store. (See P. 24–25.)
Changes you make will be stored only for the selected mode.
HOW TO USE MENUS
1
2
3
Ex.: “PICTURE” selected in the main menu
screen
PICTURE Menu screen (Video Input Mode)
PICTURE Menu screen (RGB Input Mode)
PICTURE
AUDIO
FEATURES
FACTORY DEFAULT
POSITION/SIZE


