


74
L i f e B o o k C S e r i e s N o t e b o o k – S e c t i o n S i x
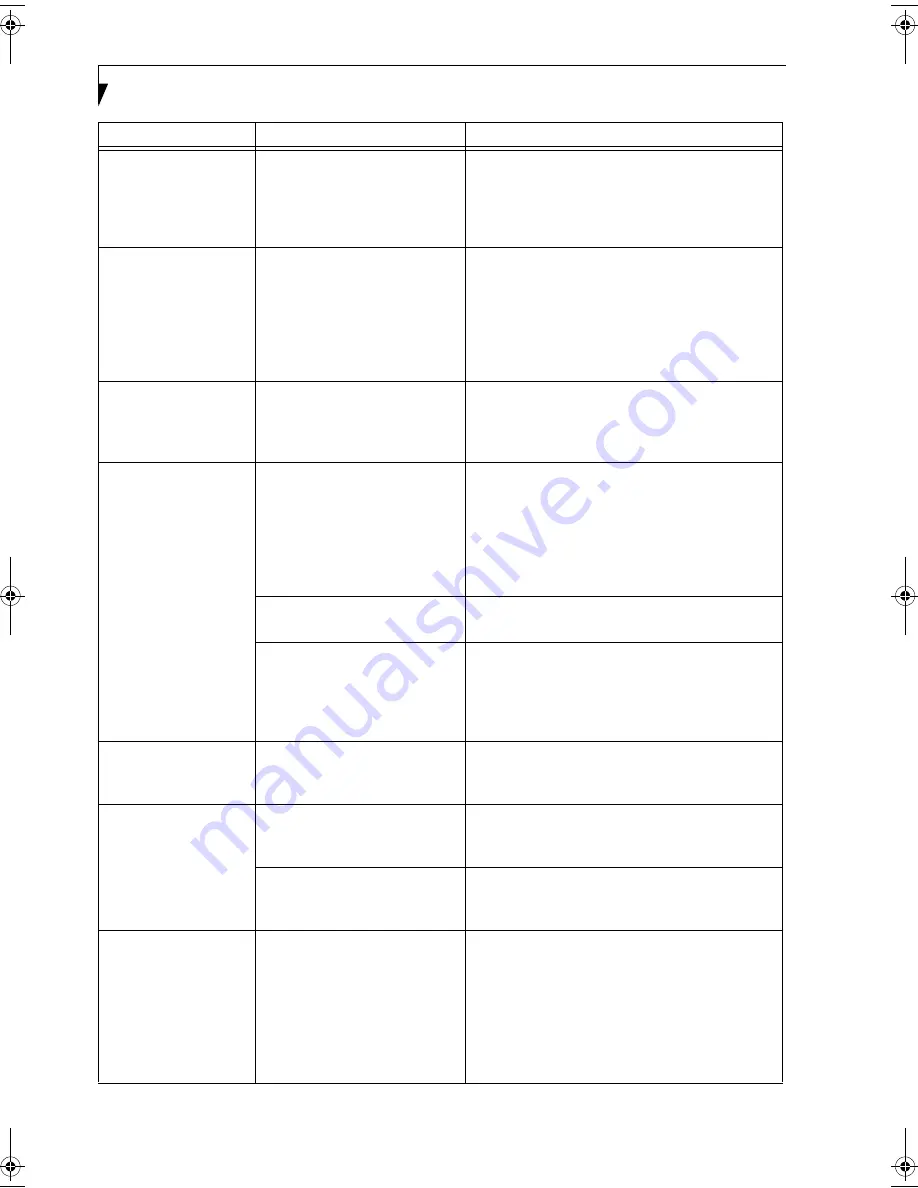
Display is blank when
you turn on the system.
(continued)
The power management timeouts
may be set for very short intervals
and you failed to notice the
display come on and go off again.
Press any button on the keyboard, or move the
mouse to restore operation. If that fails, push the
Power/Suspend/Resume button. (The display may
be shut off by Standby mode, Auto Suspend or
Video Timeout)
When the ATI Driver
CD is first installed, you
receive a Microsoft
message informing you
that the ATI driver is not
compatible with your
operating system.
The warning does not apply to
your LifeBook; the driver has
been thoroughly tested and its
installation will not jeopardize
the performance of your system.
If this message appears on your screen, click the
Continue Anyway
or
Yes
buttons to proceed.
The LifeBook notebook
turned on with a series
of beeps and your built-
in display is blank.
Power On Self Test (POST) has
detected a failure which does not
allow the display to operate.
Contact your support representative.
The display goes blank
by itself after you have
been using it.
The LifeBook notebook has gone
into Video timeout, Standby
mode, Suspend mode or Hiber-
nation (Save-to-Disk) mode
because you have not used it for a
period of time.
Press any button on the keyboard, or move the mouse
to restore operation. If that fails, push the Power/
Suspend/Resume button. Check your power manage-
ment settings, or close your applications and go to the
Power Savings menu of the setup utility to adjust the
timeout values to suit your operation needs.
(See
BIOS Setup Utility on page 29 for more information)
Something is pushing on the
Closed Cover switch.
Check the Closed Cover switch.
(See Figure 2-3 on
page 8 for location)
The power management timeouts
may be set for very short intervals
and you failed to notice the
display come on and go off again.
Press any button on the keyboard, or move the mouse
to restore operation. If that fails, push the Power/
Suspend/Resume button. (The display may be shut
off by Standby Mode, Auto Suspend or Video
Timeout)
The built-in display does
not close.
A foreign object, such as a paper
clip, is stuck between the display
and the keyboard.
Remove all foreign objects from the keyboard.
The built-in display has
bright or dark spots.
If the spots are very tiny and few
in number, this is normal for a
large LCD display.
This is normal; do nothing.
If the spots are numerous or large
enough to interfere with your
operation needs.
Display is faulty; contact your support representative.
The application display
uses only a portion of
your screen and is
surrounded by a dark
frame.
You are running an application
that does not support 800 x 600/
1024 x 768 pixel resolution
display and display compression
is enabled.
Display compression gives a clearer but smaller
display for applications that do not support 800 x
600 /1024 x 768 pixel resolution. You can fill the
screen but have less resolution by changing your
display compression setting, (See the Video Features
submenu, located within the Advanced menu of the
BIOS.
(See BIOS Setup Utility on page 29 for more
information)
Problem
Possible Cause
Possible Solutions
C2340.book Page 74 Monday, April 25, 2005 10:30 AM
Содержание Lifebook C2340
Страница 6: ...L i f e B o o k C S e r i e s N o t e b o o k ...
Страница 7: ...1 1 Preface ...
Страница 8: ...2 L i f e B o o k C S e r i e s N o t e b o o k ...
Страница 10: ...4 L i f e B o o k C S e r i e s N o t e b o o k S e c t i o n O n e ...
Страница 11: ...5 2 Getting to Know Your Computer ...
Страница 12: ...6 L i f e B o o k C S e r i e s N o t e b o o k S e c t i o n T w o ...
Страница 30: ...24 L i f e B o o k C S e r i e s N o t e b o o k S e c t i o n T w o ...
Страница 31: ...25 3 Getting Started ...
Страница 32: ...26 L i f e B o o k C S e r i e s N o t e b o o k S e c t i o n T h r e e ...
Страница 39: ...33 4 User Installable Devices and Media ...
Страница 40: ...34 L i f e B o o k C S e r i e s N o t e b o o k S e c t i o n F o u r ...
Страница 55: ...49 5 Using the Integrated Wireless LAN ...
Страница 56: ...50 L i f e B o o k C S e r i e s N o t e b o o k S e c t i o n F i v e ...
Страница 70: ...64 L i f e B o o k C S e r i e s N o t e b o o k S e c t i o n F i v e ...
Страница 71: ...65 6 Troubleshooting ...
Страница 72: ...66 L i f e B o o k C S e r i e s N o t e b o o k S e c t i o n S i x ...
Страница 86: ...80 L i f e B o o k C S e r i e s N o t e b o o k S e c t i o n S i x ...
Страница 87: ...81 7 Care and Maintenance ...
Страница 88: ...82 L i f e B o o k C S e r i e s N o t e b o o k S e c t i o n S e v e n ...
Страница 92: ...86 L i f e B o o k C S e r i e s N o t e b o o k S e c t i o n S e v e n ...
Страница 93: ...87 8 Specifications ...
Страница 94: ...88 L i f e B o o k C S e r i e s N o t e b o o k S e c t i o n E i g h t ...
Страница 98: ...92 L i f e B o o k C S e r i e s N o t e b o o k S e c t i o n E i g h t ...
Страница 101: ...95 9 Glossary ...
Страница 102: ...96 L i f e B o o k C S e r i e s N o t e b o o k S e c t i o n N i n e ...
Страница 108: ...102 L i f e B o o k C S e r i e s N o t e b o o k S e c t i o n N i n e ...
Страница 112: ...106 L i f e B o o k C S e r i e s N o t e b o o k ...


