Quick Installation Guide
Fujitsu Technology Solutions GmbH, User Documentation, 33106 Paderborn, Germany • Email - [email protected]
l
Online - http://ts.fujitsu.com/support
All hardware and software names used are trademarks of their respective manufacturers.
590-1057-640A
installation
4
KVM s4 Switch
KVM s4-0812
|
KVM s4-1622
|
KVM s4-3242
The following instructions will help you install
and use your switch easily.
Should you require further assistance, please
consult your installer/user guide.
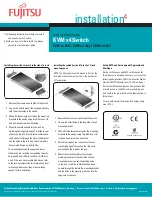
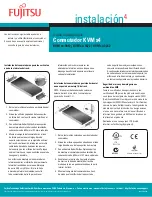
Installing the switch vertically in the side of a rack:
Remove the screws on each side of the switch.
1.
Line up the small holes of the L-shaped brackets
2.
with the screw holes in the switch.
With a Phillips screwdriver, fasten the mounting
3.
brackets to the switch using two 8/32-inch x 1/2-
inch pan-head screws on each side.
Mount the switch assembly to the rack by
4.
matching the long slots on each bracket to a set
of holes on the rack. Next, insert a combination
hex-head screw through the slots in the bracket
and the holes in the rack. Cap the screw with a
hex serrated flange nut and tighten.
The mounting holes on the upper and lower
side braces in a rack side compartment must be
between 50.8-cm (20.0-in.) and 57.3-cm (22.6-in.)
apart. If the rack has movable side braces, refer
to the rack documentation for information about
relocating side braces if they are not already
spaced for this installation.
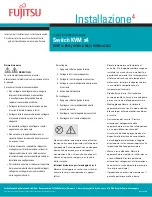
Installing the switch horizontally in the 1-U rack
mounting space
NOTE: The filler panel must be placed in front of the
rack when the switch is mounted in the horizontal
1-U orientation.
Remove the screws on each side of the switch.
1.
Line up the small holes in the long side of each
2.
mounting bracket.
With a Phillips screwdriver, fasten the mounting
3.
brackets to the switch using two 8/32-inch x 1/2-
inch pan-head screws on each side.
Attach four cage nuts or clip nuts to the rack
4.
mounting flange of the rack so that the nut is
positioned on the inside of the rack.
Mount the switch assembly to the rack by
5.
matching the holes in the short side of each
mounting bracket to a set of matching holes
on the rack. Insert the combination hex-head
screws through the slots in the mounting bracket
and the holes in the mounting rail, then into the
cage nuts or clip nuts.
Safety, EMC and Environmental Approvals and
Markings
Safety certifications and EMC certifications for
this product are obtained under one or more of the
following designations: CMN (Certification Model
Number), MPN (Manufacturer’s Part Number) or
Sales Level Model designation. Designations that
are referenced in the EMC and/or safety reports
and certificates are printed on the label applied to
this product.
For use with Listed Information Technology Equip-
ment (I.T.E.).
I.T.E.
E211752
N11803
AVO-CMN-1005-011 (A)


