background image

fi-748PRB Imprinter Operator's Guide  | 

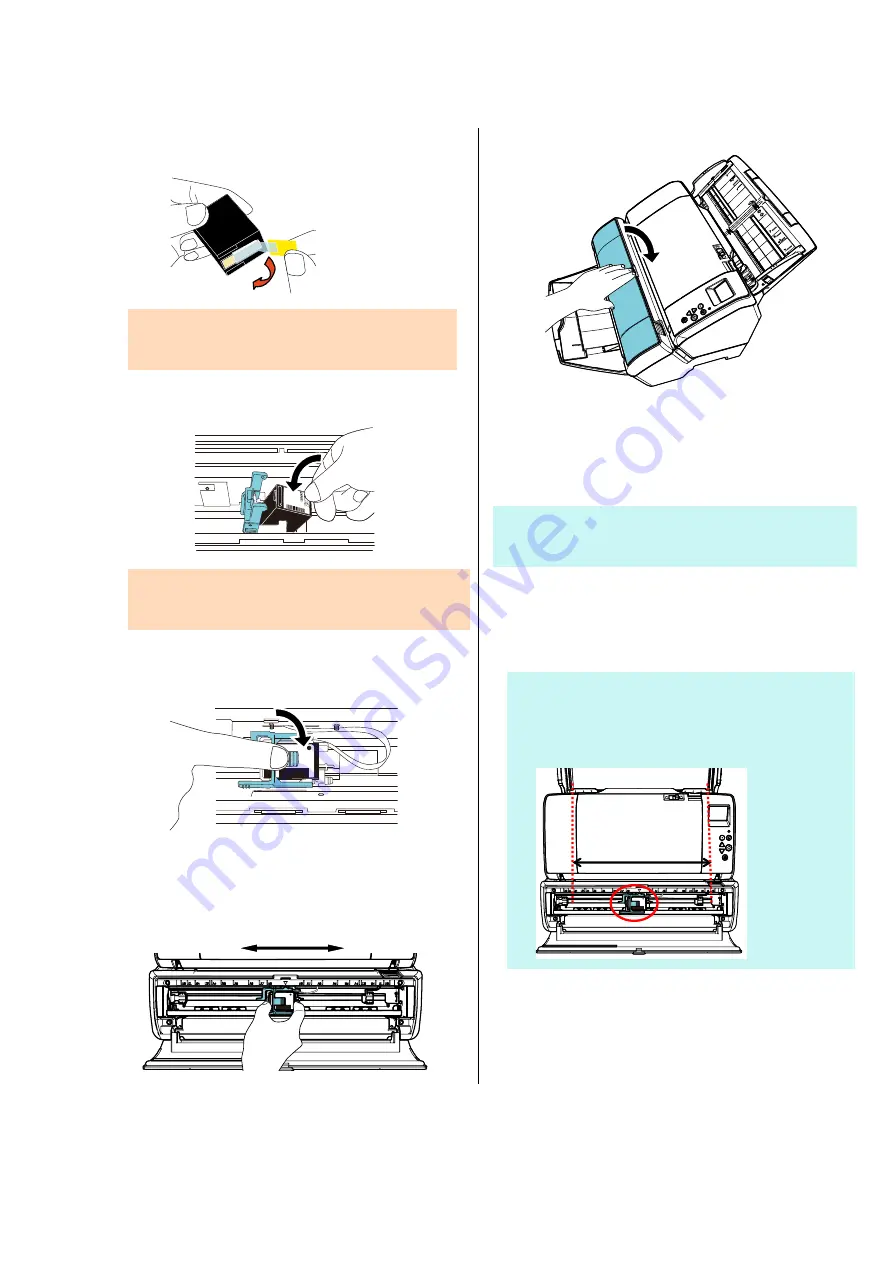
6.  Remove the protection tape on the print 

cartridge. 


ATTENTION 

Do not touch the metal part of the print cartridge nor put the 

tape back again. 

7.  Put the print cartridge into the holder with its tab 

pointing to the right. 


ATTENTION 

Be careful not to let the print cartridge catch the print circuit 

film. 

8.  Bring down the arm of the print cartridge holder 

down gently until it locks in and set the print 

cartridge in place. 


9.  Move the print cartridge to an appropriate 

printing position. 

The print cartridge should be positioned within the section 

where the document will pass through. 


10.  Close the print cartridge cover. 


2.3. Test Print 

After loading the print cartridge, check if the printing 

operation works normally. 

HINT 

For details about the operator panel, refer to the Operator's Guide 

provided with the scanner. 

1.  Push the [Power] button of the operator panel of 

the scanner. 

 The [Ready] screen is shown on the LCD. 

2.  Load a blank document in the scanner. 

HINT 

● 

Use A3 or Double Letter size blank paper. If the size is 

smaller than A4 or Letter, printing may not be completed 

successfully. 

● 

Confirm that the print cartridge is positioned within the 

document width. 


BLACK

C6602A

B

LA
CK

C6602A

BLACK

C6602A

Содержание fi-748PRB

Страница 1: ...P3PC 5822 04ENZ0 fi 748PRB Imprinter Operator s Guide ...

Страница 2: ...ents 12 Chapter 4 Daily Care 13 4 1 Cleaning the Print Cartridge 13 4 2 Cleaning the Imprinter 13 4 3 Cleaning the Rollers 14 4 4 Cleaning Materials 14 Chapter 5 Error Messages 15 Chapter 6 Specifications 16 Contact for Inquiries 18 Note The contents of this manual are subject to change without notice PFU Limited assumes no liability for incidental or consequential damages arising from the use of ...

Страница 3: ...systems and products in this manual are indicated as follows Name Indication Windows Server 2008 R2 Standard 64 bit Windows Server 2008 R2 1 Windows 7 Professional 32 bit 64 bit Windows 7 Enterprise 32 bit 64 bit Windows 7 1 Windows Server 2012 Standard 64 bit Windows Server 2012 1 Windows Server 2012 R2 Standard 64 bit Windows Server 2012 R2 1 Windows 8 1 32 bit 64 bit Windows 8 1 Pro 32 bit 64 b...

Страница 4: ...mples in this manual operate by following the actual displayed screen while referring to the user s manual of the scanner application that you are using The screenshots used in this manual are of Windows 7 or Windows 10 The actual windows and operations may differ depending on the operating system Also note that with some scanner models the screens and operations may differ from this manual when y...

Страница 5: ...sing or damaged contact your FUJITSU scanner dealer or an authorized FUJITSU scanner service provider Use this product and accessories carefully 1 2 Names of Component Parts Imprinter Unit Front Back Imprinter with Scanner Installed Front Back EXT Cable Lock ADF Paper Chute Feeder Operator Panel LCD Menu Button Button Button Scan Enter Button Stop Clear Button Power Button ADF Automatic Document F...

Страница 6: ... 4 Inside Print Cartridge Cover Print Cartridge Holder ...

Страница 7: ...ce this might damage the stacker 3 Install the scanner onto the imprinter Hold the scanner above the rear of the imprinter Gently place the scanner onto the imprinter base while lowering and pushing it forward until it touches the imprinter ATTENTION Be careful not to get your fingers caught 4 Raise the locks two locks on the rear side 1 Raise the stacker up as shown below 3 Pull out the stacker w...

Страница 8: ...he imprinter 8 Connect the power cable to the scanner 2 2 Loading the Print Cartridge Load the print cartridge as follows ATTENTION When installing the print cartridge install it properly 1 Turn off the scanner 2 Place your hand in the middle part of the print cartridge cover and open it as shown below 3 Remove the tape which fixes the print cartridge holder 4 Lift the print cartridge holder by pi...

Страница 9: ...osition The print cartridge should be positioned within the section where the document will pass through 10 Close the print cartridge cover 2 3 Test Print After loading the print cartridge check if the printing operation works normally HINT For details about the operator panel refer to the Operator s Guide provided with the scanner 1 Push the Power button of the operator panel of the scanner The R...

Страница 10: ...ow are the print test patterns Test Pattern 1 Horizontal ABCDEFGHIJKLMNOPQRSTUVWXYZ _ 00000000 Test Pattern 2 Horizontal abcdefghijklmnopqrstuvwxyz 00000000 Test Pattern 3 Horizontal 0123456789 00000000 Test Pattern 4 Vertical ABCDEFGHIJKLMNOPQRSTUVWXYZ _ 00000000 Test Pattern 5 Vertical abcdefghijklmnopqrstuvwxyz 00000000 Test Pattern 6 Vertical 0123456789 00000000 The numbering section 00000000 ...

Страница 11: ...artridge is positioned within the width of document 3 Close the print cartridge cover 3 2 Print Setup You can configure settings for the imprinter by using the scanner driver s setup window HINT How to run the scanner driver differs depending on the application For details refer to the manual or help of the application being used HINT The following items can be specified For details refer to the h...

Страница 12: ...ur hand in the middle part of the print cartridge and open it as shown below 3 Lift the print cartridge holder by pinching the lever with your fingers as shown below 4 Remove the old print cartridge 5 Remove the protection tape on the new print cartridge ATTENTION Do not touch the metal part of the print cartridge nor put the tape back again 6 Put the print cartridge into the holder with its tab p...

Страница 13: ...ams fi Series Software Operation Panel Windows Server 2012 Right click the Start screen and select All apps on the app bar Software Operation Panel under fi Series Windows Server 2012 R2 Windows 8 1 Click on the lower left side of the Start screen and select Software Operation Panel under fi Series To display move the mouse cursor Windows 10 Windows Server 2016 Windows Server 2019 Windows Server 2...

Страница 14: ...4 Remove the jammed documents 5 Close the ADF 6 Hold both ends of the print section and close it as shown in the figure ATTENTION Make sure that the ADF is closed before you close the print section Be careful not to get your fingers caught Do not move the Imprinter or give it a jolt while printing Printing may be out of order When you do not use the imprinter for a long time remove the print cartr...

Страница 15: ...e that the dirt is removed and then reinstall the print cartridge Refer to 3 4 Replacing the Print Cartridge 4 2 Cleaning the Imprinter While you use the imprinter frequently ink sticks to the print cartridge holder base which makes the paper dirty As a part of daily maintenance clean the print cartridge holder base by following the procedure below ATTENTION When cleaning use an absorbent cloth or...

Страница 16: ... When cleaning be careful not to touch the metal wheels located at the print section 3 Clean the plastic rollers Clean the two plastic rollers black at the print section Rotate the rollers manually while gently wiping the dirt and dust off the surface of the rollers with a cloth moistened with Cleaner F1 4 Confirm that the dirt is removed and then close the print section 4 4 Cleaning Materials Nam...

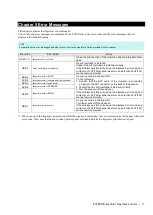
Страница 17: ...rred in the imprinter Try the following 1 Confirm that the EXT cable of the imprinter is connected properly to the EXT connector on the back of the scanner 2 Confirm that the print cartridge is installed correctly 3 Turn the scanner off then back on If the problem persists write down the displayed error code and contact your FUJITSU scanner dealer or an authorized FUJITSU scanner service provider ...

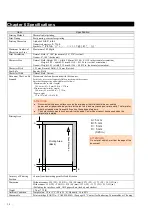
Страница 18: ...4 8 mm 431 8 mm 12 0 in 17 0 in Minimum size width length 50 8 mm 69 mm 2 00 in 2 72 in Paper weight 52 to 127 g m2 14 to 34 lb ATTENTION Documents with glossy surface such as thermal paper thermal transfer paper coated paper and art paper take longer time for the ink to dry and may cause poor print quality The Imprinter must be cleaned more frequently if you use these types of papers Thick plasti...

Страница 19: ...racters differs depending on the characters to be printed Replacement cycle 4 000 000 characters or six months after opening A print cartridge has a specific expiration date and the expiration period differs whether the package is opened or not Start using the print cartridge before the expiration date that is written on the package ...

Страница 20: ...ttps www fujitsu com global support products computing peripheral scanners fi If the solution to your problem cannot be found on the above web page refer to the contact information for your Fujitsu office on the following web page https www fujitsu com global about resources shop computing peripheral scanners index html Contact for Purchasing Consumables or Cleaning Materials https imagescanner fu...

Отзывы: