


Removing and installing components during servicing
Installing the hard disk
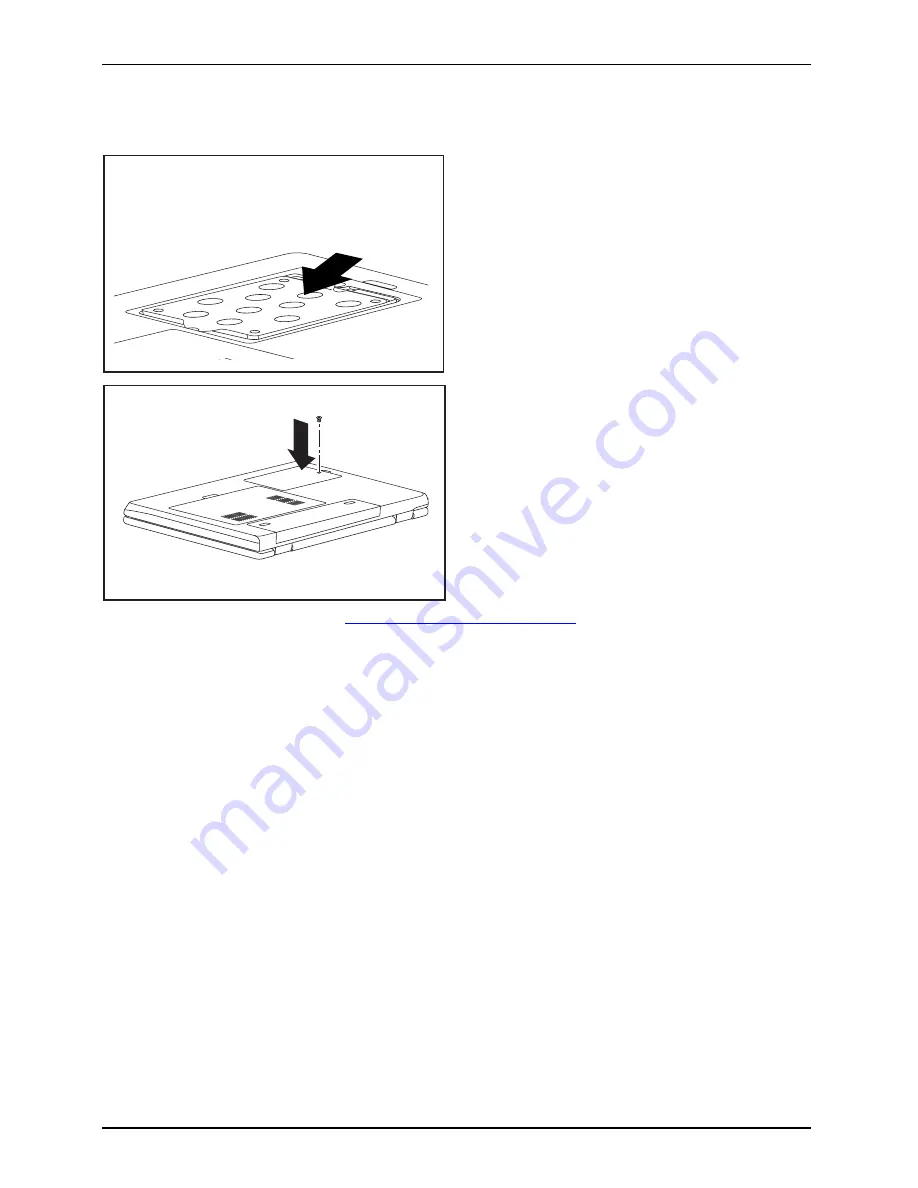
1
►
Insert the hard disk into the hard
disk compartment in the direction
of the arrow (1) .
2
1
►
Place the hard disk cover over the
opening (1).
►
Tighten the screw (2).
►
Install the battery again (see
"Installing the battery", Page 12
).
►
Turn the notebook the right way up and place it on a
fl
at surface.
►
Reconnect the cables that you disconnected previously.
18
A26391-K245-Z220-1-7619, edition 1
Содержание ESPRIMO Mobile V6555
Страница 1: ...ESPRIMO Mobile V6515 V6555 EasyGuide ...
Страница 3: ......
Страница 8: ...Contents A26391 K245 Z220 1 7619 edition 1 ...


