En-34
CAUTION
Do not reuse the refrigerant that has been recovered by the recovery pump.
To prevent the discharge of the refrigerant into the atmosphere, follow the procedure indicated below to recover the refrigerant from an
outdoor unit before moving or discarding the unit. Up to approximately 20 kg can be recovered per outdoor unit. If the volume of the
refrigerant to be recovered is large, recover it into a refrigerant recovery cylinder while measuring the weight of the refrigerant.
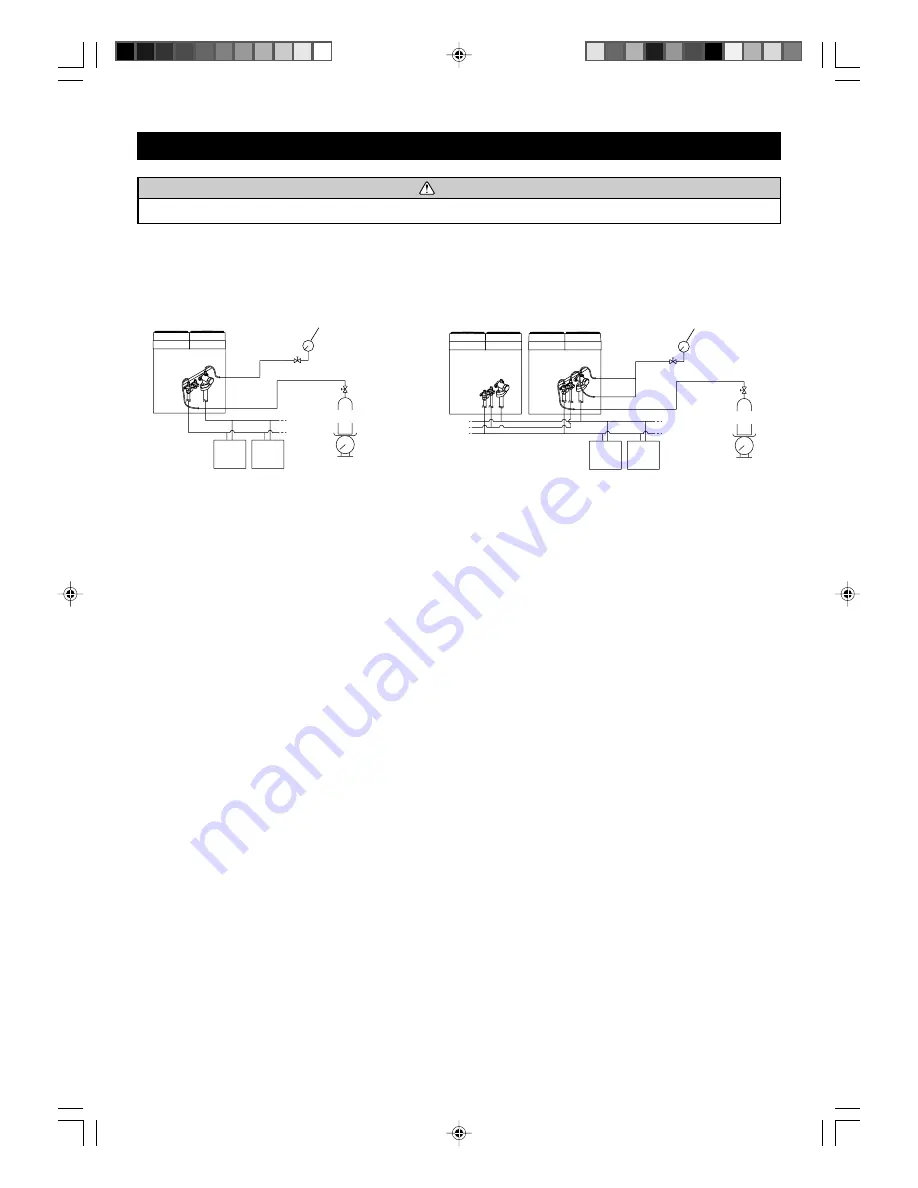
Fig. 8-1 Connecting system
A) In case of connected outdoor unit
B) In case of connected many outdoor units
Single unit Installation
Pump down method 1 (DIP switch method)
1. Fully close the 3-way valve at the liquid pipe.
2. Set the DIP switch 1-3 on the outdoor unit board “OFF
→
ON”.
The unit will start automatically in the cooling mode.
3. When the pump down is completed, the LED lamps will flash
at LED 2 to 6.
4. After the LED lamps flash, fully close the 3-way valve at the
gas pipe within 2 minutes, otherwise the compressor may be
damaged.
5. Restore the DIP switch to the original setup. (ON
→
OFF)
Pump down method 2 (manual method)
1. Connect the charge hose of the manifold gauge to the charge
port of the 3-way valve at the gas pipe. Open the pressure
reduction valve slightly to purge the air from the charge hose.
2. Fully close the 3-way valve at the liquid pipe.
3. Perform a test run in the cooling mode.
* Set the DIP switch SW1-1 to “OFF
→
ON”.
4. When the pressure gauge reads between 0.05 and 0 MPa,
fully close the 3-way valve at the gas pipe and stop the run
promptly.
Set the DIP switch SW1-1 to “ON
→
OFF”.
If the unit continues to run with the pressure at 0 MPa, the
compressor may be damaged.
In case there is too much refrigerant
1. Connect a gas cylinder to the charge port at the liquid pipe.
2. Perform a test run in the cooling mode.
* Set the DIP switch SW1-1 to “OFF
→
ON”.
* If the refrigerant is difficult to recover, fully close the 3-way
valve at the liquid pipe.
3. After recovering the refrigerant using the gas cylinder, stop
the run.
Set the DIP switch SW1-1 to “ON
→
OFF”.
4. Perform the pump down operation according to the method
describe above.
Indoor
unit
Outdoor unit
Indoor
unit
Empty cylinder
Scale
Pressure
gauge
Outdoor unit
Outdoor unit
Empty cylinder
Scale
Pressure
gauge
Indoor
unit
Indoor
unit
Multiple connections
Pump down method 1 (DIP switch method)
1. Fully close the 3-way valves at the liquid pipes.
Fully close the 3-way valves at the oil pipes of the slave units.
* Leave only the 3-way valve at the oil pipe of the master unit
fully open.
2. Set the DIP switch 1-3 on the outdoor unit board “OFF
→
ON”.
(the master unit board)
The unit will start automatically in the cooling mode.
3. When the pump down is completed, the LED lamps will flash
at LED 2 to 6.
4. After the LED lamps flash, fully close the 3-way valve at the
gas pipes and the 3-way valve at the oil pipe on the master
unit within 2 minutes.
Restore the DIP switch to the original setup. (ON
→
OFF)
If the 3-way valves are open for more than 2 minutes, the com-
pressor may be damaged.
* If it will be difficult to close the 3-way valves for all units
during the 2 minutes while the LED lamps are flashing, close
the valves a little before performing the pump down opera-
tion.
Pump down method 2 (manual method)
1. Connect the charge hose of the manifold gauge to the charge
port of the 3-way valve at the gas pipe. Open the pressure
reduction valve slightly to purge the air from the charge hose.
2. Fully close the 3-way valves at the liquid pipes.
Fully close the 3-way valves at the oil pipes of the slave units.
* Leave only the 3-way valve at the oil pipe of the master unit
fully open.
3. Perform a test run in the cooling mode. (the master unit board)
* Set the DIP switch SW1-1 to “OFF
→
ON”.
4. When the pressure gauge reads between 0.05 and 0 MPa,
fully close the 3-way valves at the gas pipes and the 3-way
valves at the oil pipes on all units and stop the run promptly.
Set the DIP switch SW1-1 to “ON
→
OFF”.
If the unit continues to run with the pressure at 0 MPa, the
compressor may be damaged.
In case there is too much refrigerant
1. Connect a gas cylinder to the charge port at the liquid pipe.
2. Perform a test run in the cooling mode. (the master unit board)
* Set the DIP switch SW1-1 to “OFF
→
ON”.
* If the refrigerant is difficult to recover, fully close the 3-way
valve at the liquid pipe.
3. After recovering the refrigerant using the gas cylinder, stop
the run.
Set the DIP switch SW1-1 to “ON
→
OFF”.
4. Perform the pump down operation according to the method
describe above.
8. PUMP DOWN
9374241033_IM_en_p18-36.p65
26/8/2008, 18:24
34


