4 Handling the Rack after Installation
115
E
4.3
Mounting a General-purpose Table (Fixed Type)
■
Confirming components
Confirm that all components have been delivered (see the table below).
Also, prepare the necessary tools:
・
Phillips screwdrivers (No. 2 and No. 3 bits)
・
Cage nut tool
The procedure for mounting a general-purpose table (fixed type) is as follows:
1. Insert cage nuts.
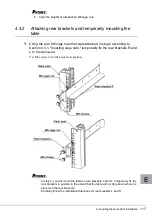
2. Attach rear brackets.
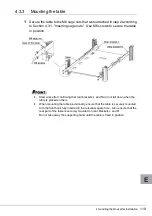
3. Mounting the table.
4.3.1
Inserting cage nuts
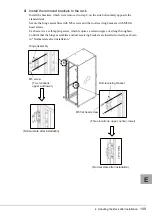
Insert cage nuts into the rack posts (front and rear). For more information on the mounting
procedure, see Section 4.1.1, "Insertion."
1
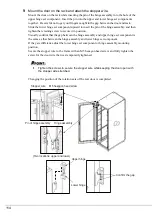
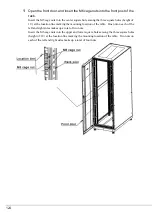
Open the front door, and insert the M6 cage nuts into the front post of the
rack.
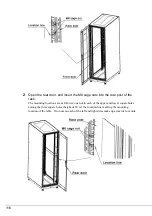
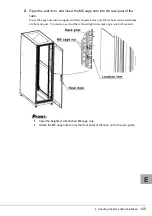
Insert cage nuts into two upper and lower square holes out of three between the location lines.
The mounting locations are as follows: one nut in each of the upper and lower square holes
among the three square holes (height of 1U) at the location line marking the mounting
location of the table. Two nuts on each of the left and right sides make up a total of four nuts.
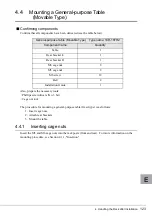
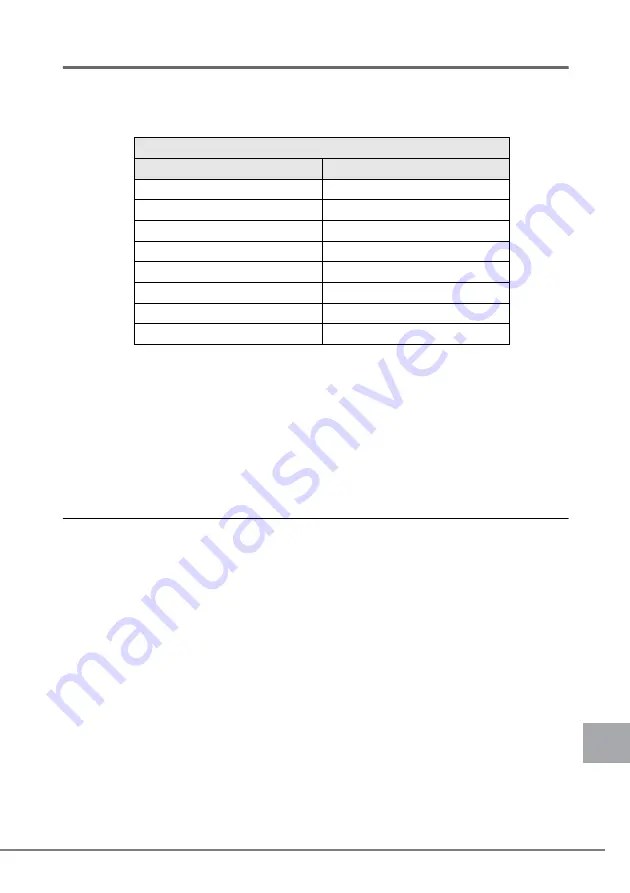
General-purpose Table (Fixed Type) Type name: 19R-16TR1
Component name
Quantity
Table
1
Rear bracket L
1
Rear bracket R
1
M6 cage nut
8
M6 bolt
4
M6 screw
8
Belt
2
Installation Guide
1
Содержание 1740
Страница 1: ...J E ...
Страница 15: ...3 ラックの構成と設置 15 J 3 3 リヤドアの開き方 1 扉用キーを回し ラックハンドルを持ち上げ 手前に引きます ...
Страница 24: ...24 7 増設ラックにサイドカバーを取り付けます 最後に 既設ラックから取り外したサイドカバーを 既設ラックから取り外した M6 ネジで取付けます これでラックの連結作業は終了です ࠨࠗ ࠞࡃ 㧹㧢ࡀࠫ ...
Страница 28: ...28 1 マイナスドライバの先端をケージナットの爪とラック柱の間に挿入して ケージナットの爪に押し込みます 2 マイナスドライバを押し下げて取り外します ...
Страница 36: ...36 8 富士通ロゴを取り付けます 富士通ロゴを扉の裏から M4 ネジで固定します 標準的な取り付け位置は 横方向寸法が 103 縦方向寸法が 122 です ࡀࠫ ን ㅢࡠࠧ ...
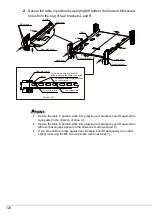
Страница 48: ...48 2 リヤドアを開け 後側のラックの柱に M6 ケージナットを取り付けます 取り付け位置はテーブル搭載位置 1U の高さ のロケーション線間にある角穴 3ヶの上下 2ヶ所 左右合計 4ヶ所となります ...
Страница 54: ...54 5 必要に応じてラックの柱に固定している M6 ネジを緩め 再調整をしてく ださい ...
Страница 63: ...4 ラック設置後の取り扱いについて 63 J 7 必要に応じてラックの柱に固定している M6 ネジを緩め 再調整をしてく ださい ...
Страница 67: ...4 ラック設置後の取り扱いについて 67 J 図は 1U 2U 3U 用をまとめて表示していますが 実際の取り付けは空きスペー スに応じて 適切なサイズを選択し 取り付けてください ...
Страница 68: ...68 ...
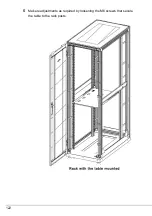
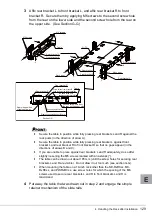
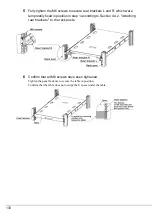
Страница 122: ...122 5 Make readjustments as required by loosening the M6 screws that secure the table to the rack posts ...
Страница 136: ...このマニュアルは再生紙を使用し リサイ クルに配慮し て製本されています 不要になった際は 回収 リサイ クルに出し て く だ さい CoverEnd fm 2 ページ 2009年1月8日 木曜日 午後11時45分 ...

