background image

77

M

o

re

 o

n

 Ph
o

to

g

ra

p

h

y a
n

d Pl

a

y

b

a

ck

Focus Mode

 Autofocus Options (AF Mode)

 Autofocus Options (AF Mode)

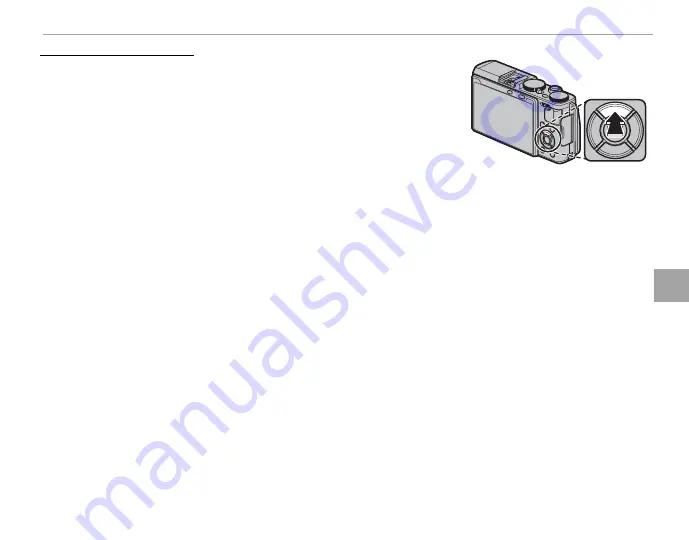
To choose the AF mode for focus modes 

S

 and 

C

, press the function but-

ton (

Fn2

) to display the options shown below, then press the selector 

up or down to highlight an option and press 

MENU/OK

 to select.

• 

r


SINGLE POINT

: The camera focuses on the subject in the selected 

focus point.  Use for pin-point focus on a selected subject.

• 

y


ZONE

: The camera focuses on the subject in the selected focus 

zone.  Focus zones include multiple focus points (5 × 3, 5 × 5, or 3 × 3), 
making it easier to focus on subjects that are in motion.

• 

z


WIDE/TRACKING

: In focus mode 

C

, the camera tracks focus on the subject in the selected focus 

point while the shutter button is pressed halfway.  In focus mode 

S

, the camera automatically focuses 

on high-contrast subjects; the areas in focus are shown in the display. The camera may be unable to 
focus on small objects or subjects that are moving rapidly.


R

AF mode options can also be accessed using the 

G


AUTOFOCUS SETTING

 option in the shooting menu 

(

P

 92).

Содержание X70

Страница 1: ...using the camera Product website http fujifilm x com x70 Additional information may be found in online manuals available from http fujifilm dsc com manuals EN BL00004741 202 Before You Begin First Steps Basic Photography and Playback Basic Movie Recording and Playback The Q Quick Menu Button The Fn Function Buttons More on Photography and Playback Menus Connections Technical Notes Troubleshooting ...

Страница 2: ... cords should be routed so that they are not likely to be walked on or pinched by items placed upon or against them paying particular at tention to cords at plugs convenience receptacles and the point where they exit from the appliance Accessories Do not place this video product on an unstable cart stand tripod bracket or table The video product may fall causing serious injury to a child or adult ...

Страница 3: ...formation is ignored CAUTION This icon indicates that personal injury or material damage can result if the in formation is ignored The icons shown below are used to indicate the nature of the instructions which are to be observed Triangular icons tell you that this information re quires attention Important Circular icons with a diagonal bar tell you that the action indicated is prohibited Prohibit...

Страница 4: ...t seek medical attention or call emergency Keepoutofreachofsmallchildren Among the ele ments that could cause injury are the strap which could become entangled about a child s neck causing strangulation and the flash which could cause visual impairment Follow the directions of airline and hospital person nel This product generates radio frequency emissions that could interfere with navigational or ...

Страница 5: ...ch as neck laces or hairpins Do not expose to flame or heat Do not disassemble or modify Use with designated chargers only Dispose of used batteries promptly Do not drop or subject to strong physical shocks Do not expose to water Keep the terminals clean The battery and camera body may become warm to the touch after extended use This is normal Disposal Dispose of used batteries in accord with local...

Страница 6: ...red trademarks of theWi Fi Alliance Adobe and Adobe Reader are either trademarks or registered trademarks of Adobe Systems Incorporated in the U S A and or other countries The SDHC and SDXC logos are trademarks of SD 3C LLC The HDMI logo is a trademark All other trade names mentioned in this manual are the trade marks or registered trademarks of their respective owners ElectricalInterference Elect...

Страница 7: ...his Class B digital apparatus complies with Cana dian ICES 003 Industry Canada statement This device complies with Indus try Canada s licence exempt RSSs Operation is subject to the following two conditions 1 This device may not cause interference and 2 This device must accept any interfer ence including interference that may cause undesired op eration of the device This device and its antenna s m...

Страница 8: ...o regulations governing wireless network devices in the country in which it was purchased Observe all location regulations when using the device FUJIFILM does not accept liability for prob lems arising from use in other jurisdictions Wireless data images may be intercepted by third parties The security of data transmitted over wireless networks is not guaranteed Donotusethedeviceinlocationssubject...

Страница 9: ...e principal camera operations are listed here Having a specific problem with the camera Find the answer here WarningMessagesandDisplays WarningMessagesandDisplays P P136 136 RestrictionsonCameraSettings RestrictionsonCameraSettings P P146 146 Find out what s behind that flashing icon or error message in the display See page 146 for restrictions on the options avail able in each shooting mode Memor...

Страница 10: ...leather on the camera body Any liquid on the camera should be removed immediately with a soft dry cloth Use a blower to remove dust from the lens and monitor then gently wipe with a soft dry cloth Any remaining stains can be removed by wiping gently with a piece of FUJIFILM lens cleaning paper to which a small amount of lens cleaning fluid has been applied Care should be taken to avoid scratch ing...

Страница 11: ...tandard Display 26 Adjusting Display Brightness 27 Basic Photography and Playback Basic Photography and Playback Taking Photographs 28 Viewing Pictures 30 Viewing Pictures Full Frame 30 Viewing Photo Information 31 Playback Zoom 32 Multi Frame Playback 33 Playback Touch Controls 34 Deleting Pictures 35 Basic Movie Recording and Playback Basic Movie Recording and Playback Recording Movies 36 Using ...

Страница 12: ...1 Advanced Filters 72 Film Simulation 73 Focus Mode 74 The Focus Indicator 75 MF Assist 76 Autofocus Options AF Mode 77 Focus Point Selection 78 Single Point AF 78 Zone AF 79 Tracking Focus Mode C Only 80 Long Time Exposures T B 81 Time T 81 Bulb B 81 Using a Remote Release 82 Interval Timer Photography 83 Focus Exposure Lock 84 Recording Pictures in RAW Format 86 Creating JPEG Copies of RAW Pictu...

Страница 13: ...E 98 JDIGITAL TELE CONV 98 Using the Menus Playback Mode 99 Playback Menu Options 99 rWIRELESS COMMUNICATION 99 jRAW CONVERSION 99 AERASE 99 GCROP 99 eRESIZE 100 DPROTECT 100 CIMAGE ROTATE 100 BRED EYE REMOVAL 101 ISLIDE SHOW 101 mPHOTOBOOK ASSIST 101 bIMAGE SEARCH 102 sPC AUTO SAVE 102 KPRINT ORDER DPOF 102 Vinstax PRINTER PRINT 102 JDISP ASPECT 102 The Setup Menu 103 Using the Setup Menu 103 Set...

Страница 14: ...nnection 122 Printing Pictures 123 Viewing Pictures on TV 124 Technical Notes Technical Notes Optional Accessories 125 Accessories from FUJIFILM 125 Connecting the Camera to Other Devices 127 Attaching Adapter Rings 128 Attaching Lens Hoods 128 Attaching Protector Filters 128 The WCL X70 Wide Conversion Lens 129 Caring for the Camera 130 Use and Storage Precautions 130 Traveling 130 Troubleshootin...

Страница 15: ...anual on which related information may be found Menus and other text in the displays are shown in bold In the illustrations in this manual displays may be simplified for explanatory purposes Supplied Accessories Supplied Accessories The following items are included with the camera NP 95 rechargeable battery AC 5VF AC power adapter Plug adapter USB cable Protective covers 2 Shoulder strap Owner s M...

Страница 16: ...e Camera Parts of the Camera For more information refer to the page listed to the right of each item 1 2 3 4 5 6 18 17 16 15 14 7 8 9 10 11 12 13 19 20 21 22 23 34 35 33 32 31 30 29 28 27 25 24 26 36 37 38 39 40 41 ...

Страница 17: ...unction buttons 4 ZMENU OK button 4 92 99 103 X control lock button press and hold aCable channel cover for DC coupler bBattery chamber cover 14 cBattery chamber cover latch 14 dTripod mount eSpeaker 38 fWi Fi button 48 113 Function button Fn6 42 gDISP display BACK button 25 Function button role selection press and hold 42 hLCD monitor 7 8 25 iAF L AE L autofocus autoexposure lock button 74 85 96 ...

Страница 18: ...ress the selector up A right C down D or left B to highlight items The up left right and down buttons also double as the AF mode self timer flash mode and focus area selection buttons respectively and as function buttons 2 through 5 P42 44 45 46 48 ...

Страница 19: ... orsetshutterspeedand or aperture manually modes S A and M Auto mode In drive mode B STILL IMAGE the camera adjusts settings automatically according to the option selected by rotating the control ring Choose from modes suited to specific subject types P55 or select SADVANCED SR AUTO to let the camera automatically match the mode to the subject P56 R Restrictions may apply to camera settings depend...

Страница 20: ...ss the center of the control to zoom in on the selected focus area during shooting or playback P31 75 Press and hold the center of the control during man ual focus to choose a manual focus assist display P76 TheControlRing TheControlRing Use the control ring for quick access to camera functions during shooting The function assigned to the control ring can be selected by pressing the control ring o...

Страница 21: ... wires behind the display failure to observe this precaution could cause camera malfunction malfunction The Indicator Lamp The Indicator Lamp The indicator lamp shows camera status as follows Indicator lamp Indicator lamp Camera status Camera status Glows green Glows green Focus locked Blinks green Blinks green Blur focus or exposure warning Picture can be taken Blinks green and orange Blinks gree...

Страница 22: ...ypes of indicator may be displayed during shooting and playback In the description that follows all available indicators are shown for illustrative purposes the indicators actually displayed vary with camera settings Shooting 11 15 2015 11 15 AM 12000 5 6 51200 00m00s ...

Страница 23: ...ance indicator 74 SBattery level 21 TSensitivity 60 UExposure compensation exposure indicator 54 62 VAperture 51 53 54 WShutter speed 51 52 54 XAE lock indicator 84 YMetering 63 ZShooting mode 50 aFocus indicator 29 75 bManual focus indicator 75 cFocus mode 74 dShutter type 98 eContinuous mode 66 fSelf timer indicator 45 gMicrophone remote release 37 82 97 hFlash mode flash compensation 46 97 iVir...

Страница 24: ...10 Parts of the Camera Playback 100 0001 100 0001 12 31 2050 10 00 AM 12 31 2050 10 00 AM 1 4000 1 4000 5 6 5 6 400 400 ...

Страница 25: ...tected image 100 GSound and flash indicator 104 HFrame number 108 IGift image 30 JPhotobook assist indicator 90 KDPOF print indicator 120 LBattery level 21 MImage quality and size 94 NFilm simulation 73 ODynamic range 94 PWhite balance 58 QSensitivity 60 RExposure compensation 62 SAperture 51 53 54 TShutter speed 51 52 54 UPlayback mode indicator 30 VMovie icon 38 WRating 30 ...

Страница 26: ... safe place You will need it to open the strap clips when removing the strap 2 Place the strap clip on an eyelet Hook the strap eyelet in the clip opening Re move the tool using the other hand to keep the clip in place 3 Pass the clip through the eyelet Rotate the clip fully through the eyelet until it clicks closed 4 Attach a protective cover Place a protective cover over the eyelet as shown with...

Страница 27: ...ap 5 Insert the strap Insert the strap through a protective cover and strap clip 6 Fasten the strap Fasten the strap as shown Repeat Steps 5 6 for the second eyelet Q To avoid dropping the camera be sure the strap is correctly secured ...

Страница 28: ... open the battery chamber cover when the camera is on Failure to observe this precau tion could damage image files or memory cards Q Do not use excessive force when handling the battery chamber cover 2 Insert the battery Using the battery to keep the battery latch pressed to one side insert the battery con tacts first in the direction shown by the arrow Confirm that the battery is securely latched...

Страница 29: ... at the back of the slot Click Q Be sure card is in the correct orientation do not insert at an angle or use force Q SD SDHC SDXC memo ry cards can be locked making it impossible to format the card or to record or delete images Before inserting a memory card slide the write protect switch to the unlocked position 4 Close the battery chamber cover Write protect switch ...

Страница 30: ...card Q Q Batteries Batteries Remove dirt from the battery terminals with a clean dry cloth Failure to observe this precaution could prevent the battery from charging Do not affix stickers or other objects to the battery Failure to observe this precaution could make it im possible to remove the battery from the camera Do not short the battery terminals The battery could overheat Read the cautions i...

Страница 31: ... see page 110 Memory cards are small and can be swallowed keep out of reach of children If a child swallows a memory card seek medical assistance immediately miniSD or microSD adapters that are larger or smaller than the standard dimensions of an SD SDHC SDXC card may not eject normally if the card does not eject take the camera to an authorized service representative Do not forcibly remove the ca...

Страница 32: ...h the plug adapter as shown making sure that it is fully inserted and clicks into place on the AC power adapter terminals AC power adapter Plug adapter Q The plug adapter is exclusively for use with the supplied AC power adapter Do not use it with other devices 2 Charge the battery Connect the camera to the supplied AC pow er adapter using the supplied USB cable Then plug the AC power adapter into...

Страница 33: ...ected to AC power and the battery is inserted Q The battery will not charge while the camera is in the shooting mode Q Remove dirt from the battery terminals with a clean dry cloth Failure to observe this precaution could prevent the battery from charging Q Do not affix stickers or other objects to the battery Failure to observe this precaution could make it impossible to remove the battery from t...

Страница 34: ...king sure the connectors are fully inserted Q Connect the camera directly to the computer do not use a USB hub or keyboard Q If the computer goes into sleep mode while charging charging will stop To continue charging disable sleep mode on the computer and disconnect and connect the USB cable Q Charging may be impossible depending on computer specifications settings or conditions ...

Страница 35: ...tically press the shutter button halfway or turn the ON OFF switch to OFF and then back to ON R For information on startup options see page 107 Q Fingerprints and other marks on the lens can affect pictures and the view through the lens in the camera display Keep the lens clean Battery Level Battery Level After turning the camera on check the battery level in the display Indicator Indicator Descri...

Страница 36: ...r month day hour or minute and press up or down to change To change the order in which the year month and day are displayed highlight the date for mat and press the selector up or down Press MENU OK to set the clock and display performance options 3 Choose a performance option Press the selector up or down to highlight one of the following options ON Make faster AF and reduce time to restart camer...

Страница 37: ...TE TIME to reset the clock or ZPOWER MANAGEMENT HIGH PERFORMANCE to change performance set tings P103 2 Adjust settings To choose a language or performance setting highlight the desired option and press MENU OK To set the clock press the selector left or right to highlight the year month day hour or minute and press up or down to change then press MENU OK once the clock has been set to your satisf...

Страница 38: ...IfFOCUSisselectedforGAUTOFOCUSSETTING RELEASE FOCUSPRIORITY P92 keep your finger on the display until the shutter is released R In burst mode pictures will be taken while you keep your finger on the display FOCUS AREA FOCUS AREA Tap to select a focus area for focus OFF OFF Touch controls off The display does not respond when tapped Touch control settings can be adjusted using the KTOUCH SCREEN MOD...

Страница 39: ... modes as follows Shooting Standard Information off P 5 6 400 4000 5 6 400 4000 Info display Playback Standard Information off 12 31 2050 10 00 AM 1 4000 1 4000 21 3 21 3 400 400 5 6 5 6 12 31 2050 10 00 AM FAVORITES 12 31 2050 10 00 AM NEXT 1 4000 5 6 400 21 3 Favorites Info display ...

Страница 40: ... GUIDELINE ELECTRONIC LEVEL P27 FOCUS FRAME AF DISTANCE INDICATOR MF DISTANCE INDICATOR HISTOGRAM P27 SHOOTING MODE APERTURE S SPEED ISO INFORMATION BACKGROUND EXPOSURE COMPENSATION FOCUS MODE PHOTOMETRY SHUTTERTYPE FLASH CONTINUOUS MODE DUAL IS MODE WHITE BALANCE FILM SIMULATION DYNAMIC RANGE FRAMES REMAINING IMAGE SIZE QUALITY MOVIE MODE REC TIME BATTERY LEVEL 4 Save changes Press DISP BACK to s...

Страница 41: ...ontal axis the number of pixels by the vertical axis Shadows Highlights No of pixels Pixel brightness Optimal exposure Pixels are distrib uted in an even curve through out the tone range Overexposed Pixels are clustered on the right side of the graph Underexposed Pixels are clustered on the left side of the graph AdjustingDisplayBrightness AdjustingDisplayBrightness The brightness and hue of the L...

Страница 42: ... A and M modes and pages 55 and 56 for information on the options available in auto mode 1 Adjust settings for program AE C D B A Shutter speed P51 Select A auto B Auto mode selector lever P50 Select z C Focus mode P74 Select S single AF D Aperture P51 Select A auto Confirm that P appears in the display P 4000 5 6 400 The Q Button The Q Button The Q button can be used to view and adjust camera set...

Страница 43: ...Focus Frame the picture with your sub ject in the center of the display and press the shutter button halfway to focus R If the subject is poorly lit the AF assist illumina tor may light P93 Ifthecameraisabletofocus it will beep twice and the focus indicator and area in focus will glow green Focus and exposure will lock while the shutter button is pressed halfway If the camera is unable to focus th...

Страница 44: ...right to view pictures in the order recorded left to view pictures in reverse order Keep the selector pressed to scroll rapidly to the desired frame R Pictures taken using other cameras are marked with a m gift image icon to warn that they may not display correctly and that playback zoom may not be available Favorites Rating Pictures Favorites Rating Pictures To rate the current picture press DISP...

Страница 45: ...5 6 5 6 12 31 2050 10 00 AM NEXT 1 4000 5 6 400 21 3 1 4000 S S 5 6 F 400 21 3 ISO LENS 23 0mm F5 6 FOCAL LENGTH 23 0mm COLOR SPACE sRGB LENSMODULATIONOPT ON NEXT Info display 2 R Rotate the control ring to view other images with out changing the photo information display format Zooming in on the Focus Point Zooming in on the Focus Point Press the center of the command control to zoom in on the fo...

Страница 46: ...left when the picture is displayed full frame P33 To view other pictures at the current zoom ratio rotate the control ring Press DISP BACK or MENU OK to exit zoom Zoom indicator Navigation window shows portion of image currently displayed R The maximum zoom ratio varies with image size P94 Playback zoom is not available with cropped or resized copies saved at a size of a ...

Страница 47: ...d full frame Press left to view more images 100 0001 100 0001 Press right to view fewer images Use the selector to highlight images and press MENU OK to view the highlighted image full frame to zoom in on the selected image press the command control right when the picture is displayed full frame P32 In the nine and hundred frame displays press the selector up or down to view more pictures ...

Страница 48: ...e a finger across the display to view other images Pinch out Place two fin gers on the display and spread them apart to zoom in Pinch in Place two fin gers on the display and slide them together to zoom out R Pictures can be zoom out until the entire image is visible but no further Double tap Tap the dis play twice to zoom in on the selected area Drag View other areas of the image during play back...

Страница 49: ...AMES SELECTED FRAMES Highlight pictures and press MENU OK to select or deselect pictures in photobooks or print orders are shown by S When the operation is complete press DISP BACK to display a confirmation dialog then highlight OK and press MENU OK to delete the selected pictures ALL FRAMES ALL FRAMES A confirmation dialog will be displayed highlight OK and press MENU OK to delete all unprotected...

Страница 50: ...can be selected using the WMOVIE SET UP option P97 Focus mode is selected using the focus mode selector P74 for continuous focus adjustment select C or choose S and enable Intelligent Face Detection P93 Intelligent Face Detection is not available in focus mode M R During recording exposure compensation can be adjusted by up to 2 EV R The indicator lamp lights while movies are being recorded Q The ...

Страница 51: ...hones that connect using jacks 2 5mm in diameter microphones that require bus power can not be used See the micro phone manual for details R The dialog shown at right will be displayed when a microphone is connected to the mi crophone remote release connector Press MENU OK and select MIC REMOTE RELEASE mMIC CHECK MIC REMOTE RELEASE SETTING SKIP SET ...

Страница 52: ...or right to adjust playback speed during playback Adjust volume Adjust volume Press MENU OK to pause playback and display volume controls Press the selector up or down to adjust the volume press MENU OK again to resume playback Vol ume can also be adjusted using the bSOUND SET UP PLAYBACK VOLUME option in the setup menu P105 12 31 2050 10 00 AM PLAY PLAY 0 Movie icon Progress is shown in the displ...

Страница 53: ...TE BALANCE 58 EhNOISE REDUCTION 95 FOIMAGE SIZE 94 GTIMAGE QUALITY 94 HPFILM SIMULATION 73 IrHIGHLIGHTTONE 95 JsSHADOWTONE 95 KfCOLOR 95 LqSHARPNESS 95 MBSELF TIMER 45 NFAF MODE 77 OpFLASH MODE 46 PJLCD BRIGHTNESS 105 The quick menu shows the options currently selected for items B P which can be changed as described on page 41 The uSELECT CUSTOM SETTING item item A shows the current custom setting...

Страница 54: ...ctor to highlight items and press the command control left or right to change 3 Press Q to exit when settings are complete R The options displayed in the quick menu can be selected using the hBUTTON DIAL SETTING EDIT SAVE QUICK MENU option in the setup menu Quick menu edit options can also be displayed by pressing and holding the Q button P41 ...

Страница 55: ...E NOISE REDUCTION IMAGE SIZE IMAGE QUALITY FILM SIMULATION HIGHLIGHTTONE SHADOWTONE COLOR SHARPNESS SELF TIMER FACE DETECTION PHOTOMETRY AF MODE FLASH MODE FLASH COMPENSATION MF ASSIST MOVIE MODE MOVIE ISO MIC LEVEL ADJUSTMENT SOUND FLASH LCD BRIGHTNESS LCD COLOR WIDE CONVERSION LENS SHUTTERTYPE NONE R Select NONE to assign no option to the selected position When SELECT CUSTOM SETTING is selected ...

Страница 56: ...on buttons can be selected by pressing and holding the button The default options are shown below Fn1 button Fn2 button Fn3 button Fn4 button Movie recording P 36 44 AF mode P 44 77 Self timer P 45 Flash mode P 46 Fn5 button Fn6 button Fn7 button Fn8 button Focus frame selection P 48 78 Wireless options P 48 113 Control ring options P 49 None ...

Страница 57: ...XP IN MANUAL MODE PREVIEW PIC EFFECT CONTROL RING SETTING NONE R To disable the selected button choose NONE R You can also display options for any of the function buttons by pressing and holding the button R The roles played by the function buttons can also be selected using hBUTTON DIAL SETTING FUNCTION Fn SETTING P107 The Fn1 Button The Fn1 Button To prevent accidental operation of the Fn1 butto...

Страница 58: ... Fn7 At default settings no function is assigned to Fn8 MovieRecording Fn1 MovieRecording Fn1 Press the button to start or stop movie recording P36 AFMode Fn2 AFMode Fn2 Choose the AF mode for focus modes S and C R AF mode selection can also be accessed using the GAUTOFOCUS SETTING option in the shooting menu P92 ...

Страница 59: ...to appear yourself OFF OFF Self timer off R Self timer options can also be accessed from the shooting menu P95 3 Press the shutter button halfway to focus Q Stand behind the camera when using the shut ter button Standing in front of the lens can in terfere with focus and exposure 4 Press the shutter button the rest of the way down to start the timer The display in the mon itor shows the number of ...

Страница 60: ...bright light F F SLOW SYNCHRO SLOW SYNCHRO M M RED EYE SLOW RED EYE SLOW Capture both the main subject and the background under low light note that brightly lit scenes may be overex posed D D COMMANDER COMMANDER The built in flash can be used to control optional remote flash units C C EXTERNAL FLASH EXTERNAL FLASH Select when using optional third party flash units P P SUPPRESSED FLASH SUPPRESSED F...

Страница 61: ...aken with the flash Flash Sync Speed Flash Sync Speed The flash will synchronize with the shutter at shutter speeds of 1 2000s or slower Optional Flash Units Optional Flash Units The camera can also be used with optional FUJIFILM shoe mounted flash units Do not use third party flash units that apply over 300V to the camera hot shoe Flash Mode and Shooting Mode Flash Mode and Shooting Mode The flas...

Страница 62: ...election can also be accessed using the GAUTOFOCUS SETTING option in the shooting menu P92 WirelessOptions Fn6 WirelessOptions Fn6 Press the function button in shooting mode to connect to a smartphone or tablet via Wi Fi P113 Once a connection is established you can control the camera from the phone or download location data R Wireless options can also be accessed from the shooting and playback me...

Страница 63: ...h the shooting mode Auto mode selector lever Auto mode selector lever AUTO AUTO z z Shooting mode Shooting mode P P DIGITAL TELE CONV DIGITAL TELE CONV S S A A M M u u FILM SIMULATION FILM SIMULATION j j FILM SIMULATION FILM SIMULATION Y Y Advanced filter selection Advanced filter selection AUTO AUTO Scene selection Scene selection R When the focus mode selector is rotated to M the control ring ca...

Страница 64: ...tate the auto mode selector lever to z to take pictures in P S A and M modes Auto Modes Rotate the auto mode selector lever to AUTO to let the camera adjust settings to suit the subject AUTO is displayed in the LCD monitor Scene Selection Scene Selection In auto mode you choose options for different sub ject types by rotating the control ring or using the ASCENE POSITION option the shooting menu P...

Страница 65: ...ll appear in the display Q If the subject is outside the metering range of the camera the shutter speed and aperture displays will show P 4000 5 6 400 Program Shift Program Shift If desired you can press the command control left or right to select other combi nations of shutter speed and aperture without altering exposure program shift The new values for shutter speed and aperture are shown in yel...

Страница 66: ...tter speed can also be adjusted in increments of 1 3 EV by pressing the command control left or right Shutter speed can be adjusted even while the shutter button is pressed halfway Q If the correct exposure can not be achieved at the selected shutter speed aperture will be displayed in red when the shutter button is pressed halfway Adjust shutter speed until the correct exposure is achieved Q If t...

Страница 67: ...splayed in red when the shutter but ton is pressed halfway Adjust aperture until the correct exposure is achieved Q If the subject is outside the metering range of the camera the shutter speed display will show 8 0 400 A Previewing Depth of Field Previewing Depth of Field When LPREVIEW DEPTH OF FIELD is assigned to a function button P42 43 pressing the button stops aperture down to the selected se...

Страница 68: ...ues other than A M will appear in the display R Shutter speed can also be adjusted in increments of 1 3 EV by pressing the command control left or right M 1000 8 0 400 Exposure indicator Exposure Preview Exposure Preview To preview exposure in the LCD monitor select ON for ASCREEN SET UP PREVIEW EXP IN MANUAL MODE Select OFF when using the flash or on other occasions on which exposure may change w...

Страница 69: ...RT Choose when photographing moving subjects O ONIGHT NIGHT Choose for poorly lit twilight or night scenes H HNIGHT TRIPOD NIGHT TRIPOD Choose this mode for slow shutter speeds when shooting at night p pFIREWORKS FIREWORKS Slow shutter speeds are used to capture the expanding burst of light from a firework Q QSUNSET SUNSET Choose this mode to record the vivid colors in sunrises and sunsets R RSNOW...

Страница 70: ...shown by an icon in the display aAUTO cLANDSCAPE dNIGHT eMACRO vSUNSET xSKY zSKY GREENERY gBACKLIT PORTRAIT aPORTRAIT MOTION uBEACH wSNOW yGREENERY dPORTRAIT cMOVING OBJECT bBACKLIT PORTRAIT MOTION Q The mode selected may vary with shooting conditions If the mode and subject do not match select a scene manually ...

Страница 71: ...ults 1 Assign DIGITAL TELE CONV to the control ring P49 2 Choose the zoom angle using the control ring Standard 28mm 35mm 50mm 35mm format equivalent 3 Take pictures at the selected zoom angle R JDIGITAL TELE CONV can also be accessed from the shooting menu P98 Q Image quality drops slightly at DIGITAL TELE CONV settings of 35 and 50mm Q The digital teleconverter may be unavailable in some modes ...

Страница 72: ...ue for white balance P59 k k Selecting this option displays a list of color temperatures P59 highlight a temperature and press MENU OK to select the highlighted option and display the fine tuning dialog i i For subjects in direct sunlight Option Option Description Description j j For subjects in the shade k k Use under daylight fluorescent lights l l Use under warm white fluorescent lights m m Use...

Страница 73: ...sure compensation P62 and try again If OVER is displayed lower exposure compensation P62 and try again k k ColorTemperature ColorTemperature Color temperature is an objective measure of the color of a light source expressed in Kelvin K Light sources with a color temperature close to that of direct sunlight appear white light sources with a lower color tempera ture have a yellow or red cast while t...

Страница 74: ...O 200 to ISO 6400 are recommended in most situations If AUTO1 AUTO2 or AUTO3 is selected the camera will adjust sensitivity automatically in response to shooting conditions 1 Press MENU OK in shooting mode to display the shooting menu Press the selector up or down to highlight NISO and press MENU OK 2 Press the selector up or down to highlight the desired option and press MENU OK to select R Sensi...

Страница 75: ...itivity between the default and maximum values Sensitiv ity is only raised above the default value if the shutter speed required for optimal exposure would be slower than the value selected for MIN SHUTTER SPEED R If the value selected for DEFAULT SENSITIVITY is higher than that selected for MAX SENSITIVITY DEFAULT SENSITIVITY will be set to the value selected for MAX SENSITIVITY R The camera may ...

Страница 76: ...ue is determined by the sensitiv ity of the image sensor and the amount of light to which the sensor is exposed Doubling the amount increases EV by one while halving it reduces EV by one The amount of light entering the camera can be controlled by adjusting aperture and shutter speed Choosing an Exposure CompensationValue Choosing an Exposure CompensationValue Backlit subjects Choose values from 2...

Страница 77: ...ion color and bright ness distribution Recommended in most situations p p SPOT SPOT The camera meters lighting conditions in an area at the center of the frame equivalent to 2 of the total Recommended with backlit subjects and in other cases in which the background is much brighter or darker than the main subject q q AVERAGE AVERAGE Exposure is set to the average for the entire frame Provides cons...

Страница 78: ...D monitor to the self portrait posi tion automatically enables Intelligent Face Detec tion P93 and eye focus P93 The LCD monitor shows a mirror image of the view through the lens R Intelligent Face Detection is not available with man ualfocus P74 orifM N P V orWisselected with the auto mode selector lever rotated to AUTO ...

Страница 79: ...66 O OAE BKT AE BKT 67 67 Modes Modes P P S S A A and and M M W WISO BKT ISO BKT 67 67 X XFILM SIMULATION BKT FILM SIMULATION BKT 68 68 H HWHITE BALANCE BKT WHITE BALANCE BKT 68 68 Y YDYNAMIC RANGE BKT DYNAMIC RANGE BKT 68 68 Adv MODE Adv MODE All shooting modes All shooting modes Camera functions in auto mode when auto mode selector lever is rotated to AUTO u uMOTION PANORAMA MOTION PANORAMA 69 6...

Страница 80: ...l circuits Wait for the camera to cool before turning it on again R Frame rate varies with the subject shutter speed sensitivity and focus mode and may slow as more shots are taken R The flash turns off automatically the previously se lected flash mode is restored when burst shooting is disabled R Additional time may be required to record pictures when shooting ends R If file numbering reaches 999...

Страница 81: ...Each time the shutter but ton is pressed the camera will take three shots one using the metered value for exposure the second overexposed by the selected amount and the third underexposed by the same amount regardless of the amount selected exposure will not exceed the limits of the exposure meter ing system WISO BKT ISO BKT Press the selector left or right to choose the bracketing amount Each tim...

Страница 82: ...ed the camera takes three shots one at the current white balanced setting one with fine tuning increased by the selected amount and another with fine tuning decreased by the selected amount YDYNAMIC RANGE BKT DYNAMIC RANGE BKT Each time the shutter button is pressed the camera takes three shots with different dynamic ranges P94 100 for the first 200 for the second and 400 for the third While dynam...

Страница 83: ... start recording There is no need to keep the shutter button pressed during recording 5 Pan the camera in the direction shown by the arrow Shooting ends automatically when the camera is panned to the end of the guides and the panorama is complete 800 2 0 30 Sweep camera along yellow line in direction of y ANGLE DIRECTION R Shooting ends if the shutter button is pressed all the way down during shoo...

Страница 84: ...bjects subjects close to the camera unvary ing subjects such as the sky or a field of grass sub jects that are in constant motion such as waves and waterfalls or subjects that undergo marked chang es in brightness Panoramas may be blurred if the subject is poorly lit ViewingPanoramas ViewingPanoramas In full frame playback you can use the command control to zoom panoramas in or out Alterna tively ...

Страница 85: ... and return to the shooting display 2 Take the first shot 3 Press MENU OK The first shot will be shown su perimposed on the view through the lens and you will be prompted to take the second shot R To return to Step 2 and retake the first shot press the selector left To save the first shot and exit without creating a multiple exposure press DISP BACK 4 Take the second shot using the first frame as ...

Страница 86: ...ow contrast images Filter Filter Description Description Z Z LOW KEY LOW KEY Create uniformly dark tones with few areas of emphasized highlights K K DYNAMICTONE DYNAMICTONE Dynamic tone expression is used for a fantasy effect X X SOFT FOCUS SOFT FOCUS Create a look that is evenly soft throughout the whole image u u PARTIAL COLOR RED PARTIAL COLOR RED Areas of the image that are the selected color ...

Страница 87: ...ommended for outdoor portrait photography i i CLASSIC CHROME CLASSIC CHROME Soft color and enhanced shadow contrast for a calm look g g PRO Neg Hi PRO Neg Hi Offers slightly more contrast than h PRO Neg Std Recommended for outdoor portrait photogra phy h h PRO Neg Std PRO Neg Std A soft toned palette The range of hues available for skin tones is enhanced making this a good choice for studio portra...

Страница 88: ...ds the distance in front of and behind the focus point that appears to be in focus you can also check focus visually in the LCD monitor Choose for manual control of focus or in situations in which the camera is unable to focus using autofocus P85 Reduce focus distance Increase focus distance 01 0 5 1 0 1 5 2 0 3 0 5 0 10 4000 5 6 400 M Manual focus indicator Manual focus mode icon Focus distance w...

Страница 89: ...using and are displayed continuously in mode C j is displayed in manual focus mode 4000 5 6 400 P Focus indicator Checking Focus Checking Focus To zoom in on the current focus area P78 for precise focus press the center of the command control Press again to cancel zoom In manual focus mode zoom can be adjusted by pressing the command control left or right when STANDARD or FOCUS PEAK HIGHLIGHT is s...

Страница 90: ...and holding the center of the command control The following options are available FOCUS PEAK HIGHLIGHT Highlights high contrast outlines Rotate the control ring until the subject is highlighted DIGITAL SPLIT IMAGE Displays a split black and white image in the center of the frame Frame the subject in the split image area and rotate the control ring until the three parts of the split image are corre...

Страница 91: ...The camera focuses on the subject in the selected focus zone Focus zones include multiple focus points 5 3 5 5 or 3 3 making it easier to focus on subjects that are in motion zWIDE TRACKING In focus mode C the camera tracks focus on the subject in the selected focus point while the shutter button is pressed halfway In focus mode S the camera automatically focuses on high contrast subjects the area...

Страница 92: ...oint for manual focus and focus zoom Single Point AF Press the function button Fn5 to display the focus points and focus frame Use the selector to position the focus frame over the de sired focus point or press DISP BACK to return to the center point Focus frame Focus point Use the command control to choose the size of the focus frame Press the control left to reduce the frame by up to 50 right to...

Страница 93: ... return the zone to the center of the display Focus zone To choose the number of focus frames in the zone use the command control Press the control right to cycle through zone sizes in the or der 5 5 3 3 5 3 5 5 left to cycle through zone sizes in reverse order or press the center of the control to select a zone size of 5 3 Press MENU OK to put your selection into effect ...

Страница 94: ... into effect The camera will track focus on the subject while the shutter button is pressed halfway Focus frame Q Manual focus frame selection is not available when wide tracking is selected in focus mode S Burst Mode Focus Frame Selection Burst Mode Focus Frame Selection During high speed burst photography J the number of focus frames available in focus mode C drops and the maximum zone size is r...

Страница 95: ... after shooting Time T Time T 1 Rotate the shutter speed dial to T 2 Press the command control left or right to choose a shutter speed 2 200 S 3 Press the shutter button all the way down to take a picture at the select ed shutter speed A count down timer will be displayed while the ex posure is in progress Bulb B Bulb B 1 Rotate the shutter speed dial to B 2 Press the shutter button all the way do...

Страница 96: ...RR 90 for more information Third Party Remote Releases Third Party Remote Releases Electronic releases from third party suppliers can be connect ed via the microphone remote release connector A confirma tion dialog will be displayed when a third party release is connected press MENU OK and select nREMOTE for MIC RE MOTE RELEASE CHECK MIC REMOTE RELEASE SETTING SKIP SET ...

Страница 97: ... 001 2 1 24 23 0 01 00 h m s 3 Use the selector to choose the starting time and then press MENU OK Shooting will start automatically START WAITING TIME ESTIMATED START TIME 11 00 PM START CANCEL LATER h m 2 1 24 23 0 00 Q Interval timer photography can not be used at a shutter speed of B bulb or during panorama or multiple exposure photography In burst mode only one picture will be taken each time...

Страница 98: ...lock to compose photographs with off center subjects 1 Position the subject in the focus frame P 2 Press the shutter button halfway to set focus and exposure The focus frame will turn green R This process can be repeated as often as desired before the picture is taken P 3 Recompose the photograph Do not change the distance to the subject while the shutter button is pressed halfway P 4 Press the sh...

Страница 99: ... MODE in the shooting menu focus and or exposure will lock when the button is pressed and remain locked until the button is pressed again P96 Autofocus Autofocus Although the camera boasts a high precision auto focus system it may be unable to focus on the sub jects listed below Very shiny subjects such as mirrors or car bodies Fast moving subjects Subjects photographed through a window or oth er ...

Страница 100: ...o record both JPEG copy together with the RAW images FINE RAW uses lower JPEG compression ratios for higher quality JPEG images while NORMAL RAW uses higher JPEG compression ratios to increase the number of images that can be stored The Function Buttons The Function Buttons TotoggleRAWimagequalityonoroffforasingleshot assignRAWtoafunctionbutton P42 43 IfaJPEGoption is currently selected for image ...

Страница 101: ...to select Press the selec tor up or down to highlight the desired option and press MENU OK to select and return to the settings list Repeat this step to adjust additional settings 3 Press the Q button to preview the JPEG copy and press MENU OK to save Setting Setting Description Description REFLECTSHOOTING COND Create a JPEG copy using the settings in ef fect at the time the photo was taken PUSH P...

Страница 102: ...STOM 5 CUSTOM 6 CUSTOM 7 2 Highlight a custom settings bank and press MENU OK to select Ad just the following as desired and press DISP BACK when adjustments are complete NISO UDYNAMIC RANGE PFILM SIMULATION DWHITE BALANCE fCOLOR qSHARPNESS rHIGHLIGHT TONE sSHADOW TONE and hNOISE REDUCTION EXIT SAVE CURRENT SETTINGS DYNAMIC RANGE FILM SIMULATION WHITE BALANCE COLOR CUSTOM 1 AUTO 0 ISO 200 R To rep...

Страница 103: ... Search for pictures that include faces BY I FAVORITES Search by rating P30 BY SCENE Search by scene BYTYPE OF DATA Find all still pictures all movies or all RAW pictures 3 Select a search condition Only pictures that match the search condition will be displayed To delete or protect selected pictures or to view the selected pictures in a slide show press MENU OK and choose from the options at righ...

Страница 104: ... Scroll through the images and press the se lector up to select or deselect To display the current image on the cover press the selector down Press MENU OK to exit when the book is complete R The first picture selected becomes the cover im age Press the selector down to select a different image for the cover 3 Highlight COMPLETE PHOTOBOOK and press MENU OK to select all photos or all pho tos match...

Страница 105: ...o scroll through the pic tures EditingandDeletingPhotobooks EditingandDeletingPhotobooks Display the photobook and press MENU OK The following options will be displayed select the desired option and follow the on screen instruc tions EDIT Edit the book as described in Creating a PhotoBook P90 ERASE Delete the book Photobooks Photobooks Photobooks can be copied to a computer using MyFinePix Studio ...

Страница 106: ...nly available when YADVANCED FILTER is selected for drive mode A ASCENE POSITION SCENE POSITION Choose the shooting mode used when the auto mode selector lever is in the AUTO position G GAUTOFOCUS SETTING AUTOFOCUS SETTING Adjust autofocus settings Option Option Description Description FOCUS AREA FOCUS AREA Choose the focus area P78 AF MODE AF MODE Choose the AF mode for focus modes S and C P77 RE...

Страница 107: ... indicated by the green border when the picture is taken EYE DETECTION AF EYE DETECTION AF Choose whether the camera detects and focuses on eyes when Intelligent Face Detection is on Choose from u AUTO the camera automatically chooses which eye to focus on wRIGHT EYE PRIORITY the camera focuses on the right eye vLEFT EYE PRIORITY the camera focuses on the left eye and OFF eye focus off R If the ca...

Страница 108: ... T TIMAGE QUALITY IMAGE QUALITY Choose a file format and compression ratio Select FINE or NORMAL to record JPEG images RAW to record RAW images or FINE RAW or NORMAL RAW to record both JPEG and RAW images FINE and FINE RAW use lower JPEG compression ratios for higher quality JPEG images while NORMAL and NORMAL RAW use higher JPEG compression ratios to increase the num ber of images that can be sto...

Страница 109: ... f fCOLOR COLOR Adjust color density q qSHARPNESS SHARPNESS Sharpen or soften outlines r rHIGHLIGHT TONE HIGHLIGHT TONE Adjust the appearance of highlights s sSHADOW TONE SHADOW TONE Adjust the appearance of shadows h hNOISE REDUCTION NOISE REDUCTION Reduce noise in pictures taken at high sensitivities K KLONG EXPOSURE NR LONG EXPOSURE NR Select ON to reduce mottling in long time exposures P81 u u...

Страница 110: ...CUS PEAK HIGHLIGHT The camera heightens high contrast outlines Choose a color and peaking level k kAE AF LOCK MODE AE AF LOCK MODE If AE AF ON WHEN PRESSING is selected exposure and or focus will lock while the AF L AE L button is pressed If AE AF ON OFF SWITCH is selected exposure and or focus will lock while the AF L AE L button is pressed and remain locked until the button is pressed again v vA...

Страница 111: ... UP Adjust movie settings P36 Option Option Description Description MOVIE MODE MOVIE MODE Select a frame size and rate for movie recording i1920 1080 60fps Full HD 60fps i1920 1080 50fps Full HD 50fps i1920 1080 30fps Full HD 30fps i1920 1080 25fps Full HD 25fps i1920 1080 24fps Full HD 24fps h1280 720 60fps HD 60fps h1280 720 50fps HD 50fps h1280 720 30fps HD 30fps h1280 720 25fps HD 25fps h1280 ...

Страница 112: ...sELECTRONIC SHUTTER or tMECHANICAL sELECTRONIC is selected shutter speeds faster than 1 4 000 s can be chosen by rotating the shutter speed dial to 4000 and then pressing the command control left or right R Regardless of the option selected the mechanical shutter is used for motion panoramas When the electronic shutter is used shutter speed and sensitivity are restricted to values of 1 32 000 1 s ...

Страница 113: ...ork P113 R For more information visit http fujifilm dsc com wifi j jRAW CONVERSION RAW CONVERSION Create JPEG copies of RAW pictures P87 A AERASE ERASE Delete pictures P35 G GCROP CROP Create a cropped copy of the current picture 1 Display the desired picture 2 Select GCROP in the playback menu 3 Press the command control left or right to zoom in and out and press the selector up down left or righ...

Страница 114: ...t all pictures RESET ALL Remove protection from all pictures Q Protected pictures will be deleted when the memory card is formatted P110 C CIMAGE ROTATE IMAGE ROTATE Rotate pictures 1 Display the desired picture 2 Select CIMAGE ROTATE in the playback menu 3 Press the selector down to rotate the picture 90 clockwise up to rotate it 90 counterclockwise 4 Press MENU OK The picture will automatically ...

Страница 115: ...detected R Copies created with BRED EYE REMOVAL are indicated by a e icon during playback R Red eye removal can not be performed on RAW images I ISLIDE SHOW SLIDE SHOW View pictures in an automated slide show Choose the type of show and press MENU OK to start Press DISP BACK at any time dur ing the show to view on screen help The show can be ended at any time by pressing MENU OK Option Option Desc...

Страница 116: ...and PictBridge compatible devices P120 V Vinstax PRINTER PRINT instax PRINTER PRINT Print pictures on optional FUJIFILM instax SHARE printers P123 J JDISP ASPECT DISP ASPECT Choose how High Definition HD devices display pictures with an aspect ratio of 3 2 this option is available only when an HDMI cable is connected Select 16 9 to display the image so that it fills the screen with its top and bot...

Страница 117: ...u 1 3 Press the selector down to highlight the setup menu tab containing the de sired option ON EXIT SET UP DATE TIME TIME DIFFERENCE RESET SOUND FLASH SOUND SET UP SCREEN SET UP ENGLISH Tab 1 4 Press the selector right to place the cursor in the setup menu 2 Adjust settings Highlight items and press the selector right to view options then highlight an option and press MENU OK Press DISP BACK to e...

Страница 118: ...OK To set the clock to the time in your home time zone select hHOME If gLOCAL is selected g will be displayed for three seconds when the camera is turned on Q Qa a Choose a language P22 23 R RRESET RESET Reset shooting or setup menu options to default values Custom white balance custom settings banks created using K KEDIT SAVE CUSTOM SETTING r rWIRELESS SETTINGS and the setup menu FDATE TIME NTIME...

Страница 119: ...ing Colors may differ slightly from those in the final image and noise mottling may be visible at high sensitivities Option Option Description Description CONTINUOUS CONTINUOUS Pictures are displayed until the MENU OK button is pressed or the shutter button is pressed halfway To zoom in on the active focus point press the center of the com mand control press again to cancel zoom 1 5 SEC 1 5 SEC Pi...

Страница 120: ...ilters and of monochrome and sepia settings FRAMING GUIDELINE FRAMING GUIDELINE Choose the type of framing grid available in shooting mode F FGRID 9 GRID 9 G GGRID 24 GRID 24 H HHD FRAMING HD FRAMING P P P For rule of thirds composition A six by four grid Frame HD pictures in the crop shown by the lines at the top and bottom of the display AUTOROTATE PB AUTOROTATE PB Choose ON to automatically rot...

Страница 121: ...ayed in the quick menu P39 40 I ICONTROL RING CONTROL RING Choose the direction in which the control ring is rotated to increase the focus distance in manual focus mode L LTOUCH SCREEN SETTING TOUCH SCREEN SETTING Enable or disable touch screen controls P24 34 Z ZPOWER MANAGEMENT POWER MANAGEMENT Adjust power management settings Option Option Description Description AUTO POWER OFF AUTO POWER OFF C...

Страница 122: ...this option to reduce the number of pictures with duplicate file names RENEW RENEW Numbering is reset to 0001 after formatting or when a new memory card is inserted R If the frame number reaches 999 9999 the shutter release will be disabled P137 R Selecting RRESET P104 sets FRAME NO to CONTINUOUS but does not reset the file number R Frame numbers for pictures taken with other cameras may differ SA...

Страница 123: ... smartphone the original is not affected PC AUTO SAVE PC AUTO SAVE SETTINGS SETTINGS Choose DELETE REGISTERED DESTINATION PC to remove selected destinations DE TAILS OF PREVIOUS CONNECTION to view computers to which the camera has recently connected PC AUTO SAVE PC AUTO SAVE SETTING SETTING Choose an upload destination Choose SIMPLE SETUP to connect using WPS MANUAL SETUP to config ure network set...

Страница 124: ...emory card highlight OK and press MENU OK To exit without formatting the memory card select CANCEL or press DISP BACK Q All data including protected pictures will be deleted from the memory card Be sure important files have been copied to a computer or other storage device Q Do not open the battery chamber cover during formatting SET FORMAT FORMAT OK ERASE ALL DATA OK CANCEL ...

Страница 125: ... SIZE O3 2 TIMAGE QUALITY FINE UDYNAMIC RANGE V100 PFILM SIMULATION cPROVIA STANDARD BSELF TIMER OFF D DWHITE BALANCE AUTO fCOLOR 0 MID qSHARPNESS 0 STANDARD rHIGHLIGHTTONE 0 STANDARD sSHADOWTONE 0 STANDARD hNOISE REDUCTION 0 STANDARD KLONG EXPOSURE NR ON Menu Menu Default Default uSELECT CUSTOM SETTING CUSTOM 1 YWIDE CONVERSION LENS OFF wCONTROL RING SETTING DIGITAL TELE CONV KTOUCH SCREEN MODE O...

Страница 126: ...ETERS DISP CUSTOM SETTING DISP CUSTOM SETTING FRAMING GUIDELINE ELECTRONIC LEVEL AF DISTANCE INDICATOR HISTOGRAM All other options R hBUTTON DIAL SETTING FUNCTION Fn SETTING See page 42 SELECTOR BUTTON SETTING Fn BUTTON EDIT SAVE QUICK MENU See page 39 ICONTROL RING XCW LTOUCH SCREEN SETTING ON Menu Menu Default Default ZPOWER MANAGEMENT AUTO POWER OFF 2 MIN HIGH PERFORMANCE OFF tSAVE DATA SET UP ...

Страница 127: ...trol the cam era remotely or copy location data to the camera To connect to the smartphone press the camera function button Fn6 R You can also connect using the rWIRELESS COMMUNICATION options in the camera shooting and playback menu WirelessConnections Computers WirelessConnections Computers Once you have installed the FUJIFILM PC AutoSave application and configured your computer as a destination...

Страница 128: ...ifilm dsc com mfs Once download is complete double click the downloaded file MFPS_Setup EXE and follow the on screen instructions to complete installation Proceed to Connecting the Camera P115 when installation is complete Macintosh Macintosh Pictures can be copied to your computer using Image Capture supplied with your computer or other software Proceed to Connecting the Camera P115 Viewing RAW F...

Страница 129: ...in loss of data or damage to the memory card Insert a fresh or fully charged battery before connecting the camera 2 Turn the camera off and connect a USB cable as shown making sure the connectors are fully inserted Connect the camera directly to the computer do not use a USB hub or keyboard 3 Turn the camera on 4 Copy pictures to the computer using MyFinePix Studio or applications provided with yo...

Страница 130: ...dicator lamp may remain lit after the message has cleared from the computer display Failure to observe this precaution could result in loss of data or damage to the memory card Q Disconnect the camera before inserting or removing memory cards Q In some cases it may not be possible to access pictures saved to a network server using the software in the same way as on a standalone computer Q The user...

Страница 131: ...l the functions described below may be supported ConnectingtheCamera ConnectingtheCamera 1 Connect a USB cable as shown and turn the printer on 2 Turn the camera on tUSB will be displayed in the monitor followed by the PictBridge dis play shown below at right USB 00 PICTBRIDGE TOTAL 00000 SHEETS SET OK FRAME R Pictures can be printed from memory cards that has been formatted in the camera R Page s...

Страница 132: ...dialog PRINT THESE FRAMES TOTAL 9 SHEETS CANCEL YES 4 Press MENU OK to start printing Printing the Date of Recording Printing the Date of Recording To print the date of recording on pictures press DISP BACK in the PictBridge display and select PRINT WITH DATEs to print pictures without the date of recording select PRINT WITHOUT DATE To ensure that the date is correct set the camera clock before ta...

Страница 133: ...ES PRINT DPOF OK TOTAL 9 SHEETS 4 Press MENU OK to start printing During Printing During Printing The message shown at right is displayed during printing Press DISP BACK to cancel before all pictures are printed depending on the printer printing may end before the current picture has printed If printing is interrupted turn the camera off and then on again Disconnecting the Camera Disconnecting the...

Страница 134: ...remove from the print order 2 Press the selector up or down to choose the number of copies up to 99 To remove a picture from the order press the selector down until the number of copies is 0 01 PRINT ORDER DPOF SHEETS SET FRAME DPOF 00001 Total number of prints Number of copies CreatingaDPOFPrintOrder CreatingaDPOFPrintOrder The KPRINT ORDER DPOF option in the playback menu can be used to create a...

Страница 135: ...cated by a u icon during playback RESET ALL To cancel the current print order select RESET ALL for KPRINT ORDER DPOF The confirmation shown at right will be displayed press MENU OK to remove all pictures from the order R Print orders can contain a maximum of 999 pictures R If a memory card is inserted containing a print order cre ated by another camera the message shown at right will be displayed ...

Страница 136: ...he camera setup menu and enter the instax SHARE printer name SSID and password The Printer Name SSID and Password The Printer Name SSID and Password The printer name SSID can be found on the bottom of the printer the default password is 1111 If you have already chosen a different password to print from a smartphone enter that password instead SSID instax 12345678 XxxxxXxxx XX 000000000 XxxxxXxxx X...

Страница 137: ... frame from a burst sequence display the frame before selecting Vinstax PRINTER PRINT 3 Use the selector to display the picture you want to print then press MENU OK 100 0020 100 0020 instax 12345678 PRINTER PRINT TRANSMIT CANCEL R Pictures taken with other cameras can not be printed R The area printed is smaller than the area visible in the LCD monitor 4 The picture will be sent to the printer and...

Страница 138: ... than 1 5 m 4 9 ft long R Be sure the connectors are fully inserted 3 Tune the television to the HDMI input channel See the documentation supplied with the televi sion for details 4 Turn the camera on and press a button The camera monitor turns off and pictures and movies are played back on the TV Note that the camera volume controls have no effect on sounds played on the TV use the television vol...

Страница 139: ...heck with your local FUJIFILM representative or visit http www fujifilm com products digital_cameras index html Rechargeable Li ion batteries Rechargeable Li ion batteries NP 95 Additional large capacity NP 95 rechargeable batteries can be purchased as required Battery chargers Battery chargers BC 65N At 20 C 68 F the BC 65N charges an NP 95 in about 240 minutes Remote releases Remote releases RR ...

Страница 140: ...of 20 65 ISO 100 m ft instax SHARE printers instax SHARE printers SP 1 Connect via wireless LAN to print pictures on instax film Leather cases Leather cases BLC X70 This case exclusively for use with the X70 is made with genuine leather and comes with a hand strap and a cloth case Protective filters Protective filters PRF 49S A protective filter with a diameter of 49mm used to protect the lens Len...

Страница 141: ...ely from third party suppliers Use an HDMI cable no more than 1 5 m 4 9 ft long USB cable supplied USB cable supplied SD SDHC SDXC memory card Flash Photography Flash Photography EF 20 shoe mount flash EF 42 shoe mount flash EF X20 shoe mount flash Remote Shutter Remote Shutter Release Release External External Microphones Microphones MIC ST1 stereo microphone RR 90 remote release HDTV Audio Visua...

Страница 142: ...h the adapter ring as shown with the pro jections facing out Q Keep the front ring and lens cap in a safe place when not in use Q Attach the adapter ring before attaching LH X70 lens hood PRF 49S protector filter or third party filters AttachingLensHoods AttachingLensHoods Attach the adapter ring Attach the adapter ring before attaching the lens before attaching the lens hood hood AttachingProtect...

Страница 143: ...n indica tor is displayed when ON is selected 12000 5 6 51200 R The WCL X70 may cast shadows in pictures taken with the built in flash Use an optional external flash approved for the X70 R Y WIDE CONVERSION LENS can be assigned to a function button R Be sure to select OFF for Y WIDE CONVERSION LENS when the WCL X70 is not in use Attaching theWCL X70 1 Remove the front ring R If you have trouble re...

Страница 144: ...motor transformer or magnet in contact with volatile chemicals such as pes ticides in contact with rubber or vinyl products Water and Sand Exposure to water and sand can also damage the camera and its internal circuitry and mechanisms When using the camera at the beach or seaside avoid exposing the camera to water or sand Do not place the camera on a wet surface Condensation Sudden increases in te...

Страница 145: ...ed for shooting mode is selected for shooting mode Select a different mode Select a different mode P P50 55 50 55 The battery has been charged many times The battery has been charged many times The battery has reached the end of its charging life Purchase a new The battery has reached the end of its charging life Purchase a new battery battery The camera turns off The camera turns off suddenly sudde...

Страница 146: ...or other objects The subject s face is obscured by sunglasses a hat long hair or other objects Remove the obstructions Remove the obstructions The subject s face occupies only a small area of the frame The subject s face occupies only a small area of the frame Change the composition so that the subject s face oc Change the composition so that the subject s face oc cupies a larger area of the frame...

Страница 147: ...nburstmodeathightemperatures Thecamerahasbeencontinuouslyusedinburstmodeathightemperatures Wait for the camera to cool down before Wait for the camera to cool down before turning it on again turning it on again P P66 66 Playback Playback Problem Problem Solution Solution Pictures are grainy Pictures are grainy The pictures were taken with a different make or model of camera The pictures were taken ...

Страница 148: ...ELESS SETTING RESIZE IMAGE FOR SMARTPHONE RESIZE IMAGE FOR SMARTPHONE H H Selecting Selecting OFF OFF increases upload times for larger images in addition some phones may not display images increases upload times for larger images in addition some phones may not display images over a certain size over a certain size No picture or sound onTV No picture or sound onTV The camera is not properly conne...

Страница 149: ...or insert a fully charged spare battery 18 or insert a fully charged spare battery P P14 14 The camera is connected to a wireless LAN The camera is connected to a wireless LAN End the connection End the connection The camera does not func The camera does not func tion as expected tion as expected Remove and reinsert the battery Remove and reinsert the battery P P14 If the problem persists contact ...

Страница 150: ...46 FOCUS ERROR FOCUS ERROR Camera malfunction Turn the camera off and then on again If the message persists contact a FUJIFILM dealer Camera malfunction Turn the camera off and then on again If the message persists contact a FUJIFILM dealer TURN OFFTHE CAMERA TURN OFFTHE CAMERA ANDTURN ON AGAIN ANDTURN ON AGAIN LENS CONTROL ERROR LENS CONTROL ERROR BUSY BUSY The memory card is incorrectly formatted ...

Страница 151: ...ontact a FUJIFILM dealer Notenoughmemoryremainingtorecordadditionalpictures Notenoughmemoryremainingtorecordadditionalpictures Delete pictures Delete pictures P P35 or insert a memory card with 35 or insert a memory card with more free space more free space P P14 14 The memory card is not formatted The memory card is not formatted Format the memory card Format the memory card P P110 110 READ ERROR...

Страница 152: ...onfirm that the device is turned on and that the USB cable is connected that the device is turned on and that the USB cable is connected PRINTER ERROR PRINTER ERROR Printer out of paper or ink or other printer error Check printer see printer manual for details To resume printing Printer out of paper or ink or other printer error Check printer see printer manual for details To resume printing turn t...

Страница 153: ...L Photographs Photographs O O3 2 3 2 800 800 1210 1210 1660 1660 2490 2490 RAW RAW 230 230 480 480 Movies Movies1 1 i i1920 1080 60 fps 1920 1080 60 fps2 2 i i1920 1080 50 fps 1920 1080 50 fps2 2 i i1920 1080 30 fps 1920 1080 30 fps2 2 i i1920 1080 25 fps 1920 1080 25 fps2 2 i i1920 1080 24 fps 1920 1080 24 fps2 2 26min 26min 54min 54min h h1280 720 60 fps 1280 720 60 fps3 3 h h1280 720 50 fps 128...

Страница 154: ...y result in changes not described in the manual For more information visit http www fujifilm com support digital_cameras software fw_table html fujifilm firmware FreeFUJIFILMApps FreeFUJIFILMApps FUJIFILM apps give you more opportunities to enjoy your pictures on smartphones tablets and computers http fujifilm dsc com fujifilm Wi Fi app For the latest version of MyFinePix Studio visit http fujifil...

Страница 155: ... 16 9 4 896 2 760 4 896 2 760 P P16 9 16 9 3 456 1 944 3 456 1 944 Q Q16 9 16 9 2 496 1 408 2 496 1 408 O O1 1 1 1 3 264 3 264 3 264 3 264 P P1 1 1 1 2 304 2 304 2 304 2 304 Q Q1 1 1 1 1 664 1 664 1 664 1 664 O Opanorama panorama 2 160 9 600 2 160 9 600 vertical vertical 9 600 1 440 9 600 1 440 horizontal horizontal P Ppanorama panorama 2 160 6 400 2 160 6 400 vertical vertical 6 400 1 440 6 400 1...

Страница 156: ... continuous AF manual focus with control ring Focus area selection Focus area selection SINGLE POINT ZONE WIDE TRACKING SINGLE POINT ZONE WIDE TRACKING Autofocus system Autofocus system Intelligent hybrid AF TTL contrast detect phase detection AF with AF assist illuminator Intelligent hybrid AF TTL contrast detect phase detection AF with AF assist illuminator White balance White balance Custom col...

Страница 157: ...e 1 920 1 080 1080p 24 fps stereo sound Frame size 1 920 1 080 1080p 24 fps stereo sound h h1280 720 60fps 1280 720 60fps Frame size 1 280 720 720p 60 fps stereo sound Frame size 1 280 720 720p 60 fps stereo sound h h1280 720 50fps 1280 720 50fps Frame size 1 280 720 720p 50 fps stereo sound Frame size 1 280 720 720p 50 fps stereo sound h h1280 720 30fps 1280 720 30fps Frame size 1 280 720 720p 30...

Страница 158: ...8 F Camera size Camera size W H D W H D 112 5mm 64 4mm 44 4mm 112 5mm 64 4mm 44 4mm 25 9mmexcludingprojections measuredatthinnestpart 25 9mmexcludingprojections measuredatthinnestpart 4 43in 2 54in 1 75in 1 02in 4 43in 2 54in 1 75in 1 02in Camera weight Camera weight Approx 302g 10 7oz excluding battery accessories and memory card Approx 302g 10 7oz excluding battery accessories and memory card Sh...

Страница 159: ... 0 C to 40 C 32 F to 104 F Weight Weight Approx 32g 1 1oz AC power adapter only Approx 32g 1 1oz AC power adapter only Weight and dimensions vary with the country or region of sale Labels menus and other displays may differ from those on the actual camera Notices Notices Specifications subject to change without notice for the latest information visit http www fujifilm com products digital_cameras ...

Страница 160: ...ICONTINUOUS CONTINUOUS J J O O Bracketing Bracketing O O W W X X H H Y Y J JDIGITALTELE CONV DIGITALTELE CONV K KTOUCH SCREEN MODE TOUCH SCREEN MODE p pFLASH MODE FLASH MODE10 10 RED EYE REMOVAL OFF RED EYE REMOVAL OFF A A N N F F D D C C P P 1 1 1 1 1 1 RED EYE REMOVAL ON RED EYE REMOVAL ON K K L L M M D D C C P P 1 1 1 1 1 1 1 1 FLASH COMPENSATION FLASH COMPENSATION 12 12 B BSELF TIMER SELF TIME...

Страница 161: ...00 800 400 800 400 320 200 320 200 L 100 L 100 O OIMAGE SIZE IMAGE SIZE O O 12 12 P P 12 12 Q Q 1 1 1 1 12 12 T TIMAGE QUALITY IMAGE QUALITY FINE NORMAL FINE NORMAL 12 12 RAW RAW 12 12 U UDYNAMIC RANGE DYNAMIC RANGE AUTO AUTO 1 1 1 1 1 1 1 1 1 1 1 1 1 1 1 1 1 1 1 1 1 1 1 1 1 1 1 1 1 1 1 1 1 1 1 1 1 1 12 12 V V W W X X 12 12 P PFILM SIMULATION FILM SIMULATION c c 1 1 1 1 1 1 1 1 1 1 1 1 1 1 1 1 1 1...

Страница 162: ...STANDARD 1 1 1 1 1 1 1 1 DIGITAL SPLIT IMAGE DIGITAL SPLIT IMAGE FOCUS PEAK HIGHLIGHT FOCUS PEAK HIGHLIGHT v vINTERLOCK SPOT AE FOCUS AREA INTERLOCK SPOT AE FOCUS AREA 12 12 RED EYE REMOVAL RED EYE REMOVAL AF ILLUMINATOR AF ILLUMINATOR 12 12 f fCOLOR COLOR 12 12 q qSHARPNESS SHARPNESS 12 12 r rHIGHLIGHTTONE HIGHLIGHTTONE 12 12 s sSHADOWTONE SHADOWTONE 12 12 h hNOISE REDUCTION NOISE REDUCTION 12 12...

Страница 163: ... 7 7 7 IMAGE SIZE QUALITY IMAGE SIZE QUALITY 7 7 7 7 7 7 7 7 7 7 7 7 7 7 7 7 7 7 7 7 7 7 7 7 7 7 7 7 BATTERY LEVEL BATTERY LEVEL 7 7 7 7 7 7 7 7 7 7 7 7 7 7 7 7 7 7 7 7 7 7 7 7 7 7 7 7 J JCOLOR SPACE COLOR SPACE 9 9 12 12 1 1 Fixed automatically Fixed automatically 2 2 Restricted to range of 2 0EV during movie recording Restricted to range of 2 0EV during movie recording 3 3 Options available vary...

Страница 164: ...7 3 AKASAKA 9 CHOME MINATO KU TOKYO 107 0052 JAPAN http www fujifilm com products digital_cameras index html ...

Отзывы: